Friday, February 26, 2010

Happy Food


Hope your weekend is as happy as this food!!  lol

BTW, this was Maressa's lunch per request:
Mama, I wanna smiley face san-mich, smiley face banana and smiley face cheese.

Thursday, February 25, 2010

A Really Good Read


A childhood friend of mine that I have reconnected with via Facebook, has started a new blog called The Redheaded Stepp Child.  I wanted to recommend it to you all.  It's not a crafty blog, but what I call a wordy blog.  lol  But it's words are thought provoking, relatable and encouraging!  I confess these days I don't read a whole lot.  My life is too full of stops and starts with all the little ones running around and by 8pm, my head is too mushy to think about anything deep!!

But I find Melanie's blog so easy to read and I have really enjoyed it.  I think you will too, so go check it out!

Oh and she gives away gift cards to Starbucks....that should be reason alone to hop on over there!  ;)

I have fond memories of Melanie, a fellow colorguard.  Always smiling always kind.  
Seems to be the same all these years later too!  :)

Wednesday, February 24, 2010

A Little Closet Organization

As much as I'd love a real mud room or an entry way that looks like this, it just doesn't make sense in our house.  We don't have a mud room.  The garage door opens up to our playroom.  We have a foyer at the front door, but it doesn't make much sense to spend all the money on cutsie wall 'closets' when we have a generous sized coat type closet right around the corner in our dining room.

But this is what it has looked like for a very long time.  I tried to hang hooks on the side walls for the kids to hang their stuff on, but they weren't sturdy enough and came falling out with much use (except one).  So little ones with arms far to short to reach the hanging bar, just threw their coats and bags and shoes on the floor.  I admit it, I would shove it all back with my foot and just close the door to try and forget about the mess inside.

Well I finally decided enough was enough and came up with a plan.

This is the after.  And yes it's not exactly eye candy, but it works.  I would have loved to strip everything out and paint it a fun bright color, but there are other pressing projects that are more visible that I want to tackle.  So ignoring the ugly walls, I cleaned up the closet.  I finagled a way to get hooks up for the kids to use.  I took this small drawer caddy that I no longer am using in my sewing room and put our winter gear and the kids extra totes in it.  Up top I used crates from Walmart to store my extra totes and serious winter gear (for when we go skiing) and my horse riding gear (would REALLY love to use that stuff again...I have promised myself I would make time to do that again soon!!)


The girls have one side and the boys the other side.  There is a shelf above their hooks that holds fav drawing books, etc to take to church on Sunday mornings.


They have 2 hooks each and labeled.


These have worked like a charm!  I took some leftover wood that was used for a cub scout project back in Dec and painted them red.  Then I used stickers for their name and coated the whole thing in glossy mod podge.  Then I screwed the hooks in (not all the way as they were longer than the thickness of the board.  After that I used 2 nails to secure the boards to the wall and then finished screwing in the hooks.  Nice and sturdy and none of those icky screw anchors in my wall!

Now everyday, my wonderful kids come in from school and outings and hang their things up (after a few reminders for a couple of them).  :)


Not really pictured, but on a higher side shelf I have my electronics and a basket of their accessories and chargers.  So as to easily retrieve the proper charger for each, I labeled the cords with a little electrical tape and a sharpie.  :)

Tuesday, February 23, 2010

Recipe review~Low fat lemon cupcakes

It wasn't great timing that I decided to start a diet just 2 weeks before my birthday.  I hold onto certain traditions and one of them being cake on my birthday!!  In an effort to try to be good, I googled low fat cupcake recipes.  What I really wanted were these Martha-don't-hold-back-the-fat-Stewart lemon cupcakes.  But when I found this site with low fat cupcake recipes and I thought I'd try this lemon one instead.  I followed the recipe except for substituting fat free plain yogurt for the sour cream.  Then I made up a simple icing glaze with squeezed lemon juice, a bit of water and powdered sugar and drizzled over the top.  I came up with 3-3.5 points for these cupcakes compared to the seven I calculated for the MS ones.

Now for the taste test.  :)  In my opinion I thought these were pretty good.  I liked the flavor.  The texture was definitely more spongy than my fav fluffy cake mixes I use.  When I ate these fresh I really liked them.  The next day I found them so so.  The glaze absorbed into the cake and it was all kinda dense and moist.  I would say these are good for an everyday cake craving, but definitely not so much for special occasion splurge.  So on my actual bday (I made them the day before) I bit the bullet and thoroughly enjoyed a real cupcake with a smudge of homemade choc frosting on top (the ones I made for Maressa's party).  :)

Monday, February 22, 2010

Blah

Hello, I am alive.  :)  Just swamped and caught up in everyday life that I'm not getting around to doing much that is blog worthy lately.  Laundry isn't that exciting!  It's been so crazy, I canceled my monthly sewing class I do.

I do hope to have my craft room makeover done soon to show.  I have just a few more things to do to it.  After that I need to find my crafting groove again.  

Basketball is about to end  (though baseball is starting soon and this year BOTH boys are signed up).  We are in the midst of cub scouts stuff....blue & gold banquet last night, pinewood derby in 2 weeks.  Preschool, still heavy in the party department....I'm finally going to do a fav craft from Zakka Life for their Dr Suess party next week.  Starting on the preschool quilt (this was Kalla's class last year...Micah is now in that class...I am apparently the 'sewing mom'  :)

Oh and I've started a diet...I'm unofficially doing weight watchers to finally rid myself of those annoying last 10-15 baby pounds....been not quite 3 weeks and I've lost over 2 lbs and feeling great! Counting those points has been so eye opening!!  So I will share some of my fav snacks and healthy eating stuff we try to do around here (I've always been better about having the kids eat healthy).

Once I get my sewing room put back together I've got quite the list of girl's clothes to do and some little things here and there.  THEN I am making myself some things for ME for a change!  I hope.

Some tutorials to come.  I promise.

I'm sure if spring would just come my crafting metabolism would just crank right up.

blah blah blah.........the piles of clean laundry are waiting to be put away....ugh and sorting socks for 6 different people...oh joy!

For now enjoy this story about a toddler and a cookie...I just love Bill Cosby.  :)


Monday, February 15, 2010

My 'If you Give a Cat a Cupcake' Party

This past Saturday my baby turned 3 (won't say how much I turned!  we share the same bday).  We celebrated with a cupcake bash, more specifically inspired by the book If You Give a Cat a Cupcake.

I didn't capture a bunch of photos as it was a crazy day other than the party and I was kinda frazzled by party time!  And I ran out of time/steam to do some of the details I had planned. But here is the essence of the pretty simple party (by my standards at least ;) we had.

The party favors and a party sign.  It's hard to see but on my metal board I took white cupcake liners and attached chipboard letter stickers to the inside and a magnet to the back for the birthday banner.  The top of my buffet I put a piece of striped wrapping paper (from Target dollar spot).  The party favors were simply cupcake boxes, sunglasses and roller stamps from Target and the cupcake aprons I made.  Cupcake centerpiece how to is here.


Food table covered with inexpensive polka dot sheet from Walmart (I used it first for this party).   Toddler snacks consisting of granola bars, string cheese, popcorn and fresh fruit.  Mommy food of veggies and ham and spinach wraps.  Apple juice or water to drink (Maressa only drinks water, but I put out the juice for friends).  I made simple white cupcakes and chocolate frosting and a small batch of low-fat lemon cupcakes...more on those later.

The main table was set with more colorful wrapping paper and white paper place mats.  I put a coloring page at each seat for them to do as guests arrive.  We of course had a bit more elaborate craft to do later.

After the coloring was done, we glittered.

I found these wooden cupcake ornaments at Hobby Lobby.  They colored them then glittered them.  We put magnets on the back then cut off the string to make cupcake magnets.

Next I read the book to them in another room. Then we played some games with a small parachute.  They seemed to really love that...running underneath it, hiding underneath and popping balls all over.  Didn't get any pictures though as the 'photographer' was the book reader and coordinator of the parachute fun.

Finally we had cupcakes.  Totally forgot to fix the ice cream like we did at this party, so we skipped it.

Once everyone had a cupcake we passed the sprinkles around.  :)

For more ideas on this themed party, I posted some other things a year ago here.  :)

Thursday, February 11, 2010

The Valentines are done and sent!!

Bear Valentines for Kalla's class.  Had her write the message, then scanned it and printed on red card stock and cut out hearts around it.  Then she wanted to decorate the hearts more with crayons.  :)

Shovels and Milk Chocolate Raisins for Micah's class.

Vanilla Rolled cookies for the teacher's

Lots of construction paper for our far away loved ones.


Here is the short list of some of my fav Valentines I saw out there this year:

Penquin Oreo Valentines....I'm SO doing this next year!!
Matchbox Valentines...you can get white tiny paper boxes from Oriental Trading to eliminate worry of using real matchboxes that once housed matches.  :)

Wednesday, February 10, 2010

Spicy Caramel Popcorn~I mean diet wrecking popcorn

After loving the spicy chocolate so much, and  I came across this recipe for spicy caramel popcorn I knew I just had to try it.  Wow-Wee is this good stuff!  I took it to a super bowl party and it seemed to be a hit.

Unfortunately, on a whim (kind of) I decided to try Weight Watchers (I didn't actually join, but am counting points...boy is that eye opening!) last week to hopefully help me rid of those last 10 pounds plaguing me since having 4 babies in a row.  This popcorn did not help my efforts!!  However, on a side note, it's going well and not that hard (especially since I left the bulk of the leftover popcorn at my friend's house who had the party).  :)

Details regarding the recipe:  I used the 3/4 tsp of cayenne pepper and only 1 tsp of sea salt.  I also in vain tried to make it slightly lower fat and used my Orville Redenbacher's Smart Pop microwave mini bags.  Four mini bags and the cup of peanuts seemed to be just right for the amount of caramel made.  This makes a large party sized amount of caramel popcorn.

This would make a great Valentines present too!  I almost made a batch of these for the kid's teachers, but K wanted to decorate cookies instead.  :)

Friday, February 5, 2010

Technically Speaking~how to resize your photos in Blogger

Before Blogger updated it's posting software, for some reason it only downloaded my photos in their original giant size.  When I put in 'large' it didn't change it at all.  Though I'm not real happy with some of the changed they made, at least you can press a button to change your photo size.  However, it is SUPER easy to customize it yourself.  I find that the LARGE is too small and the XLARGE a tad too big (I figure not everyone has a giant monitor like I do).  So I change my photo size all the time.    :)

Here's Z making a fast break in Blogger's XLARGE setting.

Here is their LARGE setting.  Here is the code:

img border="0" height="400" src="http://i224.photobucket.com/albums/dd58/deannasdesigns/zball1.jpg" width="265" /

Here is my CUSTOM
img border="0" src ="http://i224.photobucket.com/albums/dd58/deannasdesigns/zball1.jpg" width="400" /
What you do is find the image codes in html.  It looks like above with between <>.  To change the size, simply delete the 'height=' measurement entirely (compare the above html to the one on the picture above this one).  Then change your width number only to your preferred setting.  I generally use 400 on vertical pics and 500 on horizontal.  Then the picture adjust the appropriate height with the width size automatically.

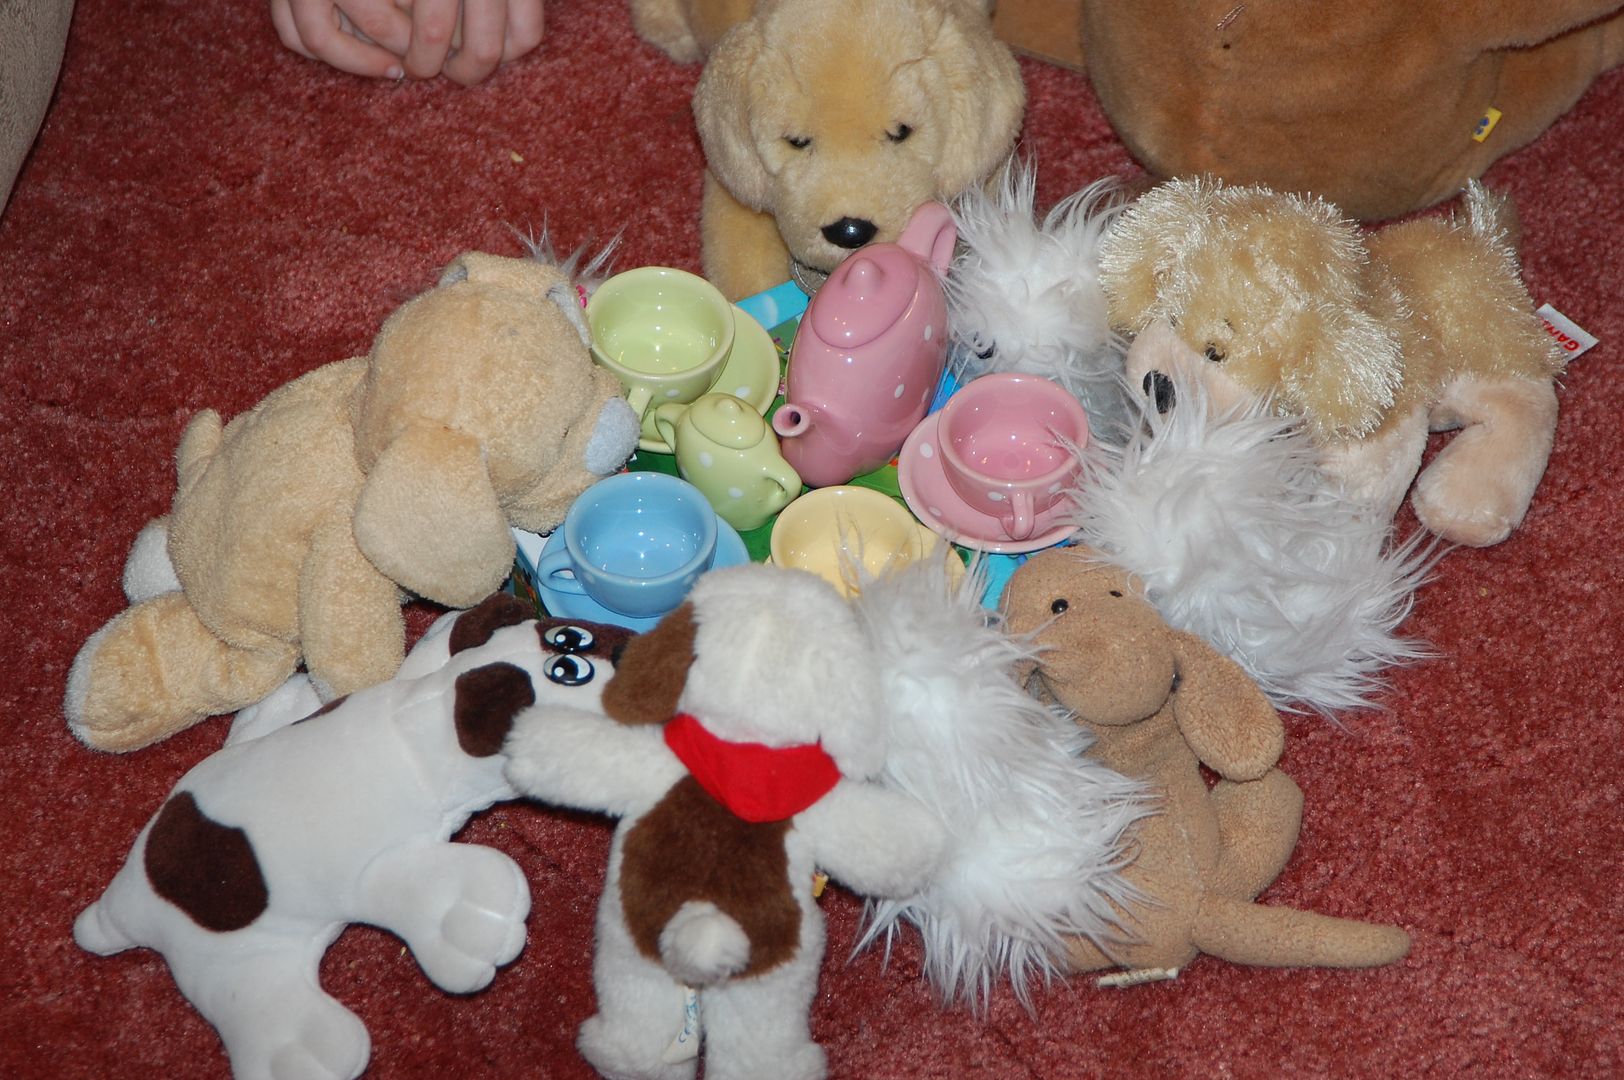
Here is a landscape size photo.
Here it is XLARGE.  It doesn't even fit.
img border="0" height="425" src="http://i224.photobucket.com/albums/dd58/deannasdesigns/partyfordogs.jpg" width="640"

Isn't this funny?  My kids were apparently playing parties with all of Micah's 18 dogs (and a few of the others).  lol

LARGE

img border="0" height="265" src="http://i224.photobucket.com/albums/dd58/deannasdesigns/partyfordogs.jpg" width="400"

CUSTOM
img border="0" src="http://i224.photobucket.com/albums/dd58/deannasdesigns/partyfordogs.jpg" width="500"

You can do so many things on your blog. If Blogger doesn't have a button/layout/setting for it and you want to do it anyway their are tutorials galore. I simply googled the widget thingies under each post to find out how to add those. And how to adjust your layout to 3 column can be found in several tutorials.

So if you are looking to find out how to do more with your blog, google is a great place to start. Just google 'blogger widgets' and there are a ton of stuff out there that I had never seen. :)

Thursday, February 4, 2010

Girl Crafts~Making a jewelry box and some pretties for her doll

Kalla and I had a craft day last weekend.  We made lots of stuff for her doll.  She got an AG doll for Christmas and it comes with a book of things to do with/for your doll.  She is all over it!  lol  So she wanted to make a necklace for her like in the book (they are doll and me necklaces, but K doesn't like to wear jewelry).  And we decided to make a jewelry box as well.

Here are the pretties we made for her doll to wear.

The bracelets are just beads strung onto a clear elastic bead string.

The necklace is a little big, but Kalla liked it and made it all herself.

So here's a low down of what all we did to make this stuff.

I keep everything if I think I can make a craft with it.  So here I found this box that once was a cheap bear Target puzzle (we took the pieces out long ago and glued magnets on the back to use on the magnet board in the playroom).    Perfect size to hold jewelry.  You of course can get a paper mache box to decorate at the craft store.

So first K painted it all pink

Note:  here is a good post on how to remove acrylic paint from clothes if you let your kids use acrylics like I do.  We did well on this project with sleeves rolled up high and apron on.  You could also have them wear an old adult tee over their clothes too.

Then we turned over the top to the smooth side and mod podged on pretty paper.  Did the same to the back.  Added letter stickers to spell out her dolls name.  Then we covered the whole box in a generous coat of mod podge to make it nice and shiny.

After it was all dry, the lid fit too tightly on top due to some paint on the sides of the lid and whatnot, so I sanded the edges down til it fit nicely.  Then I stapled a ribbon pull to make it easier to open the lid.  We also cut a piece of felt to glue down to the bottom of the inside.

For the dolls necklace I traced a heart onto shrinky dink paper and let her decorate as she pleased with Sharpies.  Then I cut it out and punched a hole in the top.

We strung the heart with black waxed string found in the jewelry section of the craft store and K strung on some choice beads as well.  Then we made a button latch on the ends by tying on a button on one end, and tying a loop on the other.


That same day as K is determined to make everything the book suggests, she needed a hat and some cookies as well.
In the book they use a knit glove to make a hat.  None that we owned that I minded chopping up would fit her head, so I found a part of a sweater already chopped up in my craft room and used a sleeve.  Just tied the top with a piece of rick rack.

Now for the cookies and cocoa.  We made an assortment with pieces of felt and craft glue.

The cocoa is just these pom poms stuffed into a tea cup.  :)

Wednesday, February 3, 2010

My 2 second Valentines Decorations

I don't really decorate for holidays (aside from Christmas of course) or seasons other than fall...I can't stand the least bit of clutter or chotchkies and I have a more contemporary taste (speaking of, I cannot decide whether to paint this dresser I use as a buffet...one day I'll get pics of my dining room as a whole and you guys can tell me what you think).  But I decided with this metal fixture I put up at Christmas to hold cards, I can use it for a little bit of holiday festiveness.  This is in my dining room and I didn't intend to keep it, but when I put it up and all the tiny holes it created, I decided to make it more permanent.  And it's been so useful.  I made a tiny Valentines statement for now and have magnetic bday wishes ready to go for Maressa's party.  :)


I simply opened a package of doily hearts, peeled them apart and hung them on my already made button clips.  Ta da!   Done!  But I didn't use them all here....


I strung some more on good old fashioned red yarn for my living room mantel.  :)

There ya go.....2 seconds!  ;)

Tuesday, February 2, 2010

Give your Valentine some Spicy Chocolate!


Ok, if you are like me the idea of eating spicy chocolate is not appetizing, but I swear this is SO good!  I would have never tried it, had my MIL not brought some over Christmas.  It was actually quite addicting.  I like some spice in my food, but not to the same measure as my I-have-to-be-on-fire-to enjoy-food hubby!!  But this spicy chocolate thing did have me curious!

Also, to me this is healthy chocolate!  I mean you have dark chocolate with spice that clears the sinuses and healthy nuts on top!  This really doesn't have any spice flavor, but more of a chocolate with a kick that warms up your mouth at the end.

So here's how you make it:

1 bag Ghirardelli semisweet choc
1 bag Ghirardelli  60% cacao
1 tsp cayenne powder
chopped nuts of your choice

Melt chocolate carefully in microwave or double broiler.  Once melted add pepper.  The 1 tsp to me is medium spicy (my preference), you can of course add more or less and taste it as you go.  Once mixed through, pour out onto parchment paper on a cookie sheet.  You want to let it be thick.  Then sprinkle on your nuts.  My fav is coarsely chopped almonds (above pic is sliced almonds as that is what I had on hand when I made this batch.)  Set chocolate in fridge til hard.  Break into pieces.  This makes a lot, but keeps a few weeks in the fridge.  If you want a smaller amount, just half all the ingredients.

My sweetheart likes super bittersweet chocolate and can't have much sugar so I'm making him a batch of super spicy with 100% cacao and 60% cacao blend.  :)

Enjoy!

btw, with the above recipe, all 4 of my children even love it.  they just keep a glass of water on hand.  lol

LinkWithin

Related Posts with Thumbnails