Friday, April 30, 2010

The Monkey Bathroom~aka The Kids Bathroom

Finally time for the full reveal of the kids bathroom.  I showed you pieces before of the monkey murals and the initial towels, but now the whole thing is basically done.  There are a few things to change one day...like the heinous countertop and the sinks need to be replaced as well, but the majority of it is good for now.   And I have new door knobs to go in here, but need to get some new door hinges as well to replace the yucky rusted ones.  Scroll to the bottom of the post to see the ugly before from when we moved in.  I FINALLY got new pendant light fixtures and hubby put them up last weekend.  The old banana valance was bugging me (it was crooked and too small) so I added some red and pom pom trim.

As you can see it's a really long and narrow space with a giant wall facing the toilet.  I admit this room is almost over the top.  I had debated a couple years back when wanting to do a monkey theme (much like the cute Target bath stuff, but not wanting to shell out the cash for all the cutsie matchy matchy stuff) I thought I would paint monkeys on canvas for each of the kids.  Don't really recall how I decided to make a giant colorful mural instead, but the kids really like it.  When they get a little older I'll probably redo the bath decor and tone it down a bit.

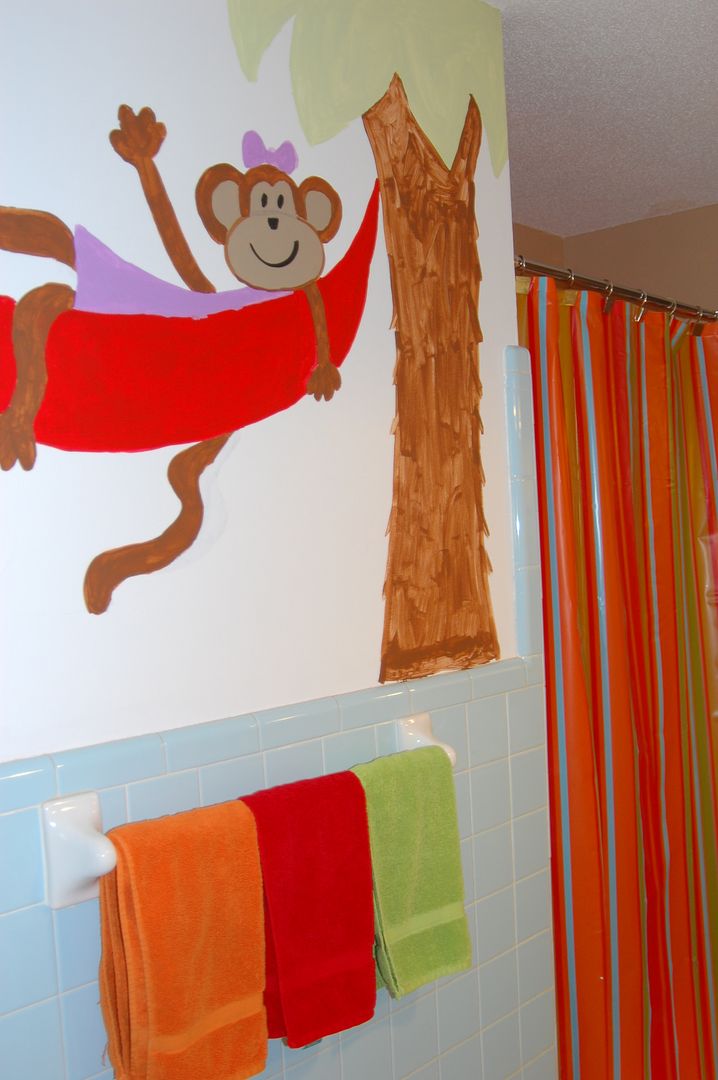
I used to have an all white cloth shower curtain which did tone the room down a bit, but I kept finding toothpaste stains on it from the kids wiping their mouths and a big beige spot where they were drying their hands on it.  Now they have their own individual hand towels, color coded to their bath towel and it has worked like a charm!!  And I found this bright plastic curtain at Target that happened to match the room perfectly.


I used acrylic paints, big sponge letters and a blank canvas to make this sign for above the toilet.


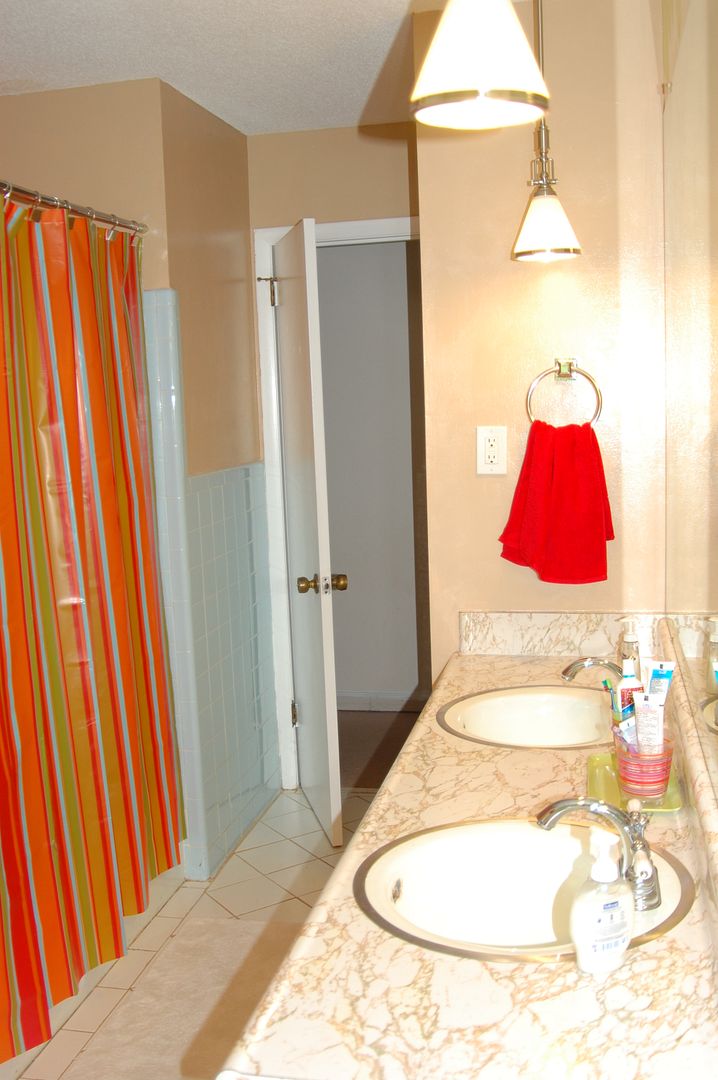
Ahhh, who knew new light fixtures can make one blissfully happy??  This other hand towel on the wall is strictly for guests...kids have been told NOT to touch it.  ;)  I used a melamine tray to house 2 old cups I already had that coordinates to house their toothbrushes and 4 different kinds of toothpaste!


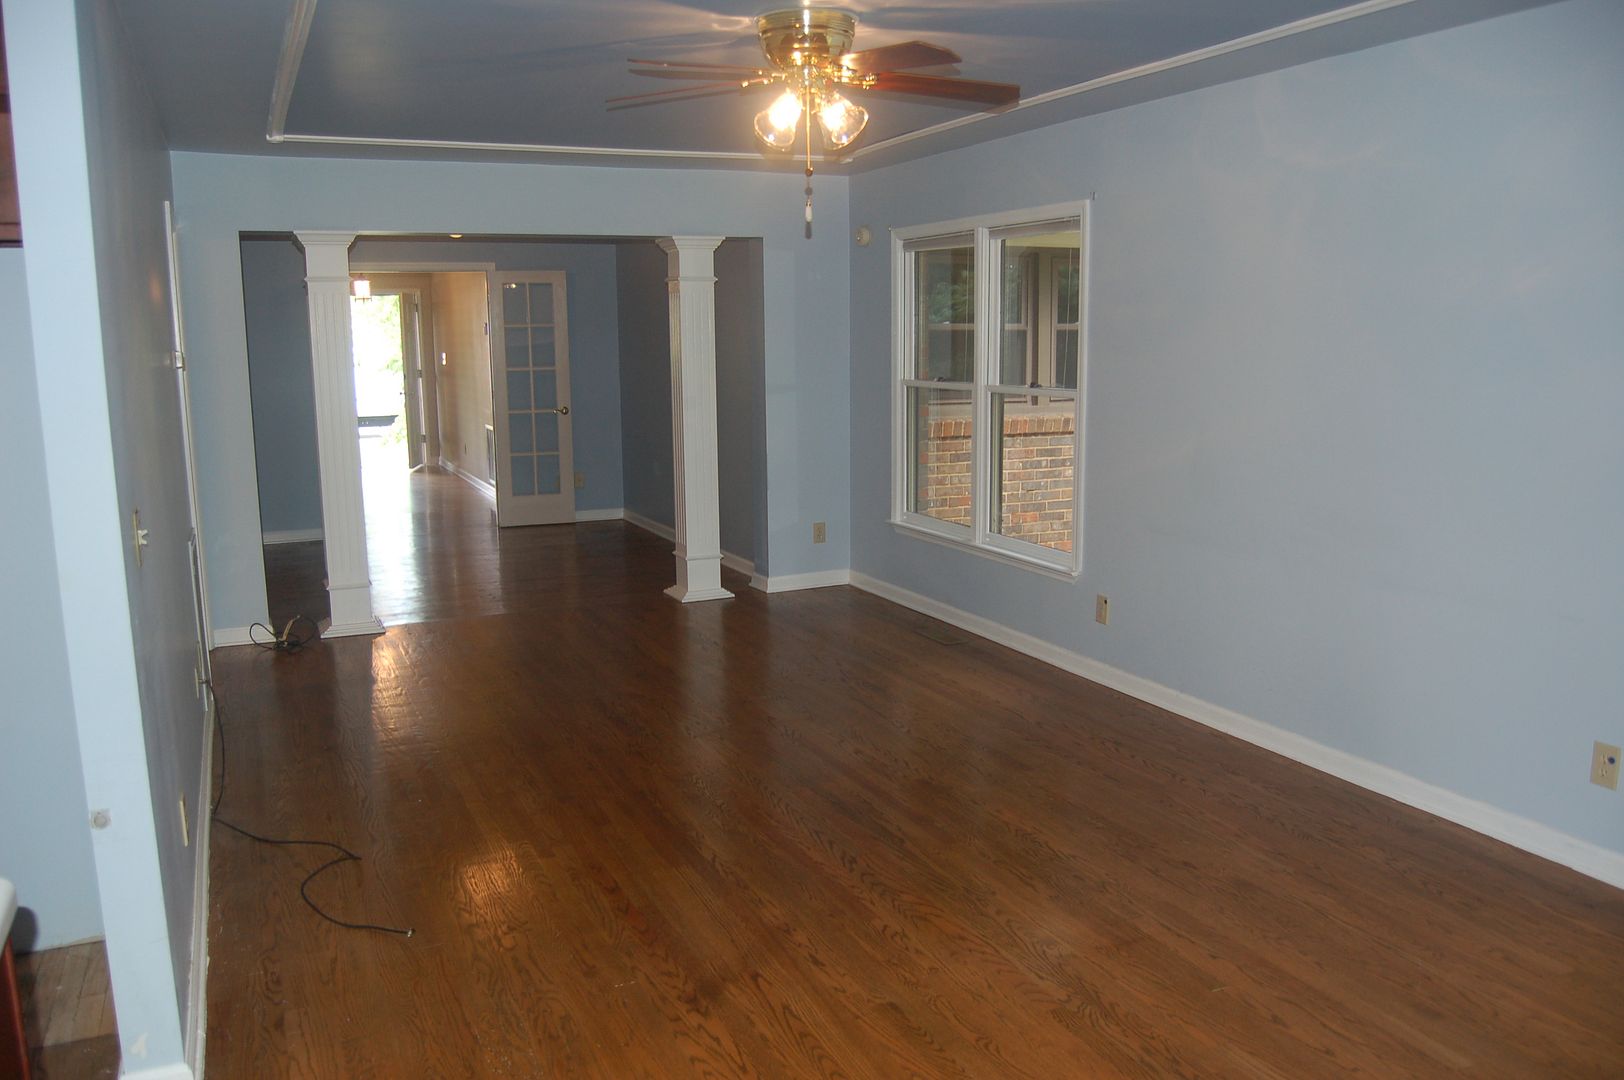
Here is the before picture before I touched the room when we moved in.  Note big ugly orb pendants??

Thursday, April 29, 2010

Rainbow Glitter Playdough and other party favors

I have a thing for party favors.  I LOVE them!  I make them for any occasion I can.  :)

Today Micah's preschool class is having a birthday party for all the kids with summer birthdays.  The moms of those kids are putting it on.  It's been a tradition for this class to let those have a special day with their classmates that don't have a school year birthday.  Of course Micah falls into this category as did Kalla last year.  Since this is a generic party for both boys and girls I like to do something colorful, but not gender specific.  Last year I brought dessert and made these rainbow cupcakes.  This year someone else is bringing dessert, but I guess I had those rainbows in my head when I decided to make party favors of rainbow glitter playdough.  Find directions here to make your glitter playdough.  To speed the process along making 6 different colors for 14 kids, I made half a recipe at a time.  I would first put in the water and then the food coloring, adding the powdered ingredients last.  To streamline, I used 6 plastic food containers to mix half the dry ingredients in and lined them on my counter.   As I finished each color playdough, I put the big glob of it back into the container til I was ready to knead and add glitter.  Anyhow, after they were done and glittered I made 14 small balls of dough and put one of each color into sandwich baggies.


This made 14 baggies of a rainbow assortment of glitter playdough.  I had Micah sign his name and stapled the tag to each bag for him to give away at school.

These would make great gender neutral party favors.  


Speaking of gender neutral favors, Micah though having a race car themed party this summer, wants to invite boys and girls to his party.  Then I realized that the dilemma was to find party favors both 5 yr old girls and boys would like.  Yeah, most would be ok with a matchbox car, but I just wanted to find something that all the kids could enjoy.  So while perusing the dollar section at Target I found these small Slinky toys.  Perfect.

Here's a random list of great party favors (most that you can make) for both boys and girls:
*pencil pinwheels
*crazy straws
*balloons...my kids love balloons and I saw some balloon sticks at Hobby Lobby the other day and was thinking it would be fun to put balloons on those since it's depressing when helium balloons fall down the next day
*personalized back pack clips...I will do a little how to soon
*bouncy balls...all of my kids still love a good bouncy ball  ;)
*craft supplies, like pens, colored pencils, stickers
*homemade coloring books like these or these made in your custom party theme

What are some of your fav gender neutral party favors??

Tuesday, April 27, 2010

Some Mother's Day gift ideas

Just a few crafting Mother's day ideas:

Books with kid art work...this was a BIG hit with Grandma last year.  :)

Knotted ribbon bracelet

For Mommy bakers

Simple heating pad~add some sugar scrub and homemade soaps in a basket...kids can even help make it.

Personalized initial towels

Tin can vase bouquet

Hand painted plates~LOVE this idea!

an adorable gathered clutch

I think there is more, but I'm not feeling so swell and can't think really straight right now.

Happy Crafting for Mom!  I need to get my booty in gear!

Monday, April 26, 2010

Homemade kid cards and a puppy pencil pouch

Turn a kids drawing into a cute little card.  This is what we do for cards lately.  I hand Kalla a rectangle piece of card stock and have her draw a picture and name (she still can't quite spell 'Happy Birthday' all by herself, so I write it out on a scrap piece of paper for her to copy).  Once she's done I cut another piece of card stock or other printed  scrap book paper slightly larger and tape the picture on top with double sided tape (how I love the invention of double sided tape...remember the days of using regular tape and looping it???).

For the party we went to this past weekend, we decided to make a cute little pencil pouch.  A super easy method in this tutorial here.  The cute dog came from a print at our local Hancocks.  They had fabrics with these adorable weiner dogs all over as well as a cat and bird one.  I bought 1/4 yard of each a few weeks ago thinking I would cut the pictures out for applique.  Kalla picked the dog for our pouch.

Along with the pouch we included a couple of Bare Books and crayons and some scratch n sniff stickers, cutsie erasers and gel pens...in other words we shopped my craft room (since this is the type of stuff I hoard keep on hand for gifts).

Tuesday, April 20, 2010

Plastic Kids Picnic Table Makeover

I took our old hand me down kids picnic table and cleaned it up.


Then I painted it with spray paint for plastic.  Honestly don't know how long it will look nice, but worth a try! ;)

Monday, April 19, 2010

We've been playing

Watercolors

Gotta love 8 yr old boys...he likes to paint 'dirt' and 'garbage' pictures.  He even made a garbage dyed egg (he put the egg in all the colors til he was satisfied it looked like garbage.)

Chalk art...Micah did this all by himself.

Jeep fun

Playing with Alex the gecko


Gravel at the ball park


Baseball

Cheering

More baseball

Picnic and feeding ducks at the park

With friends after church


Now that spring is truly here, it's so hard to stay inside and work on projects, so they are slow going.  But oh so many on the to do list!!

Working on in these few weeks:
*2 long cushions for a picnic table...moving slow on these, but cool fabric and lots of piping and velcro straps, they will be worth it!  ;)
*bicycle basket
*few skirts and capris for the girls
*Mother's Day gifts...haven't nailed down my ideas yet
*teachers gifts
*big batch of rainbow glitter playdough for preschool party favors
*helping K make a cutsie pencil pouch for bday gift
*painting kids bath
*painting hallway
*second coat of glossy white on giant moulding in dining room and playroom (I'm not a huge fan of over the top moulding!!  and having to paint it is one big reason why!!!!)  They have only had one coat for a year now, but hosting a baby shower in my home really gets me moving on these type things!!  ;)
*working on baby shower decorations and some applique onsies for gifts
*ruffle hiney onsies to send to sister whose baby is now 3 months old and I STILL haven't sent her my gift!   I'm such a slacker!  ~sorry Steph! xo

So you see, if I am scarce around here now you know why.  Course as I get this stuff done, I'll have something to post about!  ;)

Wednesday, April 14, 2010

A Reading Cube

We had this dark brown wood cube forever.  Don't know where it came from or what it was really for.  (Sorry for the washed out pic...I took it in a hurry outside right before painting it, but you can get the drift.)  I used it some as a ball bucket for the kids or blocks (but it was really too deep for little ones to get things out of the bottom).  Or sometimes on it's side as a side table.  But the other day I had an idea.


I decided to give it a coat of white paint and add some wheels.  I had these wheels already from a local mod podge type store (for the locals it was Mike's Merchandise) that I bought without even knowing what I would do with them yet.  I cheated and used Gorilla glue to attach them to the bottom after wrestling with difficult holes and a drill.


So now it is to house the kids magazines and some popular books they like to sit and read in the living room.

Simple and sweet!!  And I think even Snoopy approves!  ;)

Tuesday, April 13, 2010

Beginner Quilter

I have been teaching or more like leading a monthly sewing project at my church.  This time I asked a proficient quilter to teach us a quilting project.  She choose for use to make a Disappearing 9 Patch Quilt.  I found this tutorial here for those who don't know what they are.  While I've done patchwork before, I've never learned the cool quilting tricks you can use and how to properly cut and sew them.

So this is a cool challenge for me.  I am a impatient short-cut-taking kind of sewer which does not make the best quilter.  So I'm working on being patient and taking my time.  So far I've done 8 of these 9 patches.  I'm making 16 to make a throw quilt.  This will be a gift to Kalla for her birthday.  This picture is after my sewing the patch strips together and haven't been ironed.  In class we only got our first long strips sewn and then cut into strips of patches and I sewed those strips together at home though that makes me ahead, since we were going to pick up where left off when we have another class.  And apparently there are certain ways you lay the seams when you iron, so I'm going to wait for that.  ;)

Anyway, I've got a dozen projects half done, waiting to be started, on the brain, etc.  Will share as I get to them!!   :)

Friday, April 9, 2010

My Living Room and Lil Decorating Talk

This is my living room as of now.  I'm always up for changing it, but there aren't many options.  I have a love hate relationship with this room.  I'll talk more about that in a minute.  Short term goals for this space is to change the ceiling fan and get a rug and the perfect coffee table.  I have one in mind.  This beauty from Ikea.  Problem being that the nearest one is 3.5 hours away.  A trip is hopefully in the works real soon with my girlfriend and her hubby's truck!  For now I made the funky curtains, covered original throw pillow that came with my Craig's list find sectional with a fabric shower curtain I found at Target.  And cute little bistro in the back corner that you can't really see in this picture.

Here is the other side.  Notice I changed up my photo gallery first done a couple of years ago in this post (see post for an fool proof method to hanging up gallery picture frames.  I'm still planning on changing this wall eventually when I get a few more chairs and find the perfect shelving cabinets...something like this.  I want 2 side by side with funky art above.  If only I owned one of those money trees!!  ;)

So here's the full picture of what i have to work with.  It has several awkward spaces.  LOVE the giant windows, but have to be careful what I put in front of them.  There's this weird little space in the left side corner that is right on the other side of the column and to the left of my sectional.  Right now it has a rocking chair and beat up little wood coffee table back from college days with an old stereo the kids use underneath and basket of their magazines on top.  Btw if you are wondering the space on this side of the columns is our 'office' type space with a computer armoire and shelving and couple of chairs.  Once I make it really spiffy I'll take some photos, but right now it's just in a 'it will do' kinda state.

Another problem I have with this room is it is long and narrow.  I really love the look of furniture in the middle of rooms instead of pushed up against the wall, but I just can't make it work (and I've tried).  I'm not really crazy that one of the sectionals has it's back to the fireplace, but I have this thing about my back to doors and if you will notice in the next picture, this is one big long space that you see all the way from the front door.  The moment you walk in the first thing your eyes go to is straight down the rooms to the fireplace and mantel.

Our house is all one story with a open floor plan as you can see...the part we fell in love with.  But it's been a challenge to decorate at times.  I haven't even showed you the difficult giant dining room.  The reason it's like this is the previous owners put on this whole back addition.  The kitchen, living room, a bath and laundry.  My now dining room used to be the kitchen and that little space there on the other side of the columns was the dining room I believe.

Thursday, April 8, 2010

Little Spring Decor~Super Simple Magnet Butterflies

I am really happy I kept this cool metal board/art up in my dining room.  I don't really go all out in seasonal decorating, but nice to have a simple place to add a touch here or there.  After taking my Valentines down I was trying to think of something springy to put up in it's place.  So I came up with paper butterfly magnets.  I think I need a few more though since the space is rather large (I also think I have finally decided that the large thrifted dresser needs to go stark white like the last one I did.)

To make these little magnet butterflies, I used printed scrap book papers and some old MS butterfly stencils I've had a long time.  I found this stencil on her site that is very similar, just trace and cut on a fold and to make varying sizes, use a copy machine to change the size.  After tracing and cutting my butterflies, I simply creased in half and used hot glue to fasten small round magnets to the back.

Once they are dry, put them on something metal.  These would be cute to spruce up an empty refrigerator.  If you don't have a metal space or board to use them on, you can always use poster putty to stick them on a wall.  :)

Wednesday, April 7, 2010

A New Table

This cool little table now resides in my sewing/craft room.  I found it at a Goodwill.  I won't brag on the price as I find Goodwill often WAY over priced.  But when I saw this rare retro beauty (I haven't changed a thing) I had to have it!!  It was not expensive, but still not what I normally would pay for a thrifted side table.  ;)
The girl's love it too.  It's a perfect height for them to sit at.  This summer it will be where Kalla can use the sewing machine I'm getting her for her bday.  For now she crafts here most days when I am hanging out in my room.

Thursday, April 1, 2010

Chocolate Marshmallow Bunnies and Glitter Marshmallow Eggs and other goodies

Make your own chocolate covered marshmallow bunny.

Or glitter marshmallow eggs.  
After making the larger bunnies and eggs, I used mini cutters to use up the scraps (you can't tell here, but they are mini bunnies, flowers and butterflies).

First off I used Martha Stewart's homemade marshmallow recipe.  I sprayed a rectangle pan with Pam, then lined pan with wax paper and sprayed again.  After smoothing the marshmallow carefully in the pan, I coated the top with powdered sugar.  Then I lifted the whole thing up onto a cutting board.  Do not use powdered sugar on the other side or try to remove it til you make your shapes.

Next I used cookie cutters to cut shapes from the marshmallow sheet.  
It helps to spray your cutters during the process (though I didn't).

Now to make chocolate covered bunnies place the bunnies sticky side UP on a piece of wax paper on a cookie sheet.  I find that it is MUCH easier to get the chocolate to stick to the marshmallow if it is not put on powdered sugar coated ones.  At this point I microwaved semi sweet chocolate chips in a bowl in the microwave.  Then I used an offset spatula to spread chocolate on top and sides of sticky bunnies (the bottoms will not have chocolate, but will be soft with the powdered sugar.  Use sprinkle for the eyes.

Mmmmm...chocolate bunnies.  
I think you could also used crushed graham crackers for the bottom in stead of the powdered sugar.

Now for the glittered eggs.
When I cut my eggs out I promptly placed them sticky side down on colored sanding sugar.  
Then roll the sides in the sugar as well.

These eggs and bunnies were packed up and sent to kid's teachers.  :)

In a cute little basket.

I went the quick route for the cupcakes for Micah's preschool party.  Aren't these baskets too cute?  The cupcake baskets I found at Target.  Made chocolate cupcakes with green buttercream frosting and added a peep and some chocolate candy eggs.

And the favors.  I opted not to use the little peat pots I got.  Just got a giant container of sidewalk chalk and divided them up into goodie bags.  The cute bunny cards I just used some card stock and traced a bunny cookie cutter and drew some whiskers.  Had Micah add his name.  Cute and simple.  And preschoolers can never have enough sidewalk chalk!

LinkWithin

Related Posts with Thumbnails