Thursday, May 27, 2010

Pineapple Pancakes

These are my absolute fav way to eat pancakes.  My mom used to make them for me as a kid.  We don't remember how the idea to put pineapple in the pancakes, but boy are they tasty!  When I make them for others, they become pineapple pancake converts.  Pre-kids, we used to go camping several times a year with the teens at our previous congregation at a place that you would sleep in tents, but they did have electrical outlets.  So I would bring my skillet and make everyone pineapple pancakes in the morning. Boy I miss those days...we hope to get brave enough to take the kids camping up there this year, but Kalla is afraid of woods in the dark and bugs...ugh.


Make any pancake mix you like (I'm a big fan of the Fiber One mix...it is sweet and light, not to mention low in WW points).  You can used a small can of drained crushed pineapple, or if you have fresh on hand, just cut into small pieces.  I like a piece of pineapple in every bite, so I put in a lot.  Then drizzle on some syrup and enjoy!

Wednesday, May 26, 2010

Sew a quick doll's sleeping bag

I made this quick doll sleeping bag for Kalla's doll for her Camping Day at kindergarten a couple of weeks ago.  It was super simple as I used velcro instead of dealing with a long zipper.  Easier for her to work with too.


This is what it looks like opened up.


I also included a coordinating pillow.  It is completely separate, however you could hand sew it to the sleeping bag if you want.

To make your own doll's sleeping bag, cut 2 pieces of fabric according to the measurements above.  This fits a 25" doll.  Adjust accordingly if you have a stuffed animal or doll of different size.  You want to make sure to cut your fabric so they match up with right sides facing.  I also cut a piece of quilt batting the same size.  Lay and pin your pieces right side facing and batting on the top.  Sew along all lines leaving an opening to reverse it to right sides out along any of the sides.  Reverse it out being sure to make sure all corners are turned out neatly.  I then carefully topstitched the all edges being sure the opening is securely sewn shut.  Now folding your sleeping bag top over as seen in pictures, carefully line up velcro and pin and sew strips down.

If you like, make a pillow.  I simply cut a rectangle about 11.5" X 12.5".  Fold in half along the 12.5" side right side together and sew leaving an opening for stuffing.  Stuff firmly and close the opening by either slip stitch (hand sew) or topstitch with a machine.

Finally have a project to link in Misty's fun sewing parties:  Sew Cute Tuesday

Tuesday, May 25, 2010

Hello Kitty Fans

Target Dollar section alert.  ;)  They have Hello Kitty overload right now.  Littlest Miss is a huge fan.  Not to mention all the stamps, cutsie notebooks and gel pens are totally up the girls alley.  So, I indulged and for under $8 a piece I got both the girls what we call our 'busy bags'.  The girls both got the bag and I filled it up with the tiny notebooks, pens and whatnot.  We took it to a game last night and it kept them both happy and busy for the majority of the time.  Now they are put away til the game tonight.  They are only allowed them for brother's baseball games and I will allow them to take them to church.  I also kept a few things back to add for our drive down to the oil pit beach in a few weeks.  :)

I also found Micah, whose games are done and not super happy about having to go to big brother's games to watch, some goodies too.

Monday, May 24, 2010

Snail Mail

Zachary is into writing letters.  He has written a few to his cousins after they talked about how to write letters  in school last fall.  So I thought I would make him his own little address book and letter supplies.  For his address book I just printed the names and addresses of relatives and some of his close friends onto white cardstock.  I put them together alphabetically and stapled them along the edge.  I then used colored electrical tape to make like a binding.  I found the Snoopy stamp at Hobby Lobby.  I gave this to him along with the stamp (to decorate his envelopes) and a handful of  envelopes and a lined paper pad.  He wrote his friend a letter the other day telling him about playing his last baseball game in the pouring down rain and how he really enjoys spying with said friend at school (this is the game they play when they have free play during P.E.)

Friday, May 21, 2010

I'm still here.........


Sorry folks for the lack of posting.  :)  Been just busy living and being.  Not worried about that next project I have to finish so I can blog about it stuff.  May always sneaks up on me with a million and one things I need to do.  And we've been enjoying the warm, but not too warm yet weather.  And oh the baseball!

Now that my middle 2 are done with preschool and I'm not spending most of my morning taxi-ing back and forth to preschool we are spring cleaning!  Their first day home I put them to work.  Now I'm doing the nitty gritty cleaning out of rooms and closets.  I have serious amounts of stuff I need/want to get rid of.  And of course none of this is fun, creative or blog worthy.  ;)

So, for the next short while I'm loaning the computer to the littlest member of the Webkinz [Jr] world.  We only have one computer for the 5 of us to share.  I hope to remedy that one day with a lap top of my own.

Anyway, I'll be back to regular scheduled programing very soon!  Thanks for your patience!  :)

Wednesday, May 5, 2010

Embellishing inexpensive vinyl roller blinds

I had never been a fan of these roller blinds before.  But let's face it, they are cheap, easy to customize the size (Home Depot will cut them for you) and easy to install and use.  Not to mention they do wonders at keeping the hot sun out in the late part of the day.  Our playroom can become a sauna at about 4 pm in the middle of the summer.  The hot afternoon sum come right into this room through these doors.  And doors themselves have a challenge in you have to do 2 separate blinds/window treatments.

I didn't want anything really pop out on my doors in our playroom, but needed something functional.  So I decided to hang these roller blinds. To keep them a little more interesting that plain old blinds, I glued pom pom fringe to the bottom.  :)  You can use hot glue gun or strong craft glue.  Be careful to not pull the pom pom when using the blind though.  


And as seen before I put a little paint detail on these in the kitchen.  Just used a round foam blotter kind of brush and some red craft paint.  Then glued on a white rope pull...though it is just for looks.  ;)

You could do all sorts of fun fringe or treatments to the bottom.  You could mod podge on some fun papers.  Use a tassel as a pull.  Glue ribbon along the bottom edge.  Do a cool stencil.  Just because the blinds are cheap doesn't mean you can't have fun with them and make them a cute statement in your home.  ;)

Tuesday, May 4, 2010

Our hand painted plates

I posted the link to the cute hand painted plates in my Mother's Day gift ideas and that is exactly what we did for one gift.  One I have to mail and I don't like the thought of mailing the plates, so came up with something different for the other.  :)  But here is what my kids drew for one grandma.  I let them all totally design and draw their plates all by themselves.  We did a practice drawing on paper so they knew what they wanted to do.

Zachary, age 8, made this plate.

Kalla, age 6, draws lots of cats with tiaras and wands lately so this is what she drew.

Micah, age 4, drew Grandma and a flower.

Maressa, age 3, drew Grandma and herself with piggy tails and a big 'M'.

I thought the plates turned out so cute!  :)

A few lessons learned....I didn't realize they would want to color in everything and I ordered the fine tip markers.  And I mistakenly forgot to get yellow, pink and purple which was an issue, but they got over it.  :)

Monday, May 3, 2010

Ahoy, It's a Boy! baby shower

I held a fun baby boy shower at my home yesterday.    I choose a nautical type theme for this shower because I had the above cake mold.  :)  I bought this castle shaped bundt pan years ago when I had a beach theme party for Micah's first birthday.

So then I just ran with all the beachy decor.  Made the pennant banner with scrap book papers and a stencil to trace and then cut the letters.  I used every clear vase I had and poured clean play sand into them and got a bag of shells from Hobby Lobby to add.

In the dining room I used microsoft clip art to print the starfish onto white card stock, then cut around them and added a thin sticky backed magnet.  Cut card stock into simple blue lanterns and hung from the ceiling with my handy fishing line.

The cake was so simple, but so cute!  I used this aw
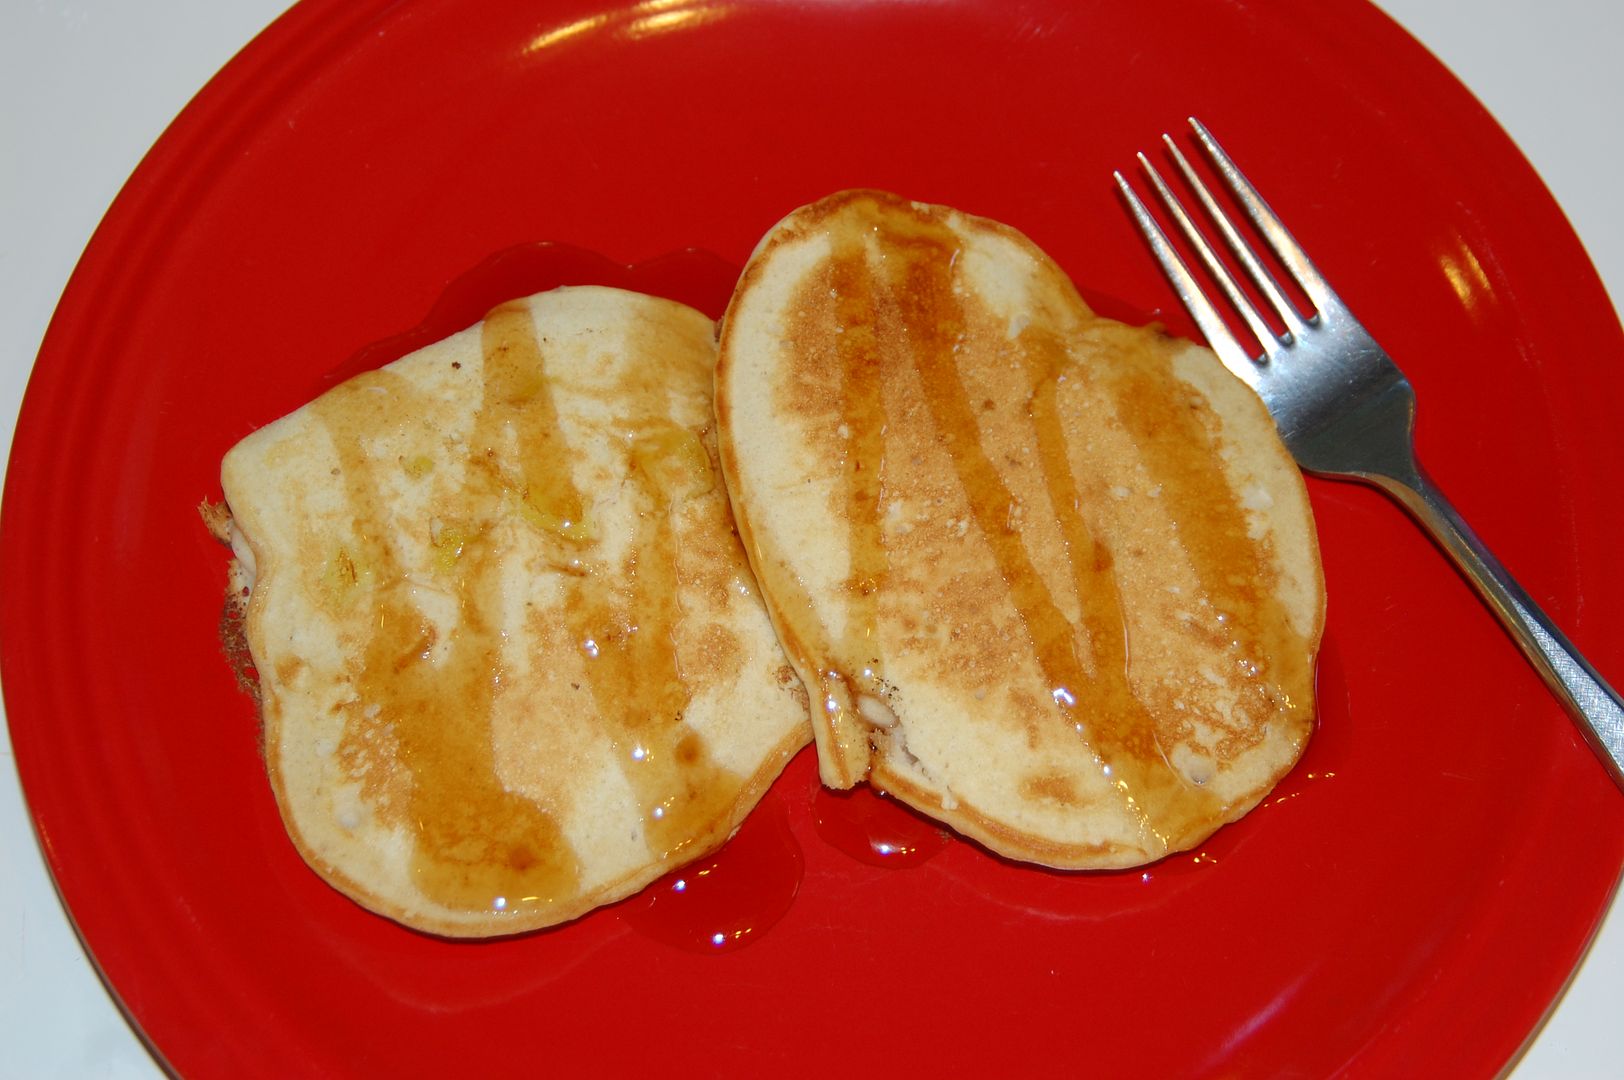
esome pound cake  recipe in my aforementioned pan.  This pan does not quite use all the recipe (I poured the extra into a loaf pan...pound cake brownies are so good! ;)  I used a shell shaped chocolate mold for the sea shells...a little how to at the bottom of the post to get that white/tan sea shell look).  I put the whole thing on a cardboard cake board covered in light brown sugar for the 'sand'.  On the side in a bowl I served fresh whipped cream (buy a pint of heavy whipping cream and directions are on the carton...basically you whip it on high for a few mins, then fold in 3 tbsp of sugar and 1 tsp of vanilla...SUPER yummy!).

We used blue napkins and I rolled them around the forks and tied with a piece of twine and put them in a metal red pail.  On the table I got a piece of burlap and layered on an inexpensive simple piece of blue cotton fabric.

This is the gift table.  I put down a clean white sheet and layered on the last piece of burlap and a fishing net.  Note if you have a party where you decorate with fish net from the hobby store, buy it ahead of time and take it out of the package to air out...these things are REAL fishing nets and stink!  The smell went away quickly as I let my air out on my deck for an afternoon.

Here's a little how to on the sea shell chocolates:

First I got some semi sweet chocolate and white chocolate melting candy wafers.  I melted a small amount of semi sweet chocolate in a bowl in the microwave.  I then melted a larger bowl of white chocolate.  I spooned a small amount of white chocolate into each shell mold (I love using baby spoons to do this with).  After I spooned a tiny amount of the semi sweet chocolate on top of each.


Then I took a toothpick and gently swirled them from top of the mold down into the bottom.  You don't want to mix this too well, but just get some brown swirling action into the mold so it will show on the top of the chocolates.  You can carefully hold the mold up and peek underneath to see if it's getting the effect you want.

LinkWithin

Related Posts with Thumbnails