Friday, July 30, 2010

Applique Tee Week: Hello Kitty

Not perfect but done and a happy girl.  Last one for a while too.  :)
So I traded in creativity for my girl's fav kitty.

I started with a plethera of HK coloring pages to pick from as my template.  Print and flip over to trace a reverse image.  Note that when tracing parts like above, I make my piece bigger so it can be layered underneath.

Ignore my extra pieces...somehow I realized I only traced half of Kitty backwards and half not.  So I had to make some new ones.  :)

Iron on your wonder under tracings.

Use your picture to help layer and assemble Kitty.

For this project I choose to do a satin stitch around my applique pieces.  To make it even harder on my self I used black thread on white fabric.  This is not a beginner project for those who aren't experienced at satin stitch on applique.  Black on white shows every imperfection as you will see.  I'm a little rusty at this but have done plenty before.  Anyways, unlike using simple straight stitches, if you satin stitch on tshirts you MUST use a stabilizer on the back.  I prefer stitch and rip.  You will cut a piece to cover your area (I did the bottom area first then cut a separate piece for the head).  Attach to the under side of the tshirt.

But if you stubbornly decide to trudge on like I did, at least practice your stitches on some scraps so you get the width to your liking.

Pin your stabilizer from the front side so you can remove them as you go.  I also like to use a clear foot so I can see what I'm doing.  They sell machine feet for this type of work.

This is what you'll have on the back.  Rip it off when stitching is done.

This is what it will look like from the inside.  I choose to not go totally insane and top stitched the bow and flower since they are so small.  You'll do any of this kind of stitching after ripping your stabilizer off.  If not you'll have a tough time getting it to rip around those areas since the stitching is lite.

Now hand embroider on the face (see bottom pic).  I used a water soluble pen to draw on her eyes and nose.  Then used a satin embroidery stitch to fill them in.

I don't know what this is called.  It is some sort of permanent fusible.  It is soft on one side and the 'glue' side looks like little bumpy pin dots.  This keeps you from going really crazy when you've worked so hard on a cute tee and your 7 year old tells you it feels all prickly inside and refuses to wear it.  You can find it with all the other stabilizers and fusibles by the yard at your fabric store.  You will cut a piece to just cover all those itchy stitches on the inside part of the tee.

You then turn your tee completely inside out and place bumpy side down over all the stitched area.  You then take a very damp cloth and a very hot iron.  Place cloth over fusible and iron over it til the cloth is a good deal drier.  It should now be ironed down permanently and can be washed and dried with the tee.

Lastly I sewed on a button on the flower.  Like I said not perfect nor a project for the faint hearted, but Kalla loves it nonetheless.  She's picked it out to wear tomorrow.  :)

Thursday, July 29, 2010

Applique Tee Week: An Apple for Henrietta Hedgehog

When I found this adorable hedgehog when browsing free coloring pages, I knew it had to be a new fall shirt.
I found this picture here.  Traced all the parts I wanted to use on my fusible.

I ironed them all on my fabrics.  One note, for the face piece I re-did it to make the piece round and I  traced and cut  the spiked portion on the dark brown polka dot intead (see picture below to understand what I mean).

When placing and ironing the fabrics I pulled the dark brown on top to layer it over the tan face.

The bottom of the face layers over the top of the tummy.

Here it is all layered just as I want andI carefully ironed them all down.

I changed the face from the original picture.  After machine stitching all the pieces down, I used a water soluble pen to mark how I wanted the face to look.

I used a back stitch and satin hand embroidery stitches to make the face.

Kalla's all excited to wear it on her first day of school! 
 (Won't mention that is in a week from this Monday!!! UGH!)

Wednesday, July 28, 2010

Applique Tee Week: Scrappy Pear Tee

The idea for this shirt came to me when I was struggling to think of something cute, but not an animal.  Animals are my daughter's fav so those are easy to think of....cute dog, cat, bunny, horse/unicorn, etc etc (though I am still on the search for the perfect guinea pig silhouette).  And I didn't want a summer theme like ice cream, popsicles, etc because these are back to school tees that will wear into the fall.  Then I remembered fruit!  And what better for fall than apples or pears.  Apples are kinda overdone.  So we have the pear.  ;)

To make the pear more interesting I decided to chop it up and make it scrappy in non-pear like colors.  

I used the image of the pear in these coloring pages.  I printed it off and then I believe I had to enlarge it on my copier.  Then I drew lines across it where I wanted it chopped up.  You can reverse this image by tracing on the back, but since this particular picture would look fine either way, I think I just used the front.

I traced all my individual pieces on my wonder-under lite.  I did make the stem shorter than the original picture.

Ironed onto all my fabric pieces.  Then cut out.

Placed carefully on my tee, then ironed down.  Then I stitched a straight stitch along the edge of every piece.

Tuesday, July 27, 2010

Applique Tee Week: Initial Bunting Tee

Instead of a plain old initial tee, this time I decided to go a different route.  I appliqued a sweet, simple bunting  on the tee with an inital on top.  I envisioned the kind of bunting you would see hanging from an apple tree's limbs over a table full of goodies at one of those well photographed little girl parties. ;) 
So I used mismatched fabric scraps and a simple letter 'K'.

This was a super quick and easy applique.  Great for those of you who've never tried it before.  :)

I started by drawing a few triangles on a sheet of paper.  When I got the size I wanted where I could fit 3 across, I used that one (the larger one above).  For the 'K' I used some printed letters in a template notebook I keep as it was already the perfect size.  You can use any standard small stencil size or freehand it or look online.  Once you find your letter template, be sure to trace it on the back so it is reversed.

Trace your triangle (the same one) 3 times and your letter on your wonder-under lite (or other fusible).

Cut and iron to the back of your fabrics.  Once cooled cut around the lines and peel the paper backing off.

Place carefully on your tee til you are happy with the arrangement. Carefully iron down.

I used a straight stitch on my triangles.  Then I used the blanket stitch on my machine for the letter.  Note also that if you don't machine sew you can always hand stitch your appliques down and the blanket stitch is fantastic for it.  After they were down I wanted the look of the bunting 'hanging' on the tee so I used a contrasting thread to straight stitch a gentle curve starting away from the left of the triangles through to the other side.  :)

Tomorrow's Tee Tutorial:  Scrappy Pear Tee

This tutorial was linked up with Creative Itch's Sew Cute Tuesday.

Monday, July 26, 2010

Applique Tee Week: The Unicorn tee

This was the first tee I made a couple of weeks back for Kalla to wear to her birthday party
I wanted a simple unicorn silhouette.

Here's where we started.  I often use free coloring pages found on the internet as templates for my appliques. Sometimes I draw them.  
I found this picture here.  I wanted something a little simpler, but that is easy to change yourself.
You can take only what parts you want from your picture.
After you find the picture you want, print it to the size you want your actual applique.

Once you've printed it and you want the finished applique to look like the original picture, you need to flip your print over.  Trace the picture with a dark pencil or sharpie.  This is where you can leave out/add anything you like.  I went for smooth hooves and legs and left off the goatee and other small details.

After making my tracings I traced this reverse image on my wonder-under lite in pieces.  I traced the tail, horn, body and 3 separate mane pieces.  Cut around them close to the drawn lines, but not on them.  Now iron each piece to the fabric you want to use on the back side of the fabric.  Once cooled, cut out the image while ironed on the fabric.  Now carefully peel the backing off.  Place your pieces on your tee (or anything else you want to sew it to like a tote).  Arrange until you are satisfied with your picture taking care to layer pieces where you need to...for example I cut the tail slightly longer where it meets the horse's backside and before ironing it on, I tucked it under the fabric for the body.

Once ironed on well, I used just a straight stitch along the edge...not the very edge, but about 1/8"-1/4" away from the edge.  The edges will fray slightly when washed.


Here is the party girl wearing her tee.  :)

Come back tomorrow for an initial bunting applique. :)

Friday, July 23, 2010

Applique Tee Week


Just a little heads up on what's coming up on my lil blog next week.

Applique T-shirt Week

Every day I will share an applique tee I'm making for Kalla (including sources, steps, etc).  
Just in time for back to school.
While it will remain hot/short sleeve weather here a good while longer, everybody likes to have some new duds for back to school.  
I've had some blank tees in my sewing room that I just never got to yet.

All ya need to make some of your own is some quality blank tees ( I got mine at Target...they still have a good many right now and some colors on clearance) and some fabric scraps.
Or you can go ahead and grab some long sleeve.  
Old Navy has white/black/hot pink bundles online right now.  :)

While next week will be completely new designs, check out some of the past tees I've made:

Thursday, July 22, 2010

Our simple rainbow sheet cake

We made this rainbow sheet cake for Kalla's 7th birthday party (see previous post).
It was a collaborative effort.  We used two white cake mixes.
Divided the batter into 6 bowls.  Approximately 1 1/4 C batter into each.
Then we mixed in some intense gel food coloring.
I used a large cake pan from Walmart wedding/cake supply aisle.  I started out spreading the red batter at the bottom.  After the first layer I wasn't able to spread the other colored batter on top without mixing the colors.  So I drizzled each color in the order of the rainbow.  All in all it worked out and we had vibrant pieces of cake.  :)

Tuesday, July 20, 2010

A Rainbow & Unicorn Party

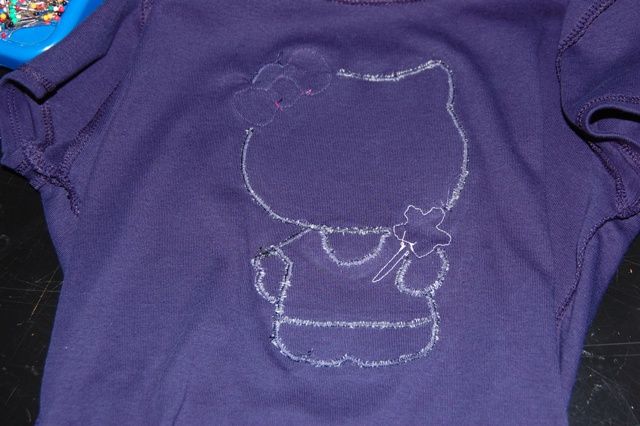
Rainbows and unicorns.  She designed her own invitations.  This was definitely a collaborative effort.  :)

I made 
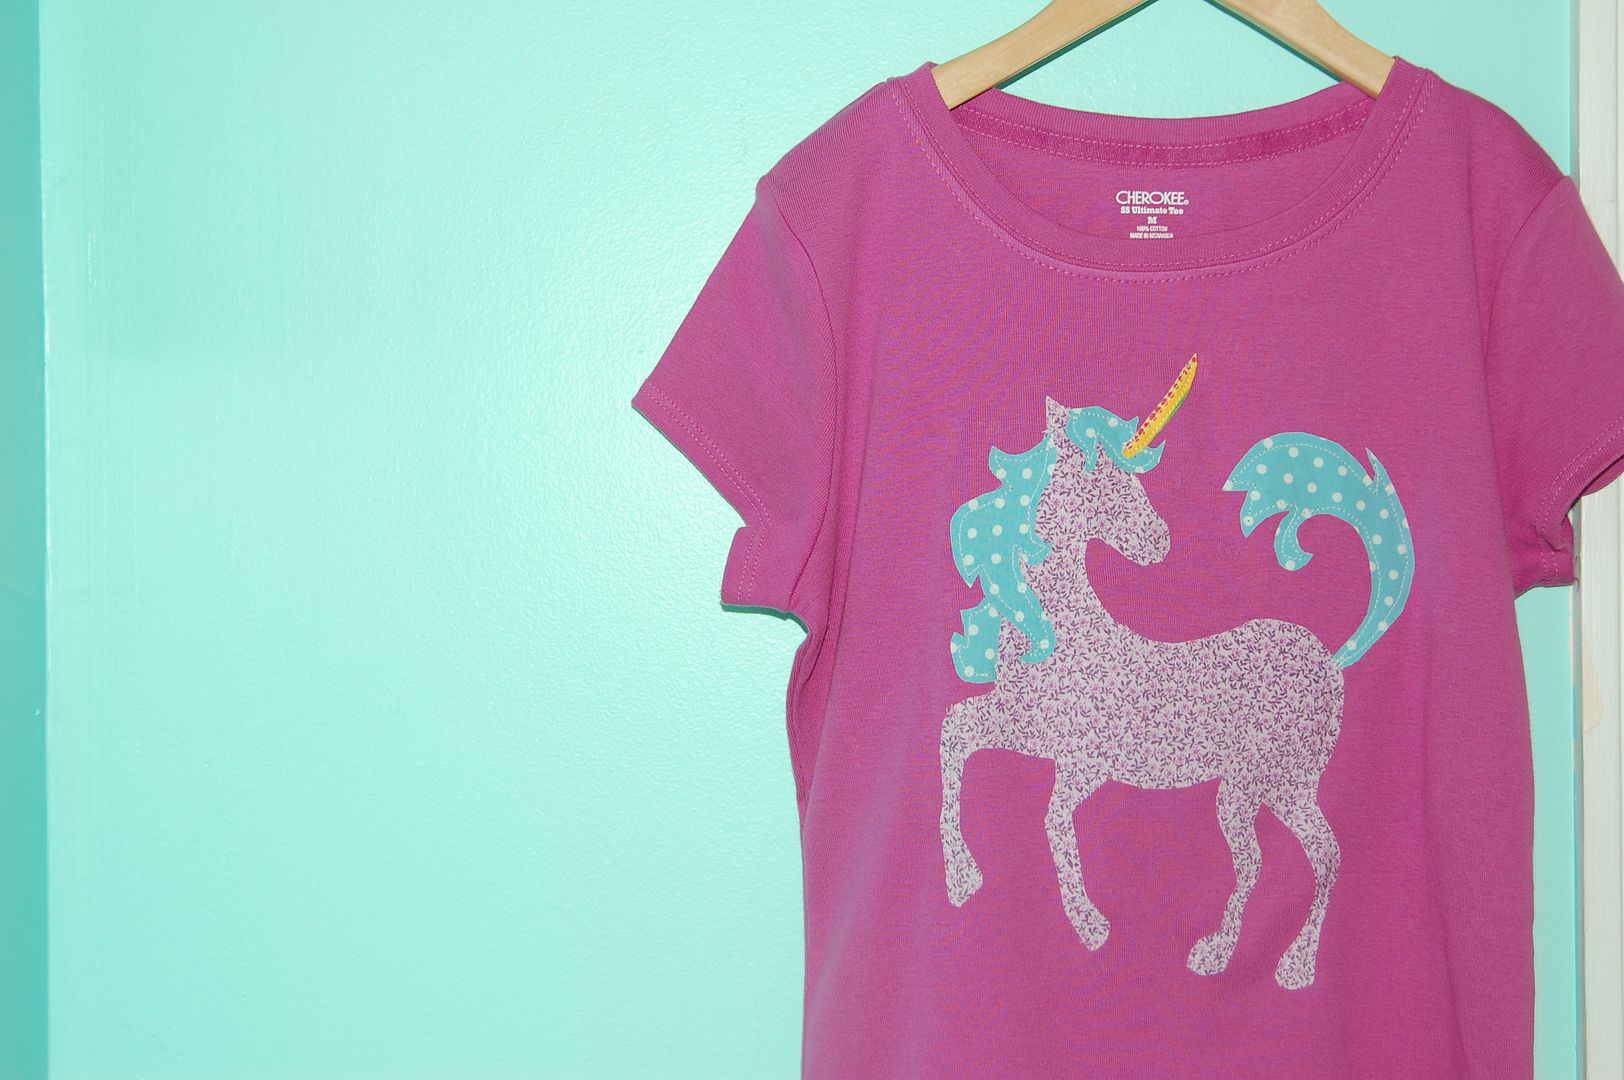
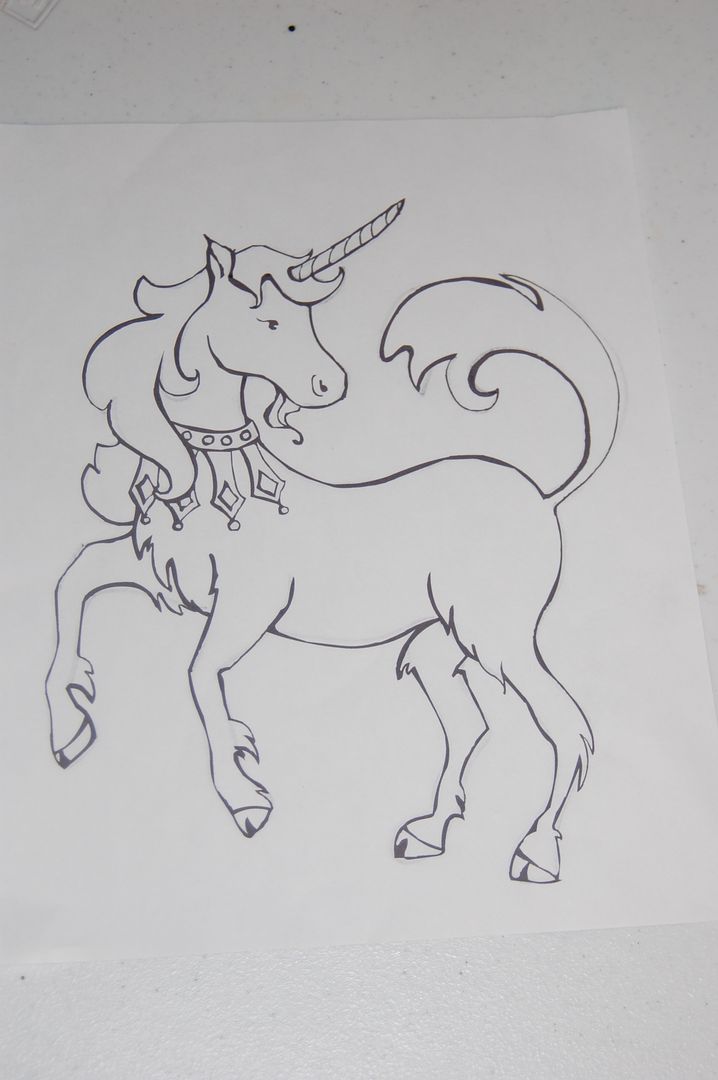
these mobiles for decoration, however this is Alabama in July and while the temp wasn't bad on Saturday (the one 'cool' day in the upper 80's), the humidity was 100%.  So as you can see it was minutes before the vellum curled really bad.  I used an unicorn cookie cutter to trace and cut the unicorn heads out of sparkly card stock paper to attach to the bottom and then tied some tiny washer to the very bottom of the thread to prevent it from curling up from the bottom as well.

Table decor:  bud vases and skittles with these cute pinwheels I picked up years ago on clearance somewhere.  I used white paper table cloths with a purple crepe runner and curling ribbons.
Used small canning jars tied with ribbon for the glasses.  Used clear glass appetizer/salad plates ($1 a piece from Walmart) with napkin, rainbow twizzler and sparkly paper unicorn head.

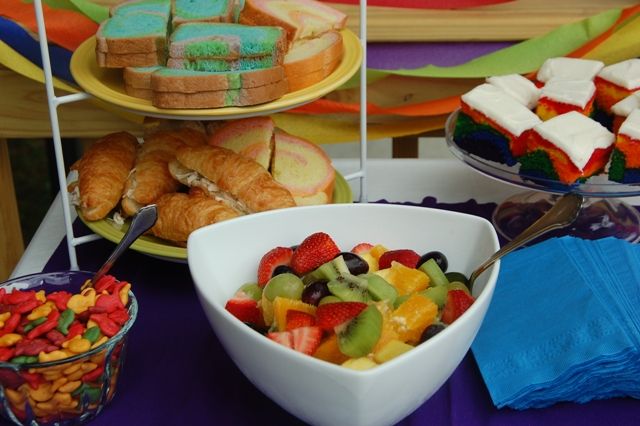
Food:  rainbow goldfish, bowl of fruit salad (I originally planned making kabobs in rainbow color form~starwberry, orange, pineapple, kiwi, blueberry and purple grapes~but ran out of time and tossed them all in a bowl) and rainbow sandwiches.  A local grocery store bakery (Publix) makes rainbow bread.  I made a variety of sandwiches on the bread.   Chicken salad crossiant sandwiches and extra pieces of rainbow cake for adults.

I made a simple rainbow sheet cake with buttercream frosting.  Cut out unicorns on purple sparkly paper and taped to lollipop sticks for toppers.  I opted to do the sheet cake as a time saver to cupcakes and I wanted to pre-cut it so we can view all the colorful goodness.  ;)
Pre-scooped chocolate chip ice cream with sprinkles.  I put the scoops in the cupcake cups in a cupcake pan the night before, then covered with alluminum foil and kept in the freezer.
Seven is {rainbow} heaven.  :)
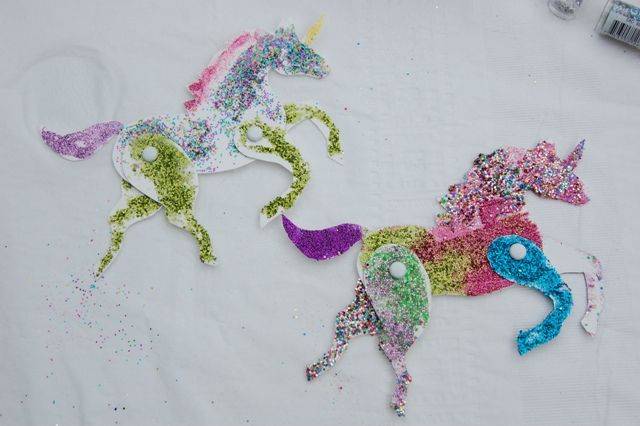
Had our craft table set up.  Supplies:  tons of glitter, mod podge, foam paint brushes, large paper plates, small brads and clear acrylic spray.  Mod podge glue was poured into cupcake liners for each girl.
Here is what we made.  Glitter unicorns.  We used Ann Woods stampede tutorial.  I printed the template and traced the pieces on posterboard and added a horn.  I cut out the pieces.  Then I used a regular hole punch to make a hole in the bodies and the legs where we would attach them.  I did these first steps  ahead of time.  I gave each girl the pieces to make a unicorn and let them glitter them.  They painted on the glue then sprinkled the glitter.  They left them to dry a bit and I took each plate and sprayed the cldear acrylic on to seal in the glitter.  Once dried a bit, we attached the legs with the brads.

Also, a big hit was our new trampoline and a plethera of sparkly temporary tatoos...they all got one on their arm and ankles.
Party favors were put in these large matchbox boxes.  I covered them in scrapbook papers and taped a lollipop on top.
Inside we put a tiny crayon set, fun stickers, eraser and these rainbow bracelets that Kalla and I made.  Beads and elastic bracelet string from Hobby Lobby.

There you have it! :)

LinkWithin

Related Posts with Thumbnails