Wednesday, September 28, 2011

Show your spirit shirts and a Pinned Project: Baseball bracelets

Make your own shirt to show off your favorite team.
I've made a handful of these for the mom's on Z's travel baseball team.
We wanted something with a feminine feel and cute.
One mom found this cute fabric and I made the appliques and sewed them on.
One I did a satin stitch and others I just did this simple topstitch and let the letters fray a bit.

These would be a great way to show off your fav pro/college team or to wear to your kids high school football games.  :)

I used these bubble letters for my templates.  When I printed them I had to copy them down to 65%.
Then used wonderunder lite to iron them down and then stitched them down permanently. 

This week's pinned project is this baseball bracelet.
It is made from a baseball and is super easy.
Go here for directions.

Now I've got my gear to be all decked out for Z's fall tournaments!  ;)

Winner of rolled canvas giveaway!

True Random Number Generator


Min: 1

Max: 16

Result:

6

Powered by RANDOM.ORG

Comment number 6 won the giveaway!!
 
Crystal, I will email you with details!
 
Congrats!!

Tuesday, September 27, 2011

Vanilla Bean Cream Cheese


Try this:
One 8oz container of your fav plain cream cheese.
 Mix in 1/4C sugar, 1 tsp vanilla extract and beans scraped from half a vanilla bean.
Spread on a bagel or waffle.
Other suggestions: on a slice of pumpkin bread, muffins or use as dip for gingersnaps!
I HIGHLY recommend the new Eggo Pumpkin Spice waffles.

Simply heaven.

**********************
Don't forget the rolled canvas giveaway ends tomorrow!
No hassle to enter, just leave your email addy!
Chances are good to win since their is low participation!
The prize is pretty awesome!!

Monday, September 26, 2011

A little Baseball Party

We had Z's birthday party this past Saturday.
Big surprise it was baseball themed.

I got this plain cardboard cupcake tower at Hobby Lobby.
Then I used some baseball printed ribbon with glue dots to decorate.
Then used stickers to add the Happy Birthday.
I cut the brown glove shape and taped to a popsicle stick and added a circle cut from baseball texture printed paper.

I had got a bunch of cute baseball papers to decorate, but never got around to making anything.
So this cute cupcake tower was pretty much it.

The cupcakes are chocolate with homemade chocolate frosting (my favorite is the one on the Hershey powdered cocoa box.)
Then I dipped oreos in white chocolate bark then decorated them like baseballs with red frosting.

I also provided snacks.  Ten year old boy type snacks.
Those awful neon cheese balls that every child loves, beef jerky, sunflower seeds and bowl of apple slices and grapes to throw out something healthy.  ;)

We had the party at a local baseball training facility.
After the last 2 year rain outs, I figured this would be a safe option for a dozen active boys.


The party favors were Cracker Jacks, baseball cards, baseball chocolates and some Big Chew gum.
I got all of it in bulk on Amazon.

I've posted these before, but just wanted to add the invites here too.  :)
As for the cupcakes, an easier version is to cut marshmallows in half and draw on them with a red food pen.
I made these to share at a baseball game.

Don't forget to enter the Rolled Canvas giveaway!
Last day to enter is Sept 28th morning.

Friday, September 23, 2011

Giveaway!! Rolled Canvas Print

****Contest has ended****

Hey guys!

I've got a great giveaway for one of you!

UPrinting has asked if they could give one of my readers on of their 16X20 rolled canvas prints.
Here are the details:

One winner will receive one (1 ) piece 16” x 20” rolled canvas print, with 2-inch border or No border,
1 Business Day Turnaround *Free shipping

Restriction: Limited to US residents 18 years old and above only.

UPrinting is an online printing company.
Visit their website and find various printing services like canvas printing and many more.
This canvas printing giveaway is sponsored by UPrinting, no monetary compensation was given for hosting.

To enter simply enter your name and email in a comment.  One entry per person.
Contest starts today and ends September 28th at 10am.
I will choose one comment by random selection and notify winner on the afternoon of the 28th.
Good luck!!!!

Thursday, September 22, 2011

The face of ten

My biggest turned bigger today.
TEN.
First one.
I'm not sure I like this.

We/I love birthdays.
I like to celebrate a lot.

Birthday boy chose cinnamon rolls for breakfast.
Then I met him for lunch at school.
Pizza and cookie cake for dinner.

Baseball party on Saturday.  :)

Wednesday, September 21, 2011

Speaking of Target designer lines...

Check out one of my latest Goodwill scores. 
 I found this Liberty of London Queen comforter and sham set.
Never been used.
Perfectly matching what I had planned for my bedroom makeover.

The gray quilt and white bed skirt I got on clearance at Target.
Mirror same.
Elephant...yep, Target.
Ok, so maybe I should invest in their stock.  lol

Tomorrow is a big day in our house.
Somebody's turning double digits.

Tuesday, September 20, 2011

I drank the Missoni koolaid

Ok so I wasn't waiting outside Target's doors on the launch day, but I did snag a few things the next day.

To be perfectly honest I didn't know this designer, nor am I really up on any. 
I'm not a 'designer' kinda girl.  I like what I like regardless of name.

I did see the commercials and did fall in love with the stuff upon first sight. 
 If you've been around here long enough you would know I love color and pattern.

I was mostly hoping to just look and touch everything.  I was dissappointed that most all was gone.
Even here in Alabama.

But I did get this shower curtain.
That's right it's a shower curtain in my dining room.
I bought it actually with the intentions of cutting it up for throw pillows and a tote.
But I really like it here for now.  And the bowl.  The colors fit perfectly in my eclectic dining room.
And do you know how hard it is to find a super cool table cloth for a large square table?

I've never showed you guys all of my dining room when it's not been decked out for a party.
I'm still working on a few spots, and I will post pictures eventually. :)

Thursday, September 8, 2011

Baseball Ticket Birthday Invitations

Working on our final birthday party of the year. 
My boy is going to be 10.  Ten.  TEN.
Dou-ble di-gits!!
Yikes!  When did that happen??

Big surprise that it's baseball themed and all.
This is the first time I'm renting out a place for a birthday party.
The last two years it was planned for a party in the park (football and nerf).
Both times it rained. 

I thought it would be fun to make the invitations to look like tickets.
I used a recent photo of Zachary doing his very fav thing, pitching.
Then used a bunch of boxes filled in with color to break parts up.
Then we easily found a sku bar in google images to use for the bottom.
Simply done in Microsoft publisher.

And approved by the boy.

Wednesday, September 7, 2011

Pinned Project: Glitter clothespins

I wanted to share some of my favorite pins on Pinterest that are ever increasing my to do list!
First one I did was this super quick project.
While I did my first string artwork from a string and clothespins about 8 years ago in my old dining room, I love the idea of making sparkly ones.
I knew this would be perfect for Maressa's ever increasing art work that she likes to hang up over her bed.

We just recently un-bunked the girls' beds and have a lot of wall.
I peeled off all the taped up pics and washed down the wall and now we're ready to go with more art.  :)

They were super easy to make. 
I would have let Maressa help me, but instead a friend and I did them over coffee one morning to surprise our girls.

We simply used a paintbrush to apply Mod Podge on the tops and then pressed them into the glitter.
I used large cupcake liners to put glitter in.
Then once they were dry I applied a thick coat of Mod Podge on top so the girls won't get glitter in their beds when they hang their art up.

These would make great magnets as well.

Maressa loves them.
No surprise there!  ;)

Tuesday, September 6, 2011

A Sewing Tutorial: The Reusable Ziplock bag

I LOVE ziplock bags.  
I could use them for virtually everything.  
Especially handy for packing.
This tutorial is about a year + coming.  
I've been wanting to make these for a long time.
Actually, this is a little different than my original idea.
I may bust out the other version soon.  :)
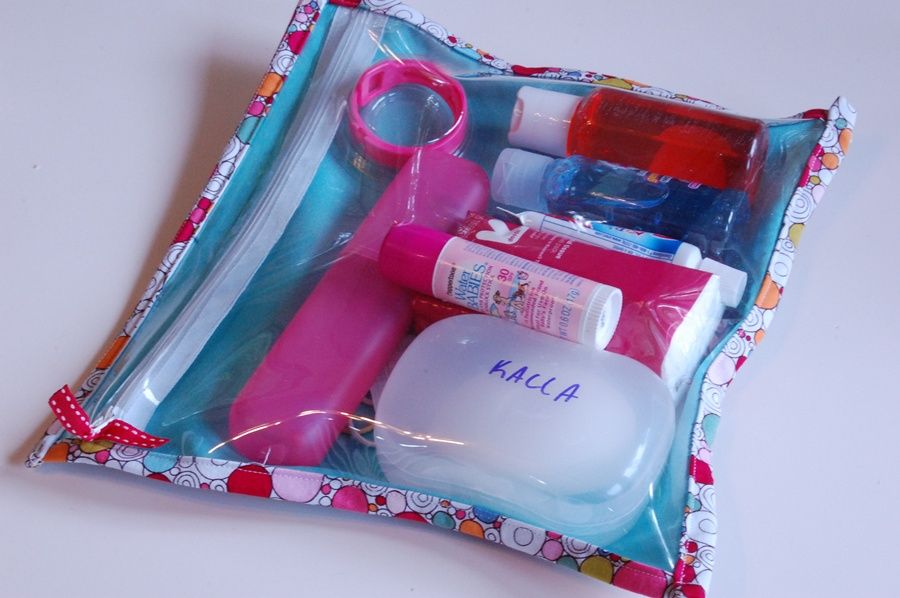
Anyway, this is the cutsie fabric version.

To make your own, just follow along.

You'll need:
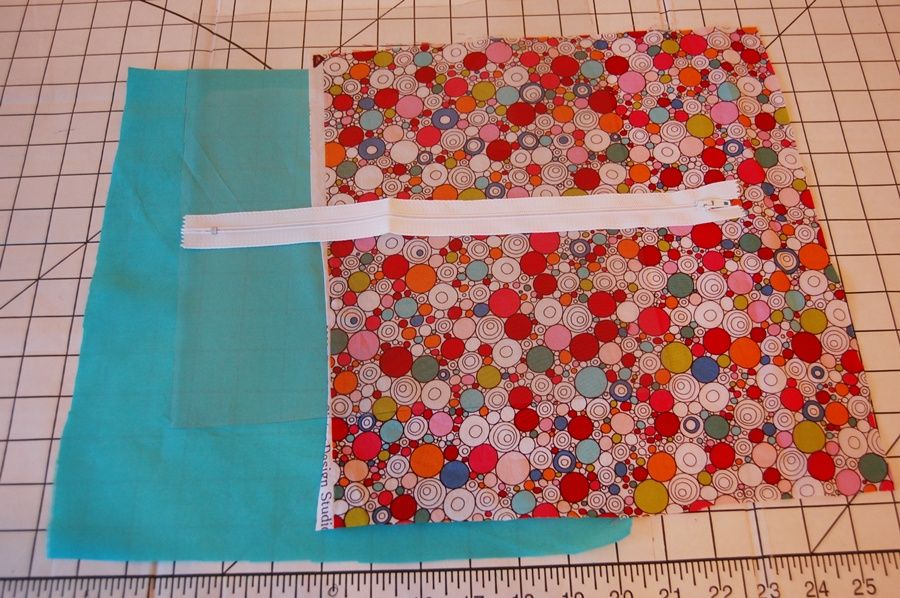
 2 pieces of fabric 12.5" X 11.5"
once piece of the nice thick clear vinyl about 11" X 11.5"
one zipper at least 12" long

First, cut your vinyl across the 11" side down 1.5"
This should leave you with a piece 11" X 1.5" and one 11" X 10"
Does that make sense?
Now you're ready to sew on your zipper.  
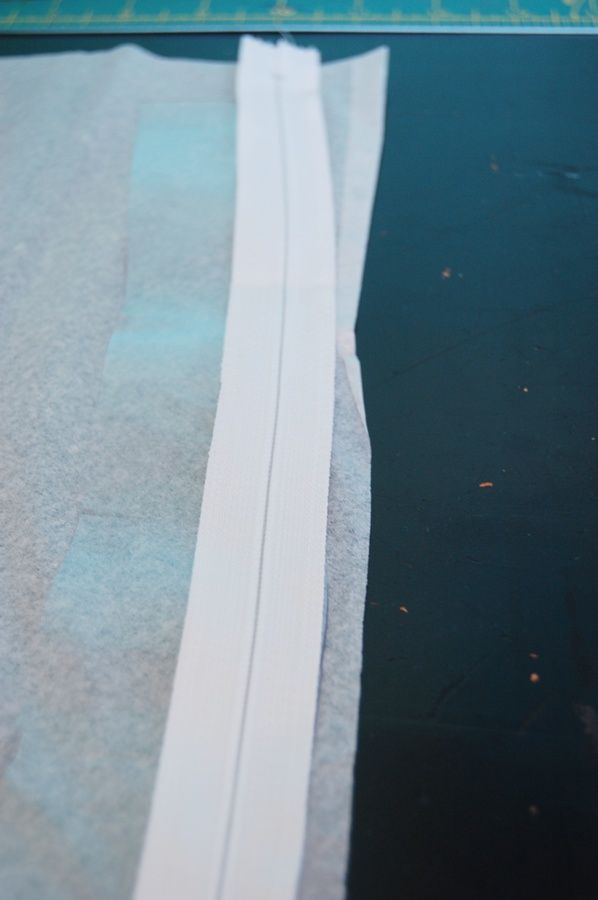
To sew with vinyl you will need a layer of tissue paper between the vinyl and feed dogs of your machine.
So lay down a piece of tissue paper, then your skinny strip of vinyl and then your zipper lining up with the long edge of the vinyl, face down.
See above picture.
Sew.

Now layer a piece of tissue again with your 11X10 piece on top.  
Flip over your zipper so the opposite edge is lined up with the 11" side, facing down.
Be careful to line up the other edges with the piece already sewn.
After sewing both down, pull off your tissue.
Now your vinyl piece should have a zipper along the top middle.

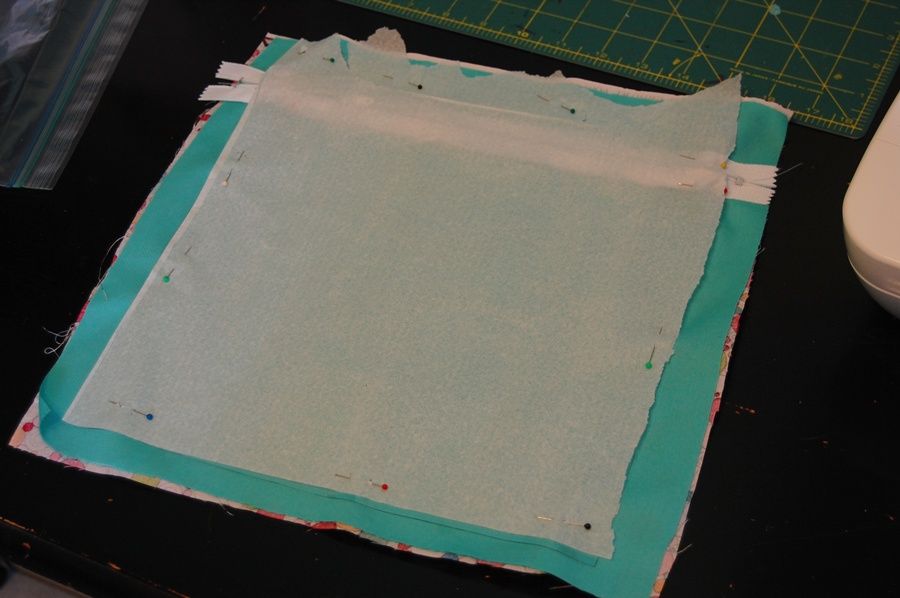
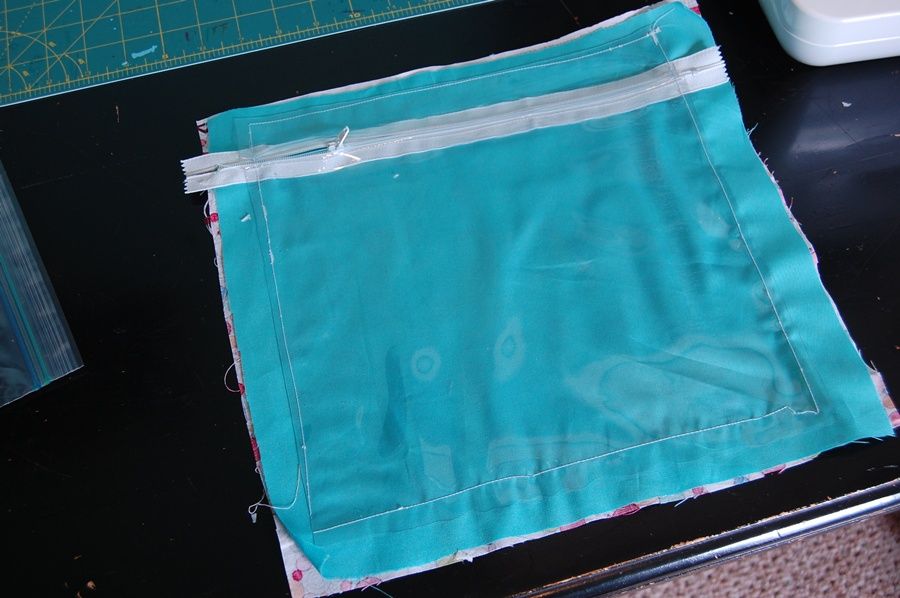
Now to make the next step easier, I chose to center the vinyl on top of the fabric and sew down.
To do this you will want to place your outside fabric down, wrong side up.  
Then place your inside fabric right side up. 
The vinyl will go down with the zipper pull to the outside, zipper seams on the inside.
Also, note, I wanted to 'press' my zipper seams to help them lie flat.  
I did this by covering the vinyl and seams with a thick cloth and pressed a hot iron on them.
This will soften up the vinyl temporarily, but will not burn it.
**Before you sew the vinyl piece down, be sure to pull your zipper pull to the inside of where you will sew.  See below.


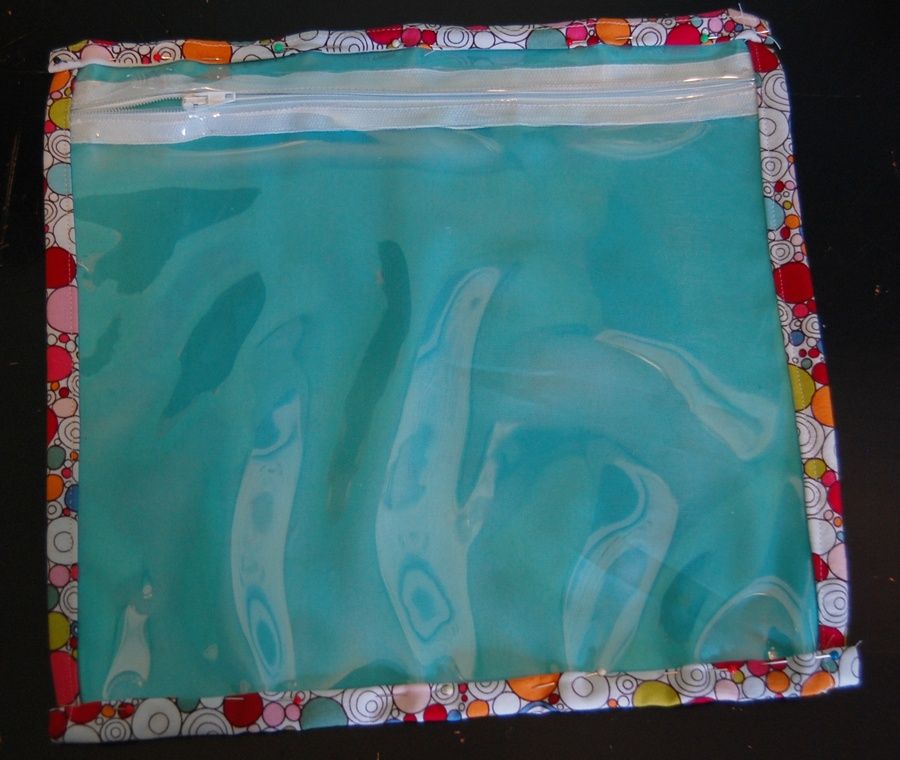
Now I folded and hemmed the sides over the edges of the vinyl.

Then the same with the top and bottom.

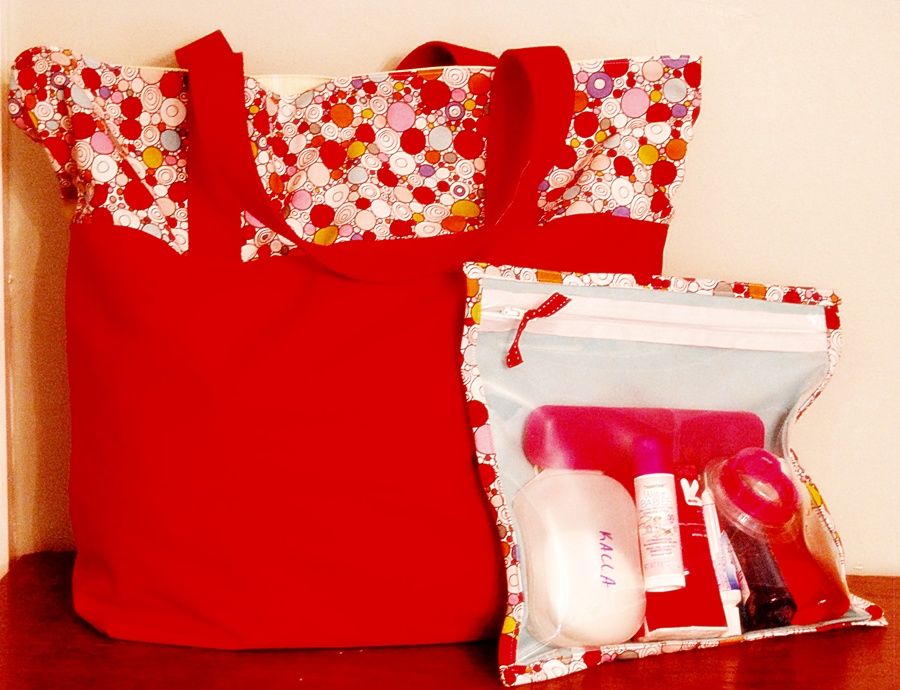
This cute little ziplock bag matches a weekend bag I made.  
Tutorial to come soon!
We used this set for Kalla's things when she went to camp this summer.
Oh and sorry for the terrible editing above...it kinda hurts my eyes now, but didn't look as bad on my little net book I was working on.  
You get the idea.  :)

Monday, September 5, 2011

Beachy

Just a few pics I took during a mini 'photo shoot' I did with the kids on our beach trip last month.

Bribery of ice cream cones goes a long way.  ;)


I intended on getting a whole family pic too, but forgot my tripod.  I do have a pic of me and the kids that hubby took, but I'm not a fan of it due to my significant sunglasses tan circles around my eyes and I kinda look like a raccoon.

Have a couple more things I plan to share of our beach trip, but I'm slow going on the posts as you may have noticed.

I won't bore you with them tomorrow.  I have an actual tutorial ready to share tomorrow!

Saturday, September 3, 2011

Pardon the mess

I'm working on making some long time coming changes to my lil ole blog.  Will probably be a little at a time, but hopefully will make it easier to read and find things around here!  :)

THEN, I hope to finally post some tutorials.  And some of my latest pinterest projects.

Stay tuned!  Talk to ya soon!

LinkWithin

Related Posts with Thumbnails