Showing posts with label girls clothes. Show all posts

Tuesday, December 13, 2011

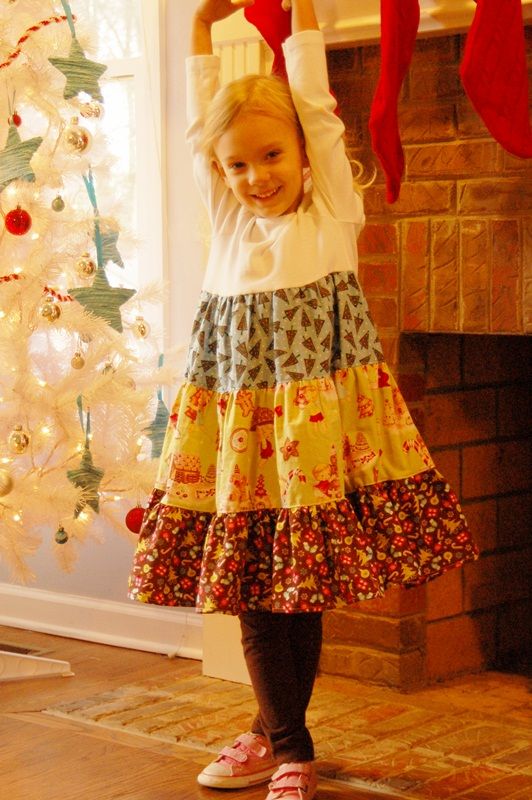
A Christmas twirly dress-and a semi tutorial


I made this dress for Maressa to wear to her Christmas preschool performance and party today.
I used to make cute things for the girls to wear for every single holiday occasion.
 I've gotten lazy.
And honestly, Kalla is almost 8.5 and kinda past the cutsie holiday wear (however I did promise an applique tree shirt for her party this Friday) and Maressa gets all the tons of hand-me-downs from holiday past.
This year I made Maressa a new dress to match her personality.
Nothing fancy.
Just used a plain white tee from her closet and let her pick some fabrics from my old stash.

Sorry there is not a full tutorial on this particular dress.
For those who want to know how to make your own twirly 3-tier dress of your own, I can guide you through the process.

First start here for a regular t-dress tutorial.
To make it with twirly tiers, instead of one big skirt piece you'll need to cut 3 pieces. 
This can be all the same fabric or different ones.
You'll want to make the 3 pieces to add up to the length of dress you want.
For example, Maressa generally wears a 5/6 size store dress (I like them plenty long).
I made her 3 pieces with the length of 7" 8" and 7".  You'll need to account for .5" on each edge for attaching to the other fabrics, bottom hem and to the shirt.
For this dress, I did the top tier the width of the fabric...selvage to selvage.
For the next tier I did the width 1.5 times that width and the bottom 1.5 times the width of the middle tier.

So if for example your fabric is 40" wide you will need the following strips to make a 5/6 size dress:
7" x 40"
8" x 60"
7" x  90"
For the middle and bottom strips you will need to sew together pieces to make the widths.
**Adjust lengths to fit different sizes.**
To know how long it should be total, I use a dress out of her closet that fits like I want to get my total finished length.

Tips:
Start from bottom up.
Sew your bottom tier strips together, serge/overlock edges, then hem the very bottom.
Gather the bottom tier and sew to middle tier.
Gather middle tier and sew to top tier.
Now gather and sew skirt to t-shirt.
Serge or overlock edges as you go.
Topstitch tiers once finished for nice look and dress to lay nicely.
Now hand to your very happy little girl for much twirling pleasure!

Tuesday, March 1, 2011

Favorite clothes: a Tea Collection review

Tea Collection is one of our favorite catalogs. So when they asked if they could send us a few things and post a review I said yes! and yes!  :)  We are already BIG fans.   They sell girls clothing, boys, babies and even womens.
We fell in love with the girl's clothing at first sight.
I love first that they sell comfortable, modest, fun clothes for the girls.  It is SO hard to find clothes especially for seven year old Kalla.  I want her to still look like a little girl without all the cutsie.
Bonus is that my VERY picky Kalla loves them.  Pretty much everything they sell.
If her Tea sets are clean they are always first to be picked out to wear.
No more fights getting ready for school in the mornings!!
The dress above was sent to us and it is just adorable and she loves it.
LOVE that it comes below her knees.  ;)
Maressa loves her new dress too.  Wore it all day!
If it doesn't  twirl, she won't wear it!
And this yellow top and skirt with pockets are just adorable.  I know this will be one of our very favorite outfits...now just for spring to come for good and we can put it in our regular rotation.  :)
Loving this green dress.  Kalla wore it to school layered with tee and some jeans.  As it warms we'll do leggings and in the summer heat just by itself!

And the last thing I love is that the quality is excellent which is very important when everything Kalla gets will be handed down and the style will never go out.

Monday, July 26, 2010

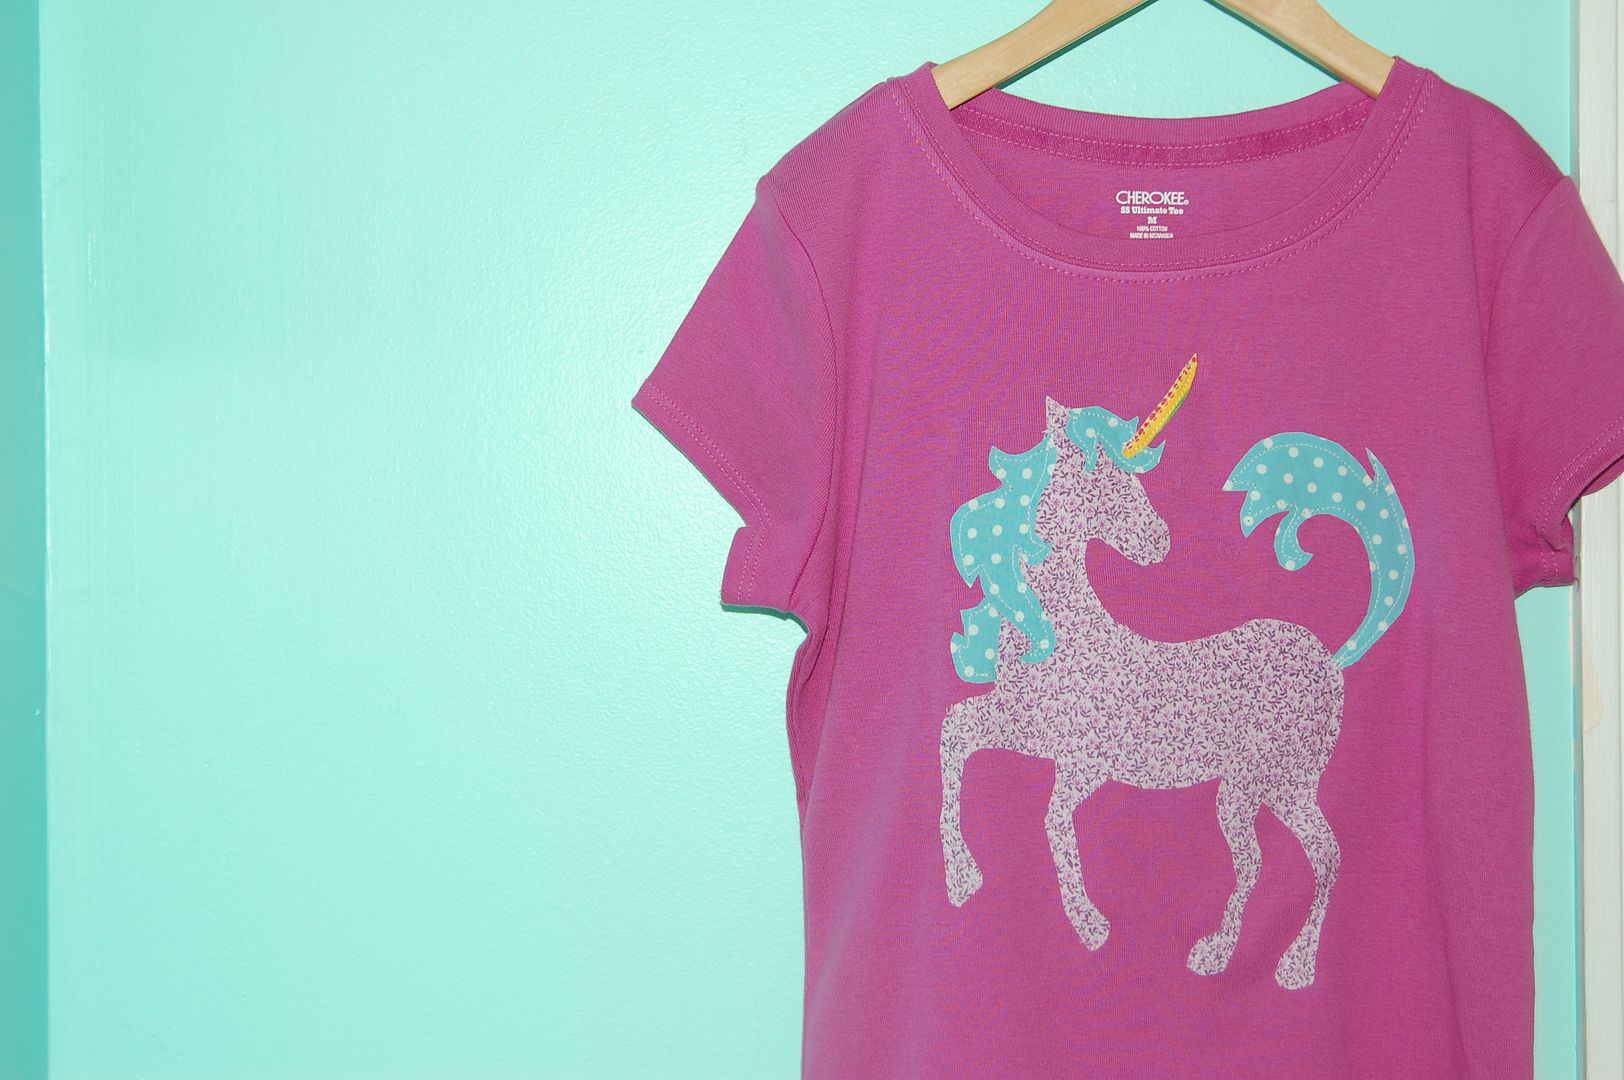
Applique Tee Week: The Unicorn tee

This was the first tee I made a couple of weeks back for Kalla to wear to her birthday party
I wanted a simple unicorn silhouette.

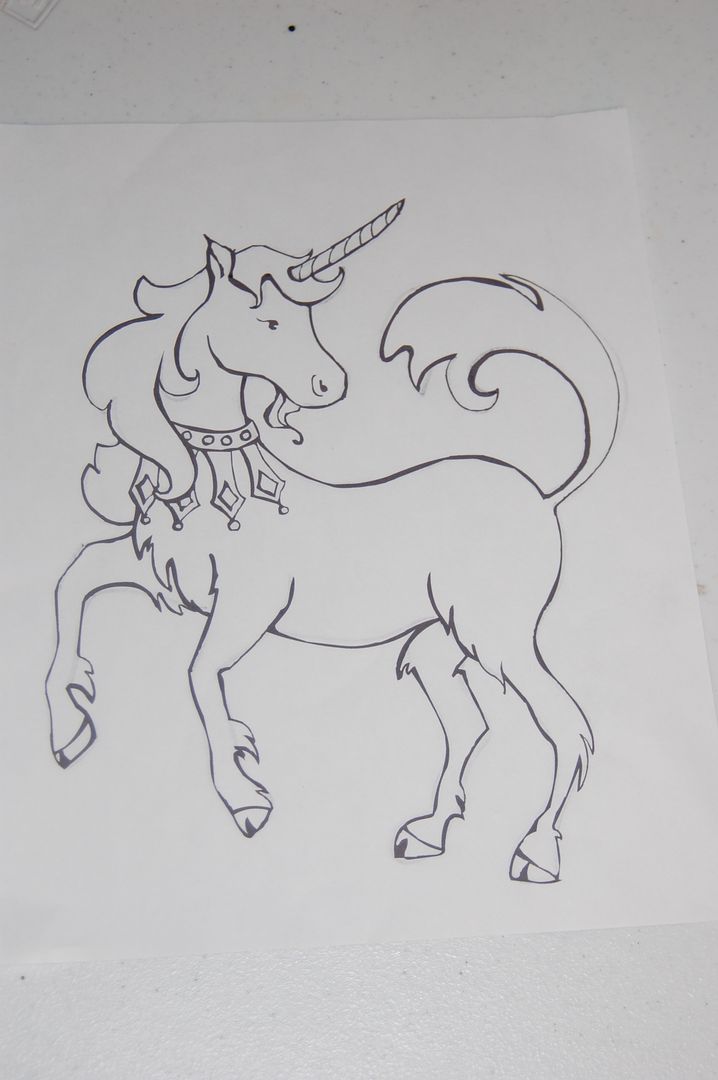
Here's where we started.  I often use free coloring pages found on the internet as templates for my appliques. Sometimes I draw them.  
I found this picture here.  I wanted something a little simpler, but that is easy to change yourself.
You can take only what parts you want from your picture.
After you find the picture you want, print it to the size you want your actual applique.

Once you've printed it and you want the finished applique to look like the original picture, you need to flip your print over.  Trace the picture with a dark pencil or sharpie.  This is where you can leave out/add anything you like.  I went for smooth hooves and legs and left off the goatee and other small details.

After making my tracings I traced this reverse image on my wonder-under lite in pieces.  I traced the tail, horn, body and 3 separate mane pieces.  Cut around them close to the drawn lines, but not on them.  Now iron each piece to the fabric you want to use on the back side of the fabric.  Once cooled, cut out the image while ironed on the fabric.  Now carefully peel the backing off.  Place your pieces on your tee (or anything else you want to sew it to like a tote).  Arrange until you are satisfied with your picture taking care to layer pieces where you need to...for example I cut the tail slightly longer where it meets the horse's backside and before ironing it on, I tucked it under the fabric for the body.

Once ironed on well, I used just a straight stitch along the edge...not the very edge, but about 1/8"-1/4" away from the edge.  The edges will fray slightly when washed.


Here is the party girl wearing her tee.  :)

Come back tomorrow for an initial bunting applique. :)

Wednesday, June 9, 2010

Add lace trim to your hem

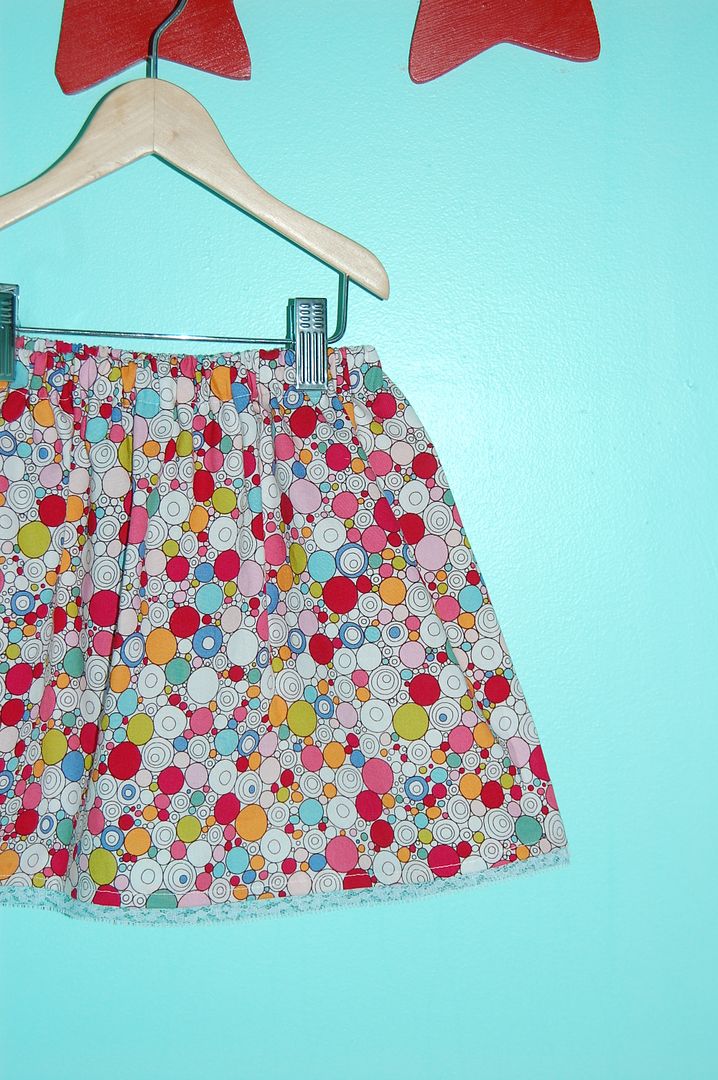
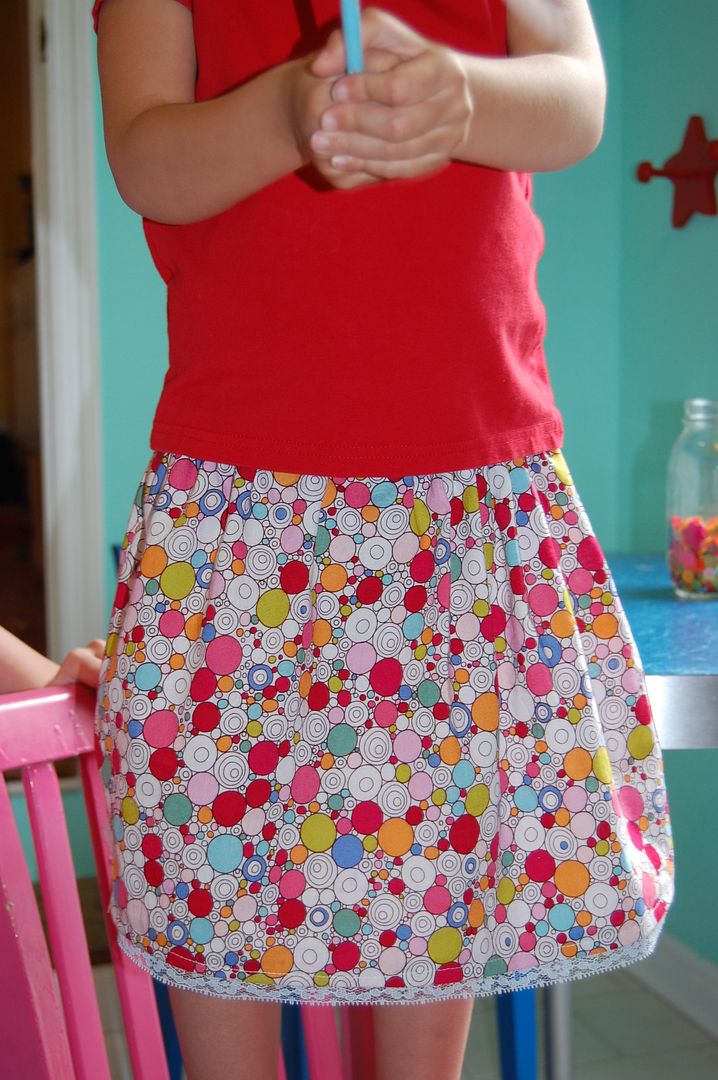
I was looking for a trim for this simple skirt I made for Maressa yesterday and came across some lovely colors of lace that were given to me I believe.  The blue went perfect and thought what a simple little girly touch it would add.


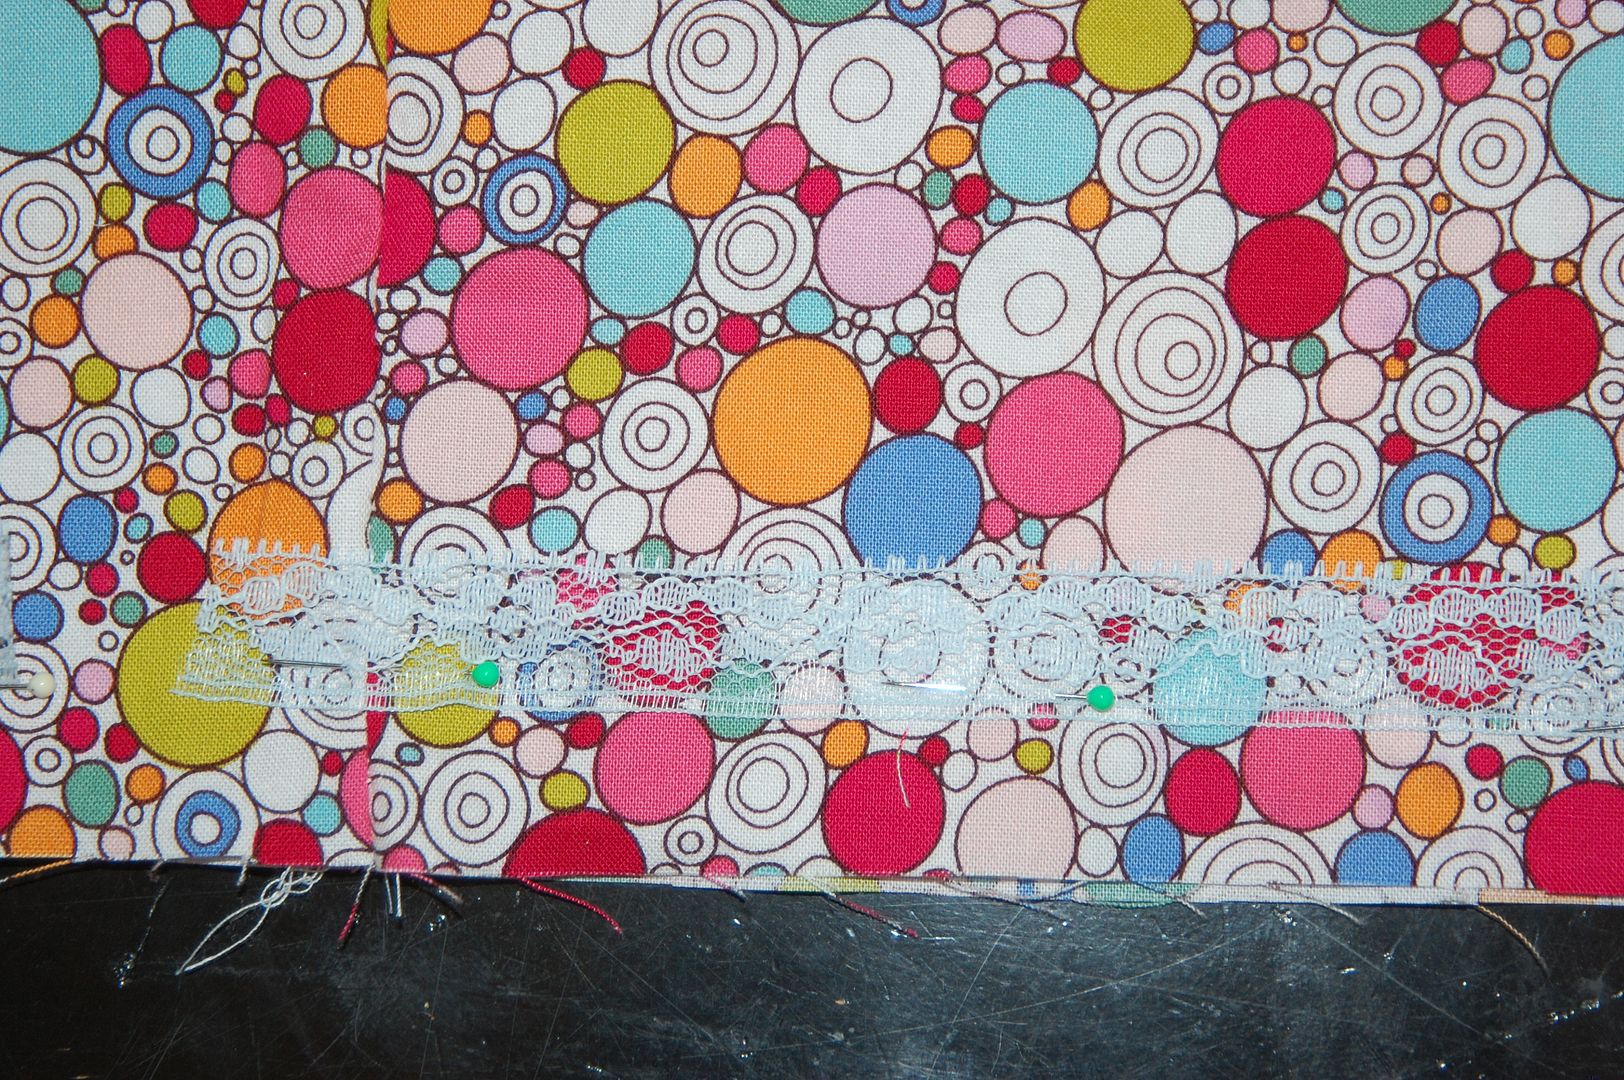
Adding lace trim to your hem is super super simple.  Same process as adding the rick rack trim.  Before hemming your skirt pin your lace 1" up from the edge on the RIGHT side of your fabric.  Be sure that the part of the lace you want to show is the furthest away from the edge...see that looped edge will be the part sticking out of my hem.  Sew along the bottom edge of the lace.


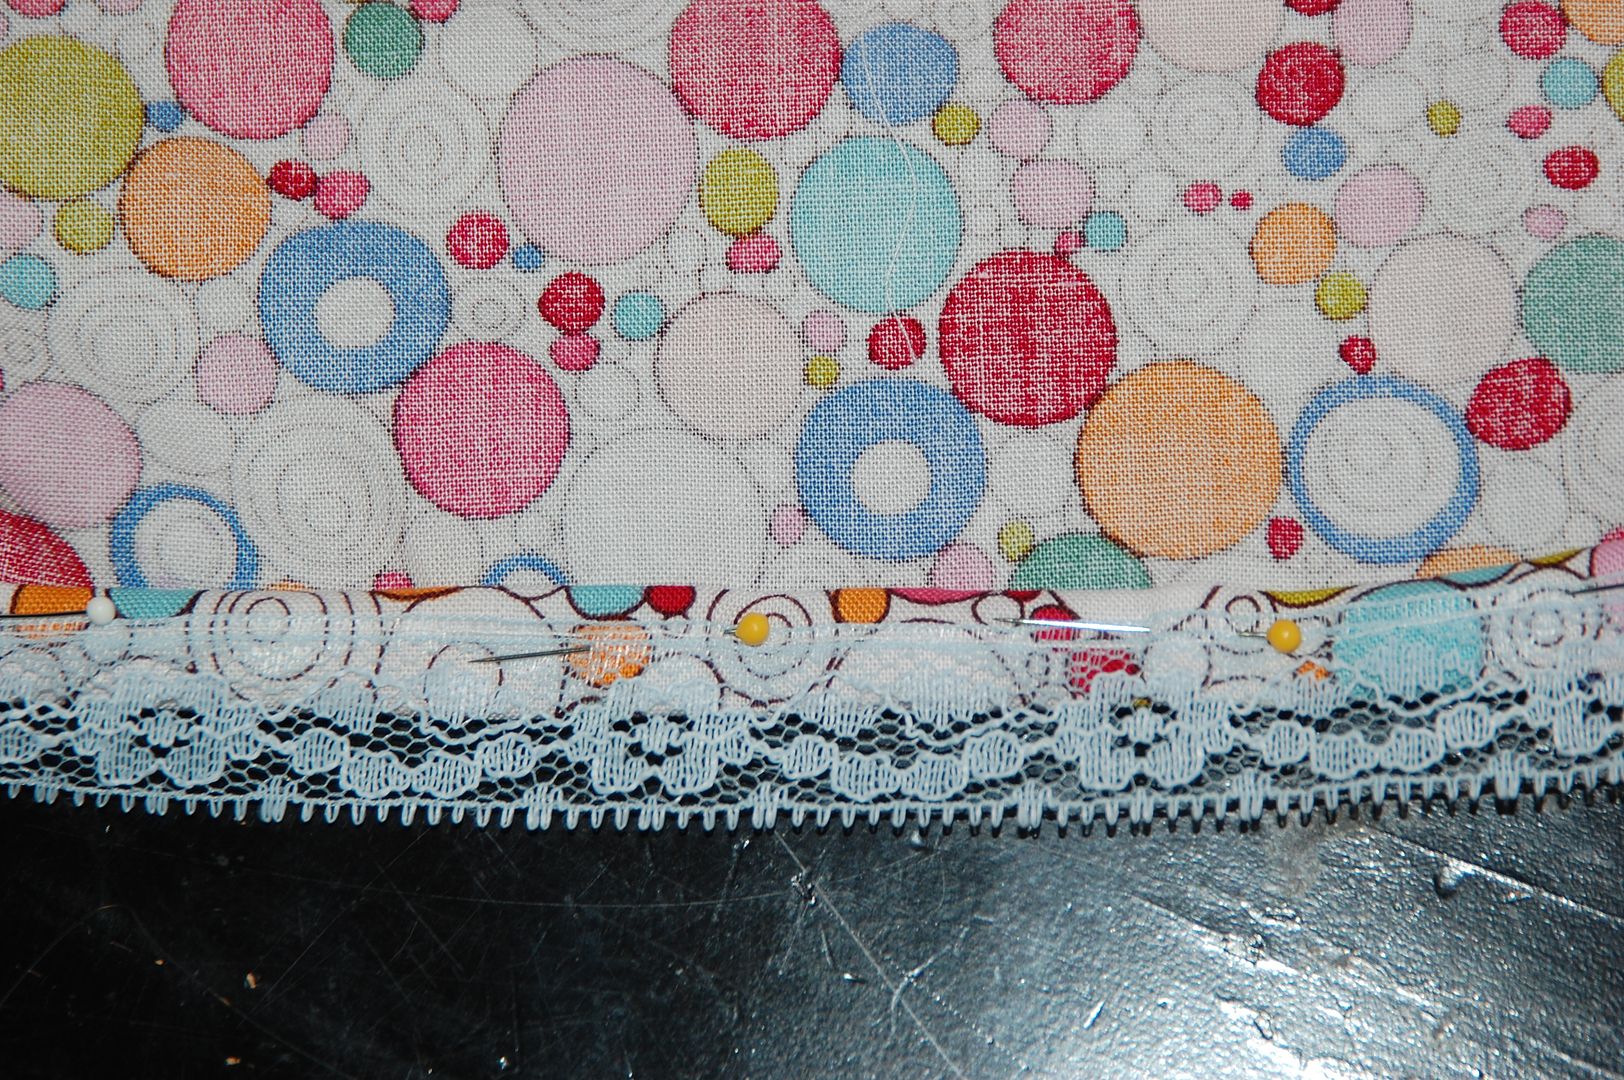
Now turn your fabric to the wrong side and pin your hem up as you would normally.  The top of the lace should be about halfway through your hem.  Now sew down your hem as you would any hem.


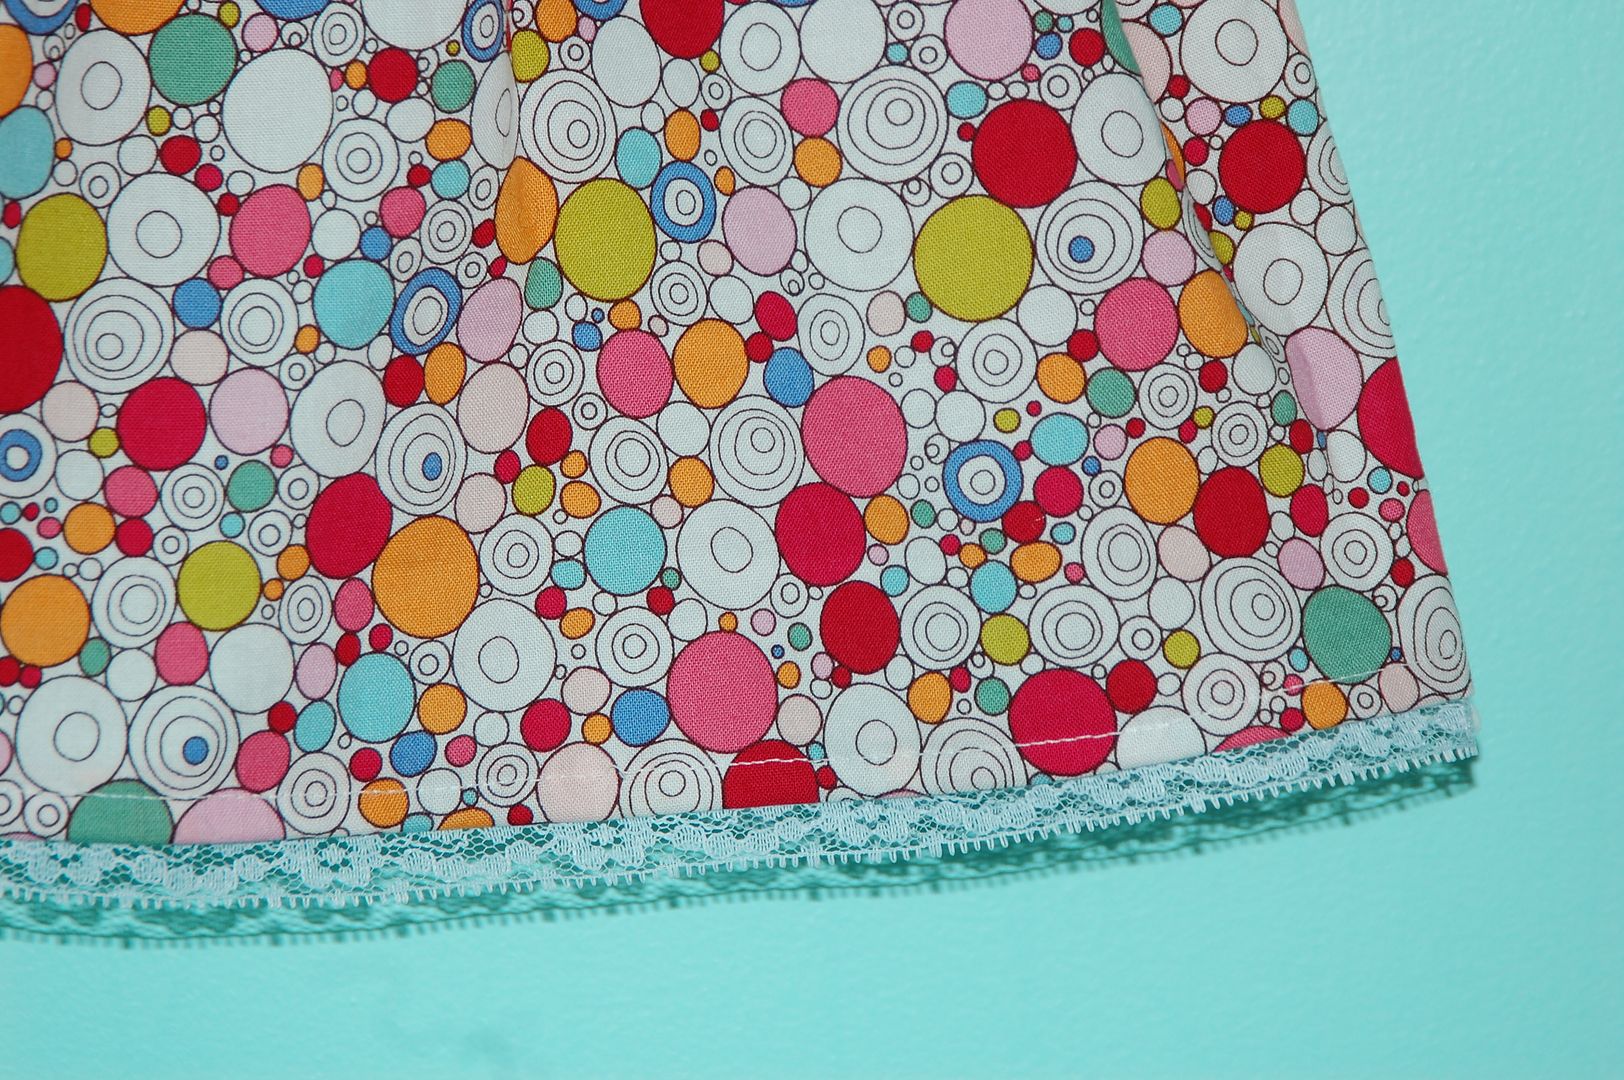
And this is what it look like when you are finished.  The lace trim would be adorable on any simple skirt, twirly skirt, tshirt dress or even a cute pair of capris.  I will definitely be making some capris with lace trim for my littlest one!


Maressa just loved this little skirt!!

LinkWithin

Related Posts with Thumbnails