
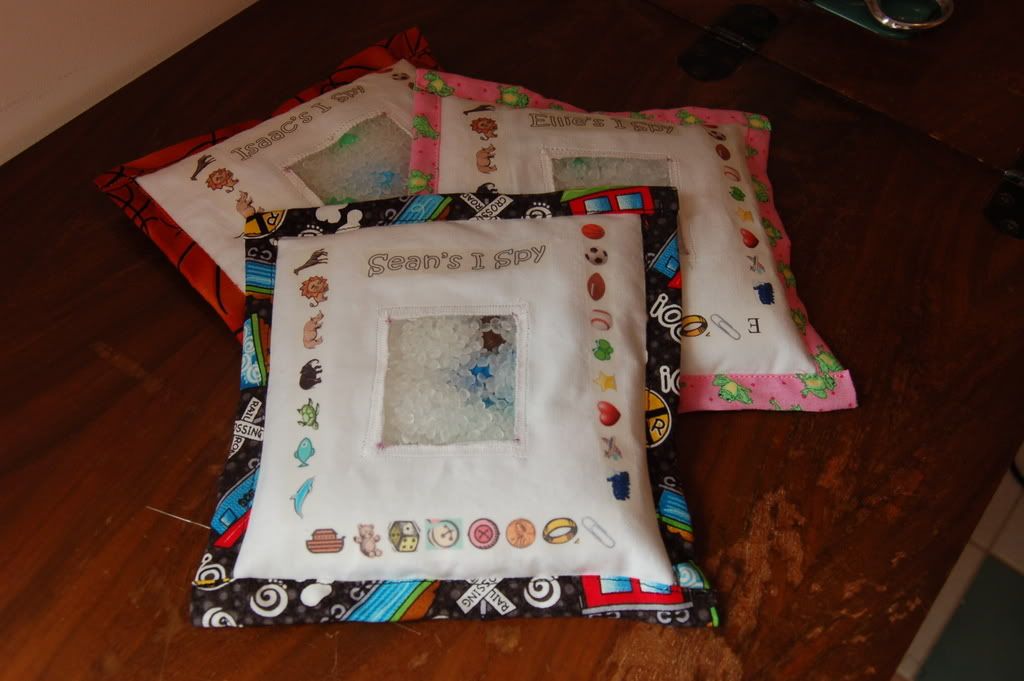
 I just made these for a birthday party we went to this past weekend. They turned out SO cute! So I will share my how to. If you are not the crafty sort and still want one, you can find many many versions on etsy.com
You will need:
*fun printed fabric cut 9"x 9"
*solid fabric (white or light colored) cut 7"x 7" , then cut 2" square window in the center
*clear vinyl cut 3"x 3"
*doll fill beads
*printer iron on paper
*small objects, I used colored paper clips, a penny, plastic rings, miniature dice and many many different shaped pony beads...find these in the bead section of craft store (Hobby Lobby has a ton)...I got dolphins, fish, turtles, stars, hearts, bears, trains, airplanes, etc
Start with the solid fabric. Make little clip art for every item you plan to put in your bag (or you could just use words, but it's nice for the non-reading crowd to have the pics). I also included a letter bead for the letter of child's last name and added that to the clipart. I also put on the bag their name. You will have to play with this part. I kept printing my samples on regular paper and cut it out to see how to fit it on the square. Also remember if you are doing iron on paper, all words and letters must be flipped backwards to print. Once you have it like you want, iron it on to the fabric.
Next, sew your vinyl square to the back of your fabric inside the window. I found the easiest way to do this was arrange the vinyl where you want and pin it from the front of the fabric. Then I cut out a piece of tissue paper and placed it on the other side of the vinyl (the inside of the fabric where it will touch the feed plate). Then I sewed a wide, close zig zag all the way around the square window.
Next place your window piece on the wrong side of your printed fabric centering it. Fold up the printed fabric over the edge and sew along 3 sides only. Now place objects and beads in bag. Sew up the last side and you are done! ;)
My kids are wanting one for themselves so bad. They helped me make these gifts (they helped with the filling part). Even my 6 year old found it amusing and the 2 year old wouldn't give his back. lol These will make great distractions for church and car rides! I plan on making theirs soon!
3 comments:
I've been looking EVERYWHERE for a "how to" on how to make these.... thank you SOOO much!!
How do did you do your clip art?
Thanks,
Meg
Hi Megan,
Thanks for your comment. I got my clipart images from Microsoft clipart. http://office.microsoft.com/en-us/images/
Post a Comment