
 This is the before. I think this is the same ironing board I bought when I got my very own first apartment. Kinda yucky now. So I figured I'd make a quick cover for it.
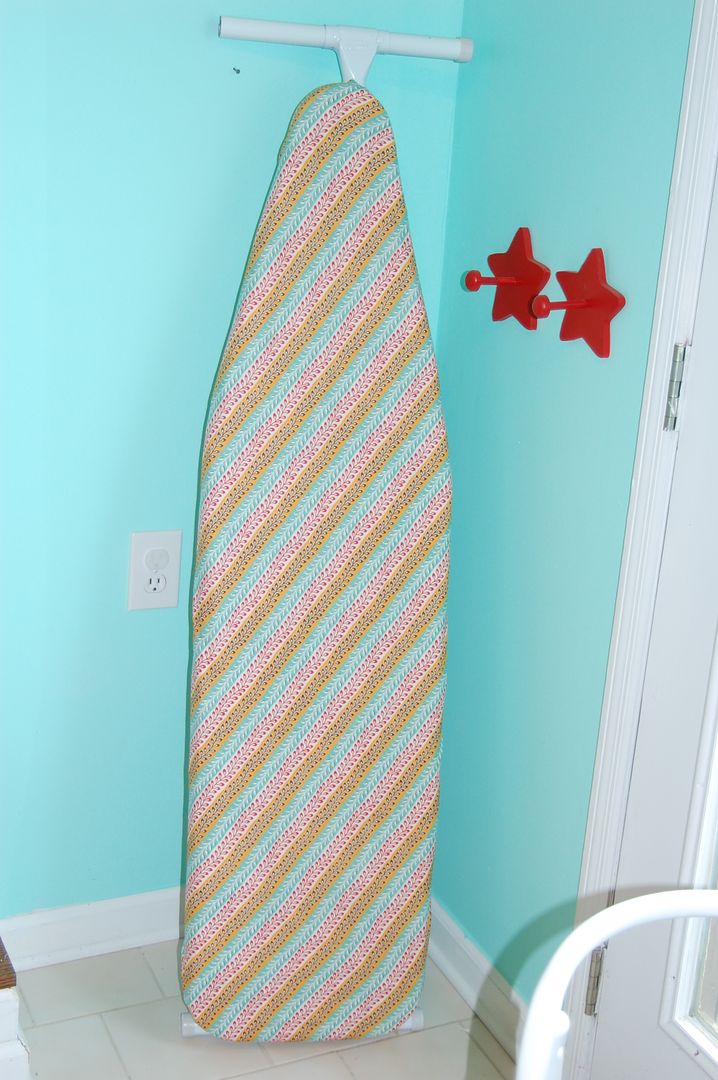 Here it is now.
 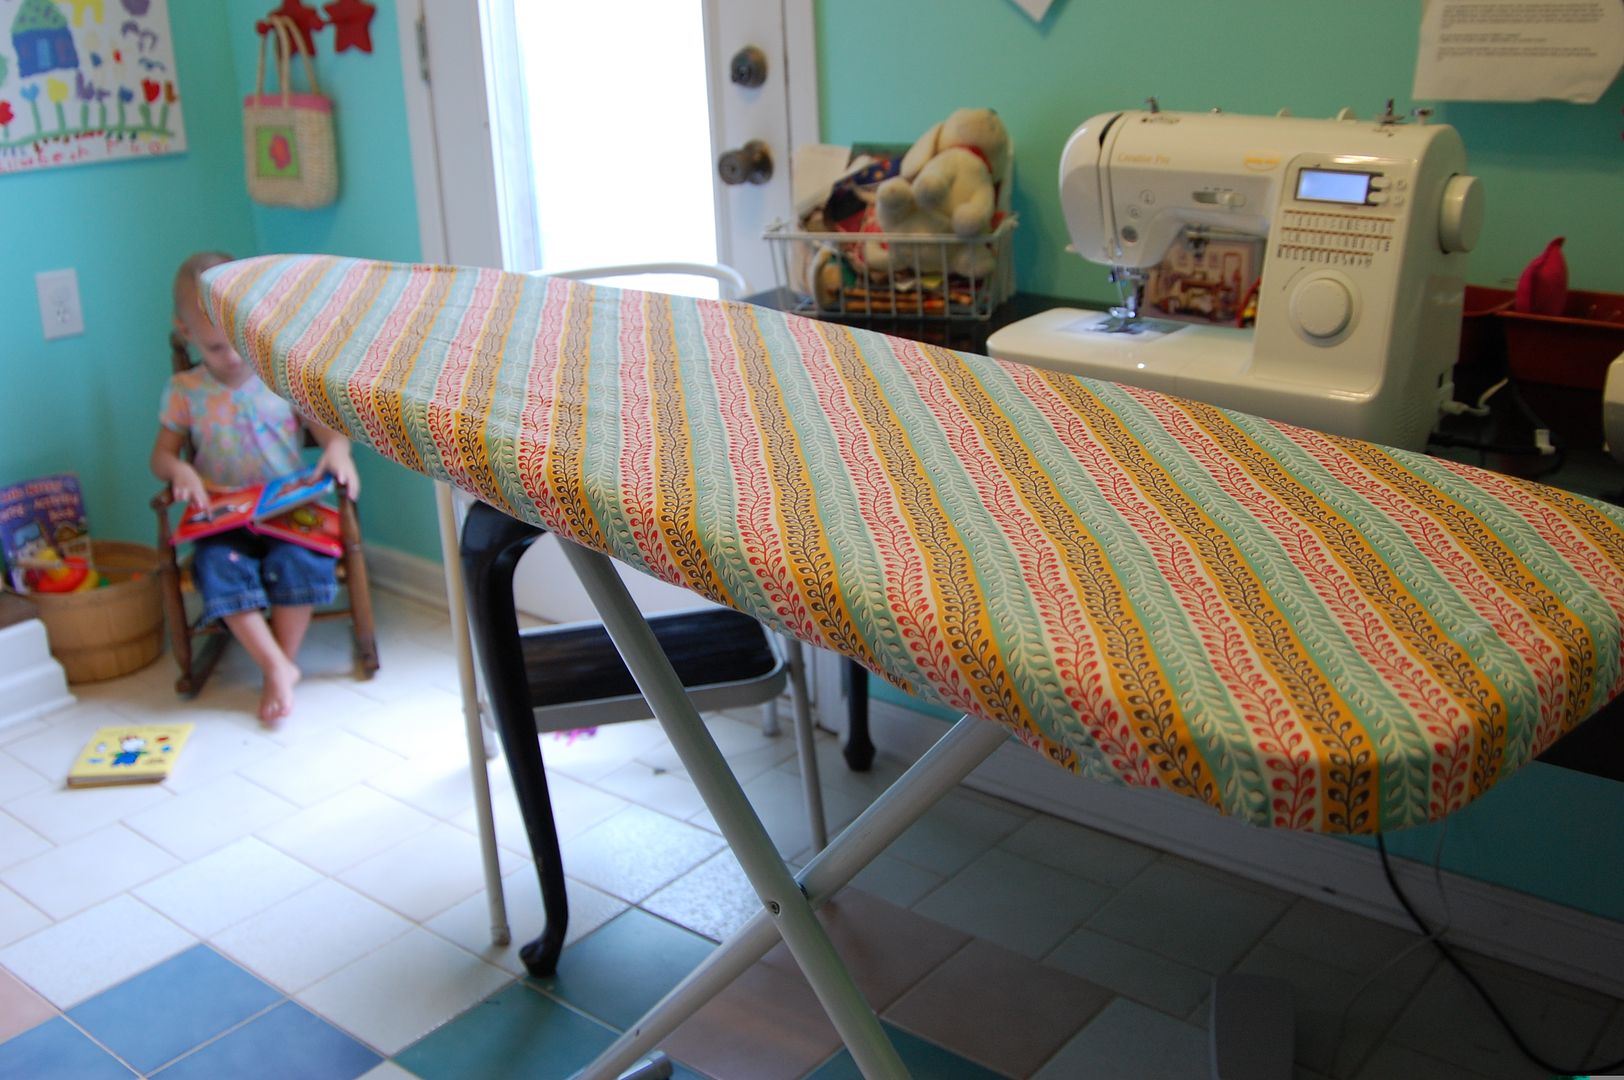 Yummy flea market fabric and matches my sewing/craft room!
And here's the low down on how I made it:
First you need a large piece of fabric. I used mine on the bias to use less length of fabric (I used fabric I already had and to get it to just barely fit I had to lay the ironing board diagonally...but I think the bias would make it fit better anyway.) You also need a long piece of 1/4" wide elastic. I used a new package as I wasn't sure how long I would need.
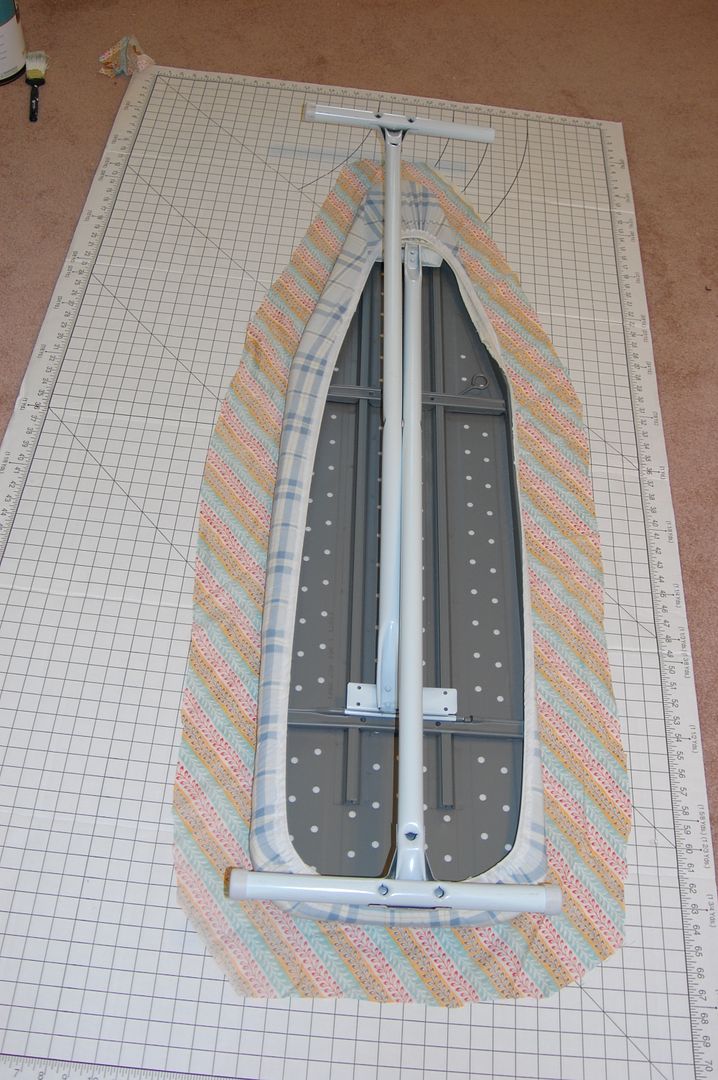 First I put my fabric on the floor and put the ironing board right on top. I roughly cut around the edges leaving several inches around.
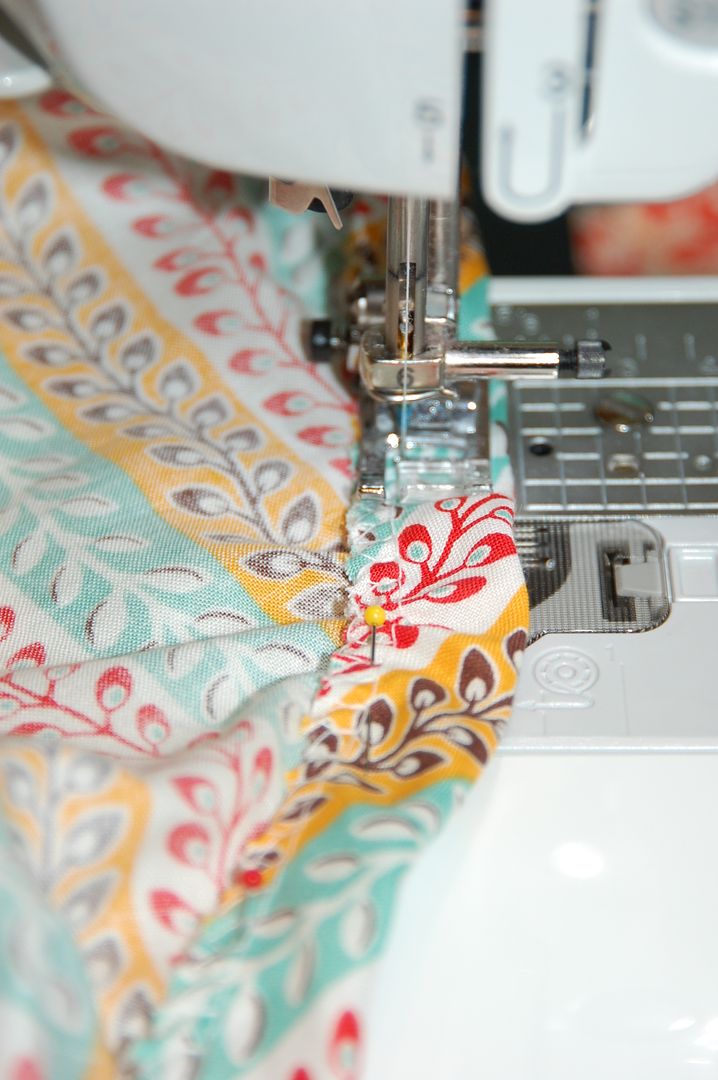 First I serged all along the edge. If you don't have a serger you can simply zigzag stitch to prevent fraying or sew down a tiny hem. Once edge is done, fold over and pin about an inch in. Because there are curves I found that I had to gather or pinch the fabric you are folding over to make it go around if that makes sense. Then you just sew it all along leaving a casing for the elastic to go through.
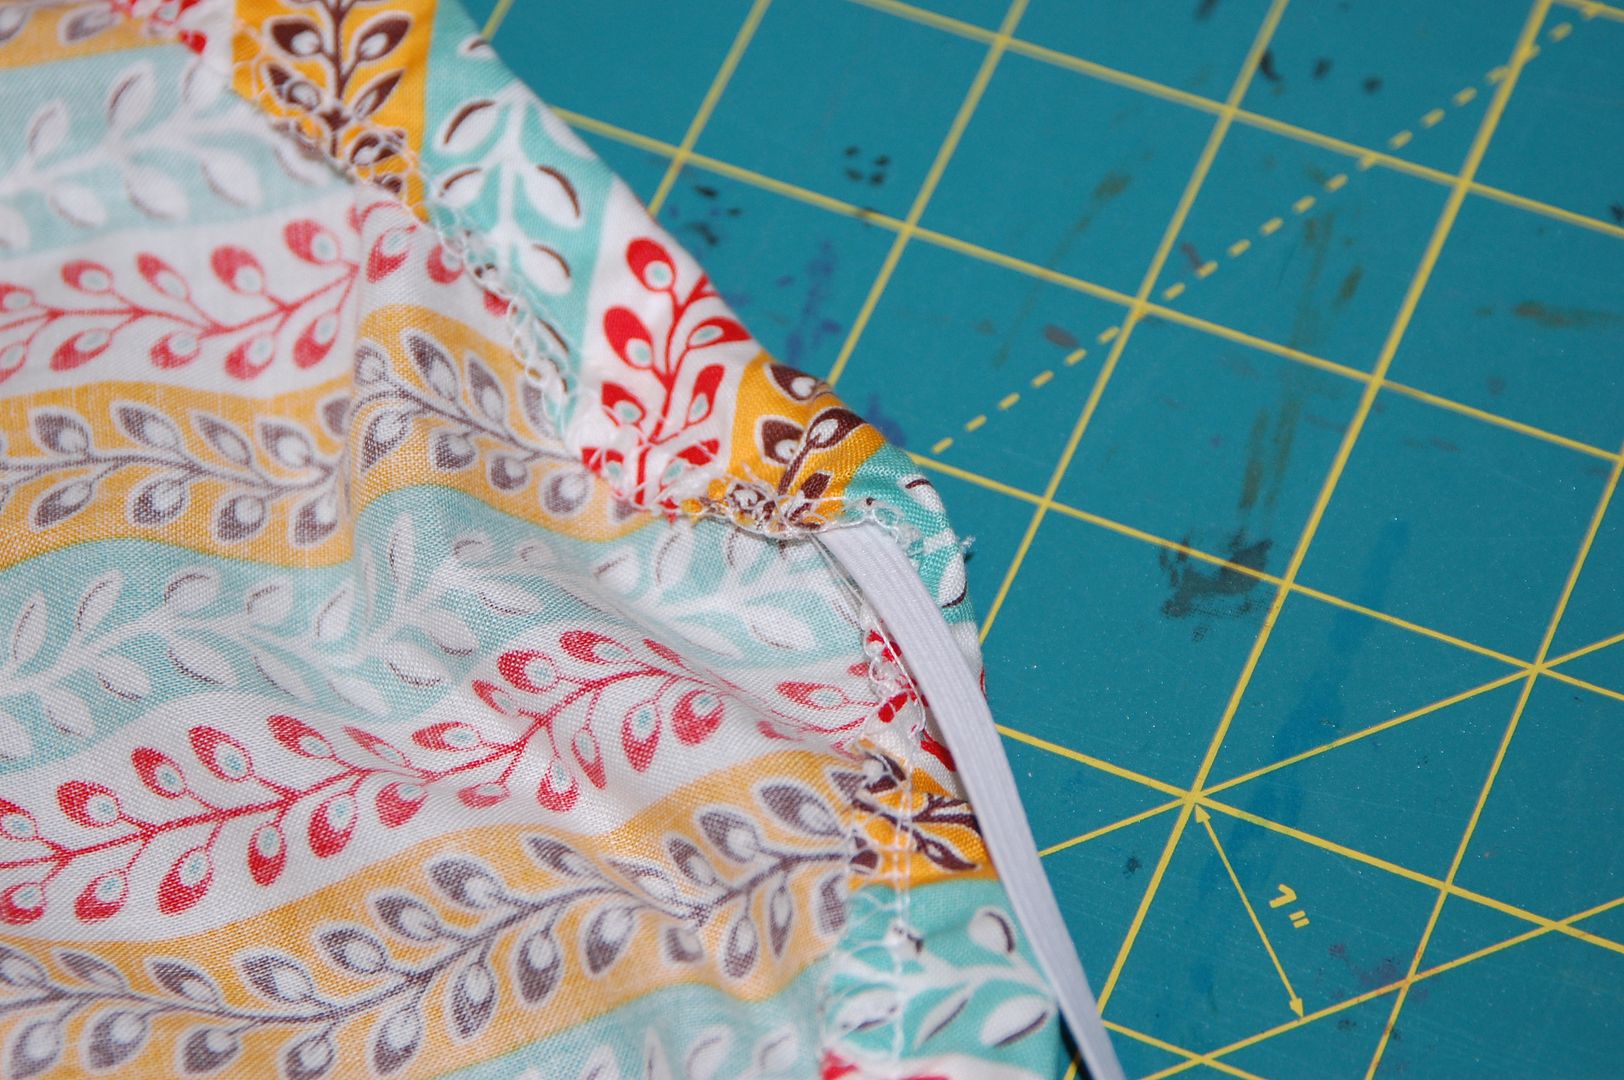 Leave a small opening at the end to pull the elastic. Attach a safety pin on the end of your elastic through all the way around back out the opening.
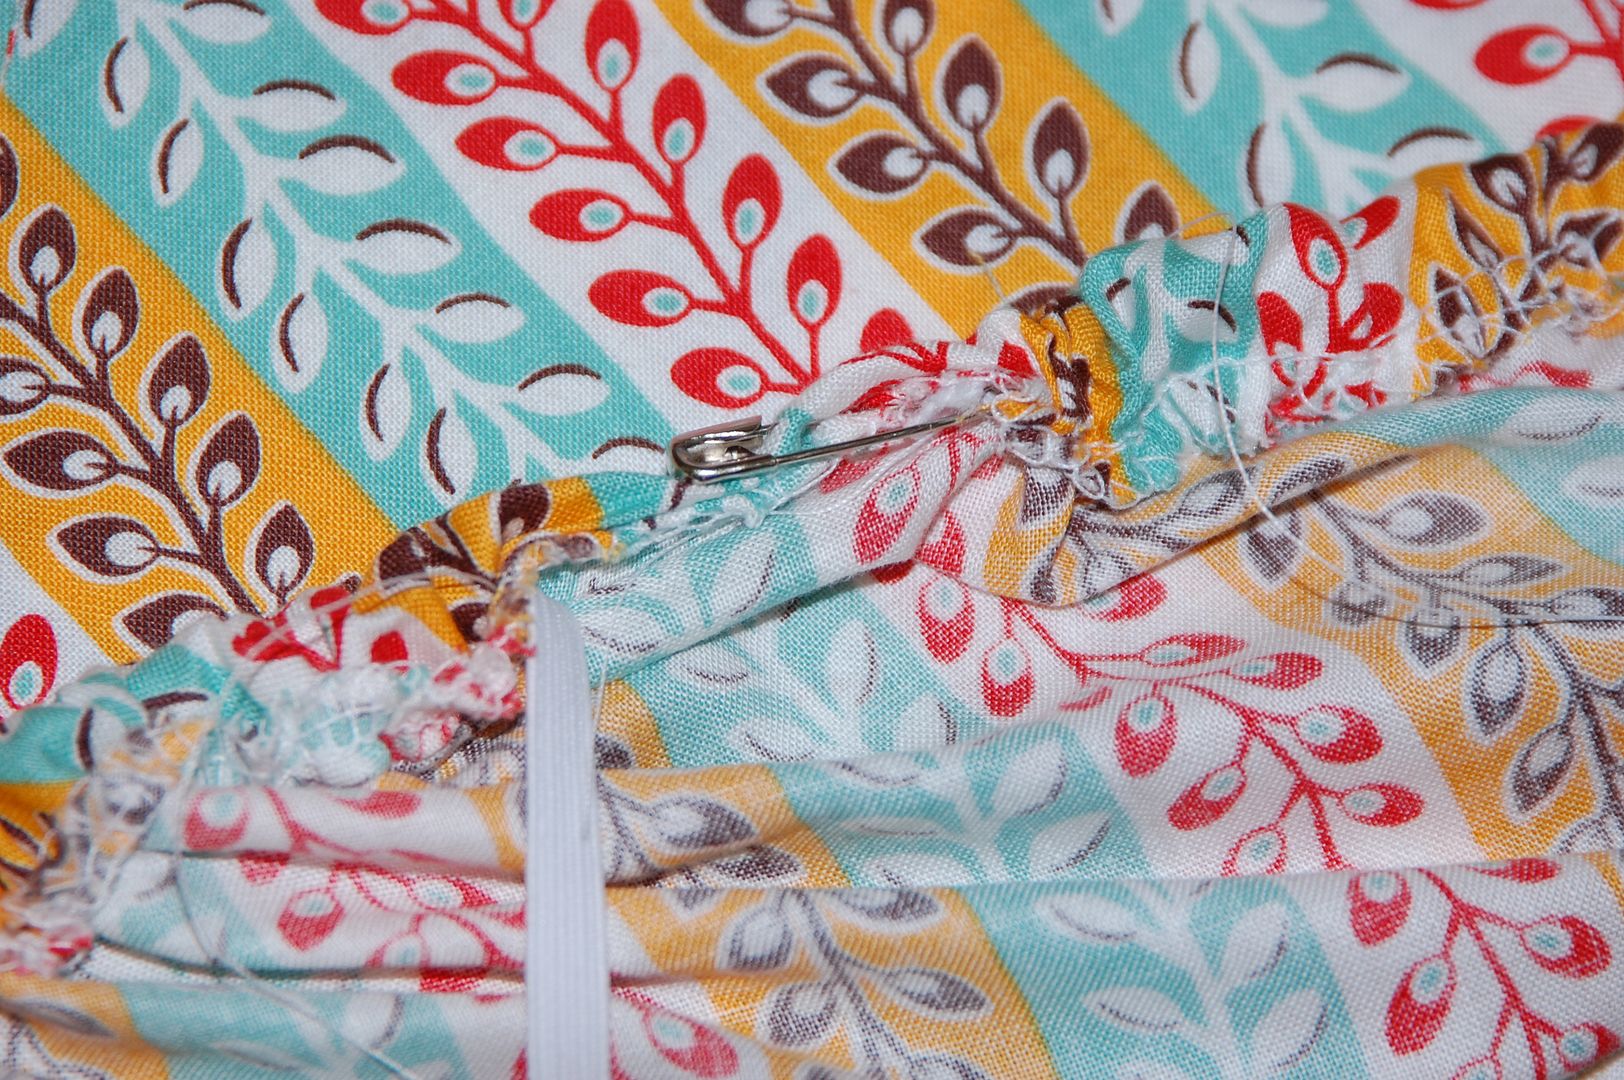 Now attach your safety pin to the fabric on the outside temporarily and slip your cover over the top of your ironing board.
 Pull all sides of your cover around to the bottom of the ironing board and adjust til it is snug. Now pull the elastic that is hanging freely out the opening tight until the cover fits tight under the board. Carefully undo your safety pin attached to the fabric leaving the elastic on it and pin it to the other elastic as you pull it tightly and pin them together very close to the opening. Now pull your cover off.
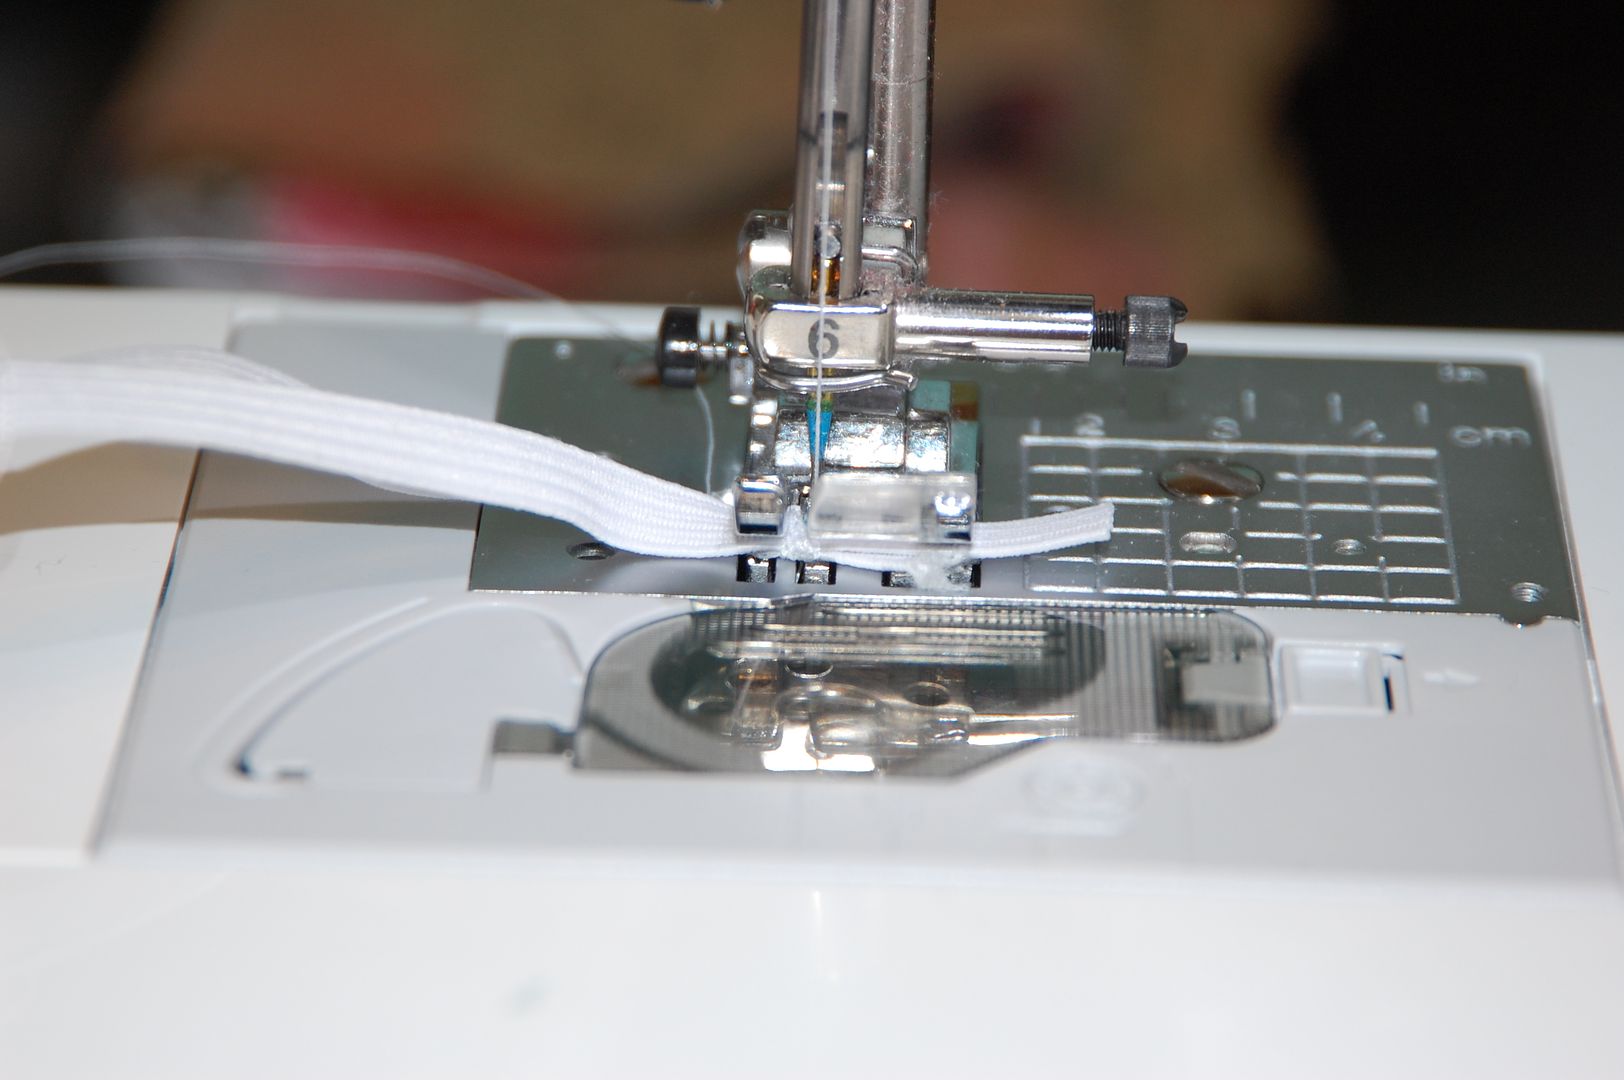 Cut the extra elastic off and sew the two pieces together securing with several back and forth stitches.
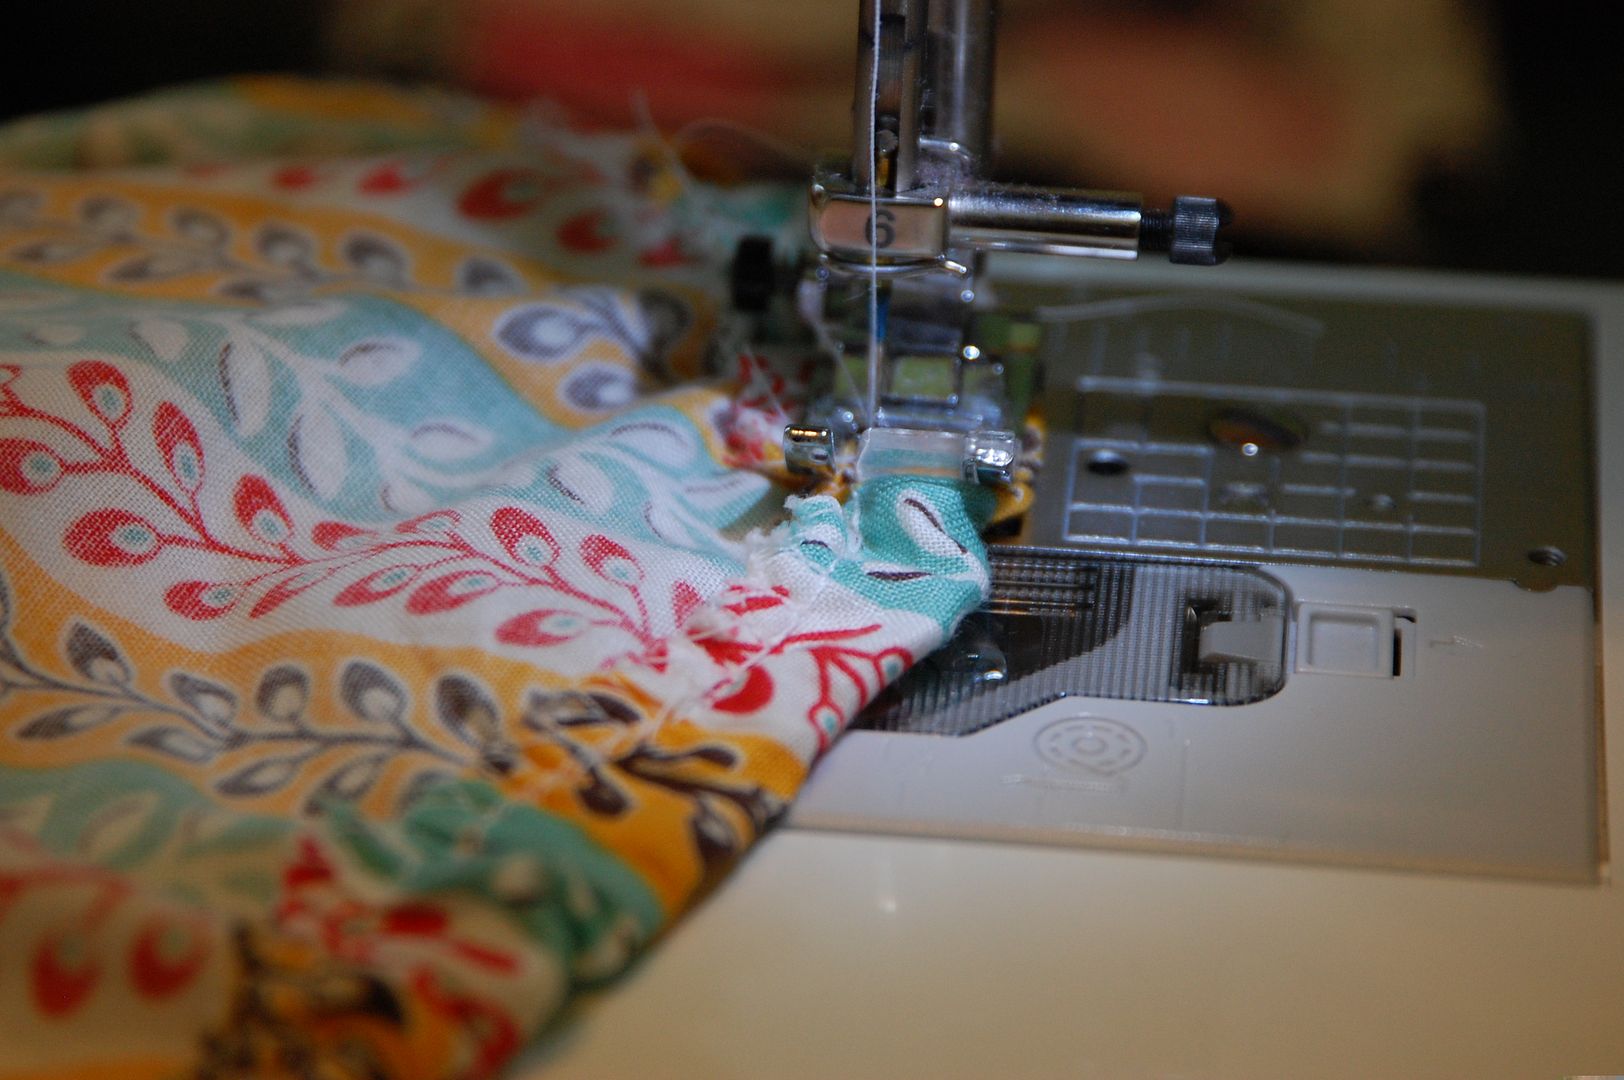 Tuck in the opening and sew the opening down. Now place on your ironing board. Now you may be inclined to not be too hasty to put away that ironing board! Enjoy! :)
Oh and a little tip. To clean all that gunk off your iron use a Magic Eraser (LOVE this product!!). A little elbow grease and that eraser and your iron will shine again! :)
10 comments:
Sweet! I totally need to do this!
I LOVE this simple solution. Looks like I'm not the only one talking about ironing today! If you are interested in a recipe for a homeande ironing spray come stop by my blog and say hi:)
Especially sharp on the bias!
Great tutorial! Your new ironing board cover is so pretty!! And thanks for the tip about Magic Eraser for cleaning the gunk from an iron.
I posted a link to your tutorial on Craft Gossip Sewing:
http://sewing.craftgossip.com/tutorial-ironing-board-cover/2009/09/20/
--Anne
I am in desperate need of one of these, so thanks for the tute. I just adore the fabric you chose. My ironing board is quite jealous.
this is just great!!! THanks so much for sharing it.
Thanks a bunch for this quick and easy tutorial. We've featured it on our Sewing Business blog: http://sewingbusiness.com/2009/09/26/need-a-new-ironing-board-cover.aspx
Sarah J Doyle
http://PatternsThatFitYou.com
http://SewingBusiness.com blog
I read your post about a week ago and I was just about to get some of the items I would need for it then POW! A sale on ironing board covers! I don't have to make one. Oh well, next time.
THank you for sharing this..I need a new ironing board cover, and your directions were so simple.yea.
Thank you. I'm off to make an ironing board cover. Never thought of turning it upside down.
Post a Comment