
 Here's a tshirt dress I just whipped up for little Maressa. Tshirt dresses are the first thing I started making when I had my first girl (now almost 6 years). They are so simple and you can do them in all sorts of fun fabrics.
To make your own, you start with a tshirt and length of fabric.
 I cut my tshirts 2" below the bottom arm seam for toddler sizes (for sizes 5T and up I'd add an inch or 2 depending on taste. I like a princess seam across the dress hitting right under the child's chest. For the skirt I usually take a dress my daughter is wearing that I like the length on. I measure the side seam of the dress from armpit to hem. If you do not plan on adding a ruffle, use that exact measurement (the 'extra' 2" will
go into the bottom hem and the seam of the tshirt and skirt.) For toddlers I use just the width of my fabric as is. Or you can measure the tshirt and do 2X the width of your shirt. If you want more fullness/gathers add more to your liking. Ok, does that make sense?
Once you've figured out how big to make the skirt fabric piece, sew together the side(s) and finish seams to your liking. French seams work nice if you don't have a serger. Now you are ready to do your hem. Following is a ruffle hem, but rick rack and contrasting fabric and bias trim like in this tutorial is nice too.
 To make a standard folded ruffle hem, first cut strips and sew all seams together so they are all connected. To figure out how to cut your strips, the length is 2X the width of your skirt. Depending on how big you want your ruffles is how you cut the width of your strip. I made 2" ruffles so my strips were 5" wide. So you should do double the length you want them to be plus 1" for the seams. You still following?? :)
 Once all seams are sewn (no need to worry about finishing these seams) fold them in half wrong sides facing.
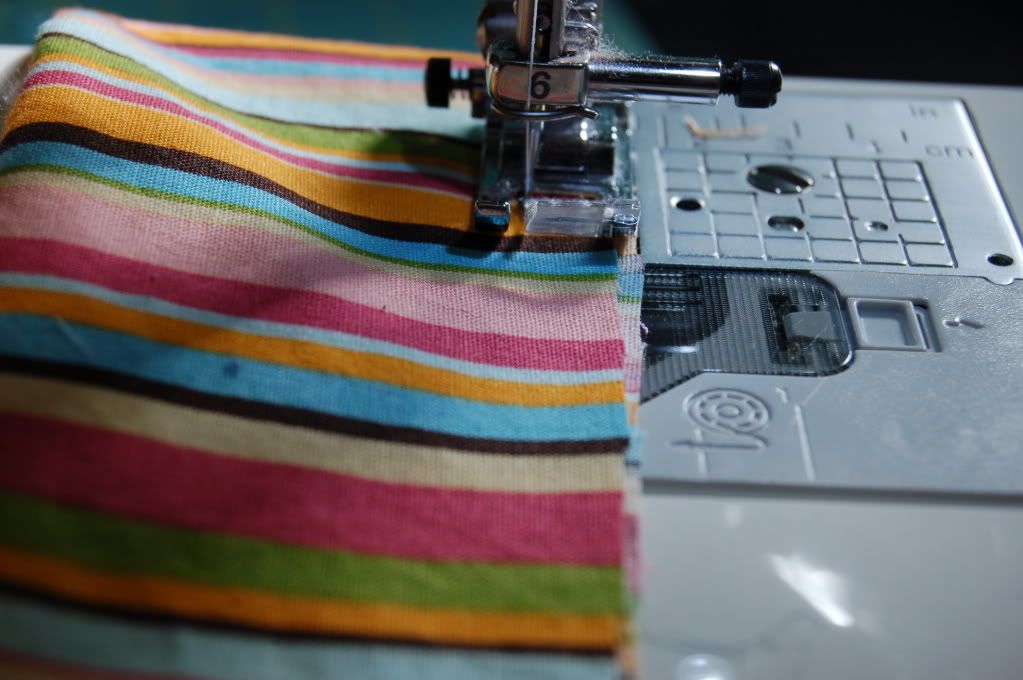 Now sew a gathering stitch. Start and reverse your stitch then change your stitch length to your highest number (longest stitch length). I like to go seam to seam then make another separate gathering stitch. So I have 2 total gathering stitches and I gather each 'side' separately.
  Pull your stitches gently to gather.
 If you are like me and have only 1 seam in the skirt I personally put the seam on the side, so I mark the other 'side' and I fit the ruffle to the seam and mark.
 Once gathered to fit the skirt, pin and sew.
 On front of dress, topstitch the ruffle down.
 Now follow previous directions for gathering to gather the whole skirt.
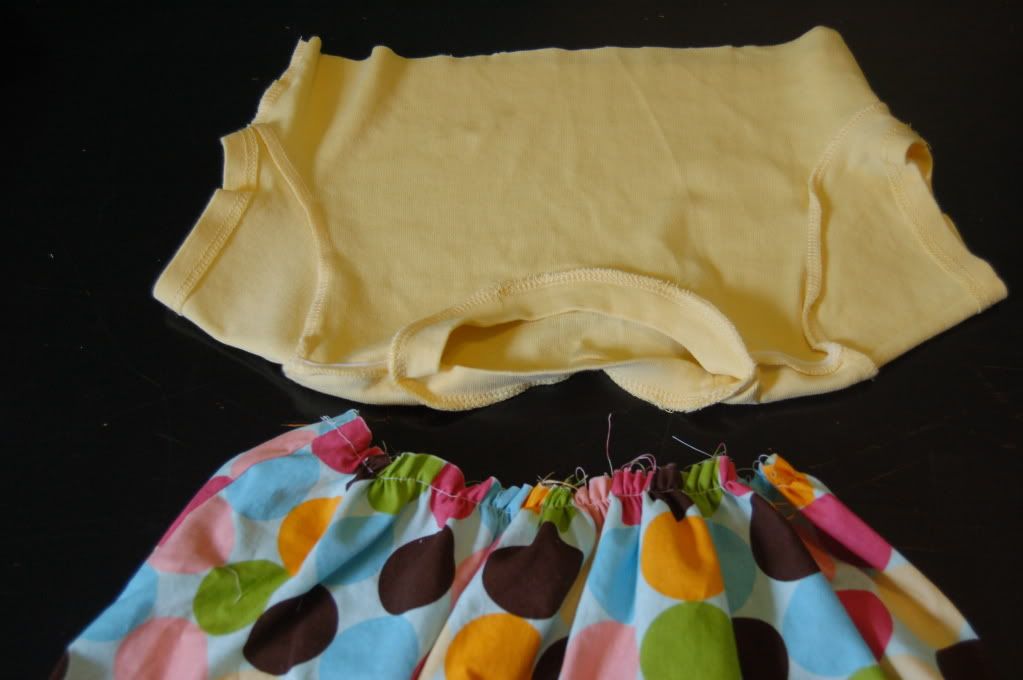 Now you want to pin and sew the skirt to the shirt. Here's how I put them together. Turn tee wrong side out and keep skirt right side out. Pull the top of the skirt gently through the neck to the inside edge of the tee.
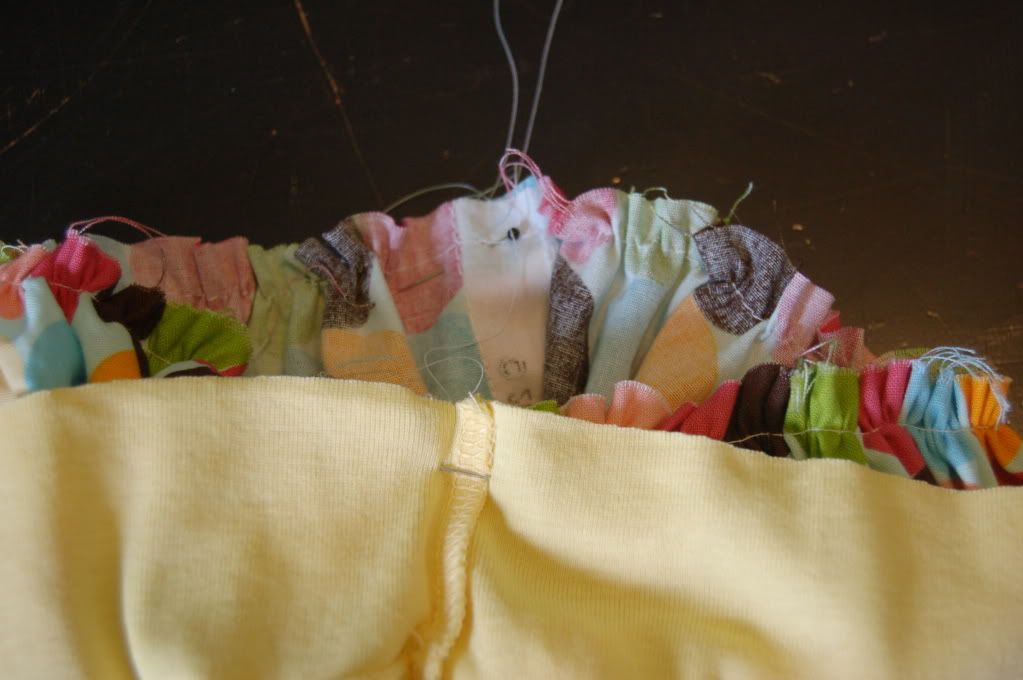 Gently fit the skirt to the tee being careful to not stretch the tee. Pin and gently sew. Finish your seam and it's ready to wear!
I will post the tutorial to make the 3-D flower applique on Mon!
Also, I had said I wanted to do a giveaway when I reached 50 followers. Well, I want to do a surprise custom type giveaway and life has gotten to be extremely busy and stressful this month. So look for that the 2nd week of June when I get back from my much needed vacation (sans kids!!)
PS. The fabrics are from Hobby Lobby and also seen in this post. :)

18 comments:
Aww, it's so cute, I love it! I'll be linking.
Thank you Rachel for all your comments and links. :)
Thanks for sharing this darling idea! I will be whipping one up this weekend for my daughter =D
Never thought of this before and I love love love the idea. Thanks a million for sharing.
I want to make one! I will link so I can remember this!!!
This is gorgeous and looks pretty easy to whip up! Might have to get into my daughters t-shirt drawer - lots of stained t-shirts down the bottom of the shirt but perfect near the top! Thank you!
I will be making one soon!
very kute :)
Love this tutorial... made my daughter summer clothing out of these type of dresses. Thank you for the tutorial.
see lots of tuts on my blog:
http://callmecraftymomma.blogspot.com/
Thank you so much for posting the tutorial! I made a tshirt dress for my daughter yesterday following your directions. You can see it here: http://janaysquilts.blogspot.com/2010/03/proud-of-their-uncle.html
Great tutorial! Thanks! I recently joined your blog, after doing a search for a t-shirt dress tutorial. I will include a link to you from my blog. Very cute blog. ;)
Thanks Mandy! Cute dress. :)
Deanna,
I just linked your amazing tutorial after making my girlies t-shirt dresses. Aren't they just the best? Lovey, love, love your flower too!
Just found your blog. Love the dress and twirly skirt. I'm going to go make a T shirt dress now for my Calla!
Is there a finished photo for this? I'd love to see one!
Love this. I made two for my youngest girls and then a matching skirt for my oldest. I will be posting pics soon at www.farmfor5.com.
Thanks!
I have a question...after I put the shirt and skirt together (I also used my ruffler on my machine :)after it is gathered and serged, my gathering stitch is below the serger stitch. Do I remove this stitch so it will have more stretchiness? Does this even make sense?
The only time I remove the gathering stitch is if it is visible on the item after I'm done sewing everything. Hope that helps. :)
Post a Comment