Showing posts with label sewing. Show all posts

Wednesday, July 11, 2012

Sew it: Satin Pillowcases

pillowcase9
My oldest daughter has long hair.
She inherited her mother’s wavy fine hair.
It tangles quickly and easily.
Especially in bed.
So I thought of a way to try to help the morning, brushing-the-hair tears.
Satin pillowcases.

pillowcase91
For ours we decided to make a pretty and decorative on one side with quilters cotton and the other side the smooth satin for sleeping.
Both girls of course wanted one of these special pillow cases.
I let them pick a print from my sewing room to match their solid satin side.

pillowcase1
To make pillowcases, I always start by using another pillowcase in the house to get my measurements.
Normally I use the fabric twice as wide as a standard pillowcase and just have 2 seams to sew up, but since we are using 2 different fabrics I cut two rectangles.
Then because I was working with satin that ravels terribly, I decided to use french seams.
To start place both sides wrong sides together and sew along both long sides and one short side (be sure to leave one side open).

pillowcase2
Then cut very carefully and closely to the seam.

pillowcase3

pillowcase4
Now flip inside out and I iron all the seams flat.

pillowcase5
Now sew a generous sized seam along the three sewn edges.
The raw edge should now be encased inside the new seam.
Flip back right side out and check along the seams.
If you have a spot sticking out, just go sew along the seam in that area to make sure to cover the raw seam.

pillowcase6
Now you will make the open side with a large hem.
I didn’t measure the exact size of this as I was using an old pillow case as a guide.  If you want exact measurements just ask and I’ll measure it when we get home.

pillowcase7

pillowcase8
The girls love their new special pillowcases!

Monday, March 19, 2012

Mommy n Me craft: Little Bear in a Box

bearcraft5
Maressa and I made this little Bea the Bear in a box for a friend's birthday.
Maressa drew the bear with fabric markers on a small piece of white cotton.

bearcraft6
We added a tiny bed in a box and a tiny blanket and tiny bunting  for decoration.
Bunting is just some washi tape and bakers twine.

bearcraft1
This idea was mostly inspired by a drawing she made the day before of all these adorable colorful bears.
Also inspired by this kids art stuffies project and putting bear in a box by this adorable project.
So first I had Maressa draw and color a bear on a piece of fabric.

bearcraft2
Now she wanted me to take a picture of her with her picture...lol

bearcraft3
Then I put the drawing face down on another piece of white fabric and sewed around the outline of the bear.  I didn't want this super detailed so I just went widely around the corners and curves.

bearcraft4
I left a hole in the bottom and then pulled the bear right side out and stuffed it.
Then I hand sewed up the bottom hole.

bearcraft7
Course after the gift was made, everyone wanted a tiny stuffed friend.
Maressa made 2 bears...one for her one for big sister.
Micah wanted to draw his own and of course made a dog.
Zachary made himself a lizard.

No boxes for their friends yet.  I may surprise them with one soon.  :)

Wednesday, February 29, 2012

Bunting Bottle centerpiece/table decor

           
A few weeks ago I was asked to make some table centerpieces for a ladies retreat at church.
I needed to make 8 in specific colors for each table.
(Yellow is missing as the yellow table used my bunting for a craft later so I came home with just yellow bottles)
I started with all those coke bottles we drank at my last Christmas craft party.
I of course saved them all.
I gave them a nice coat of color with spray paint.
To make the bunting, I simply grabbed a bunch of my fabric scraps and folded pieces in half and cut the triangles (I used the first one as a template for the rest so they would all be the same size and shape).  Then I just sewed them all together along the top.
To anchor the bottles down a bit I poured rice down to the bottom to add a little weight.
Then I used clothespins to hang the bunting to the tops of the bottles.
How fun and simple would these be for parties?
Baby showers, wedding showers  or even weddings.

I love having them all on hand now in every color and can pull them out for a little decoration for all sorts of things.

Not to mention that the painted coke bottles would make great bud vases.

Tuesday, December 13, 2011

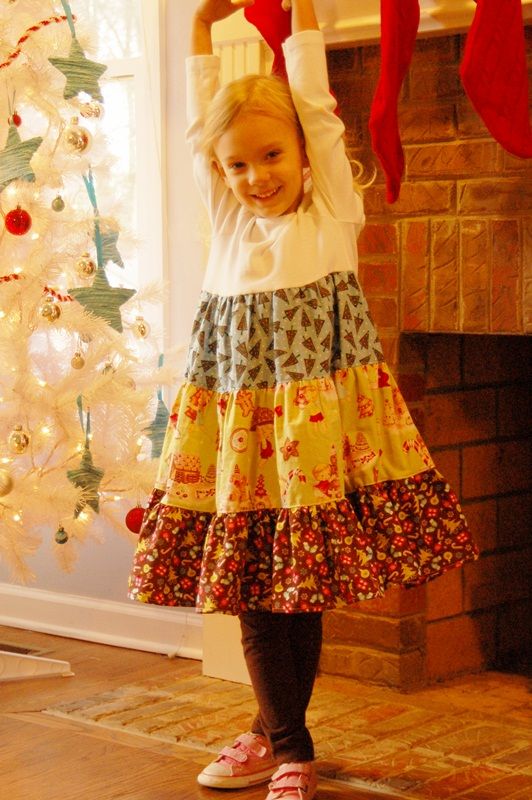
A Christmas twirly dress-and a semi tutorial


I made this dress for Maressa to wear to her Christmas preschool performance and party today.
I used to make cute things for the girls to wear for every single holiday occasion.
 I've gotten lazy.
And honestly, Kalla is almost 8.5 and kinda past the cutsie holiday wear (however I did promise an applique tree shirt for her party this Friday) and Maressa gets all the tons of hand-me-downs from holiday past.
This year I made Maressa a new dress to match her personality.
Nothing fancy.
Just used a plain white tee from her closet and let her pick some fabrics from my old stash.

Sorry there is not a full tutorial on this particular dress.
For those who want to know how to make your own twirly 3-tier dress of your own, I can guide you through the process.

First start here for a regular t-dress tutorial.
To make it with twirly tiers, instead of one big skirt piece you'll need to cut 3 pieces. 
This can be all the same fabric or different ones.
You'll want to make the 3 pieces to add up to the length of dress you want.
For example, Maressa generally wears a 5/6 size store dress (I like them plenty long).
I made her 3 pieces with the length of 7" 8" and 7".  You'll need to account for .5" on each edge for attaching to the other fabrics, bottom hem and to the shirt.
For this dress, I did the top tier the width of the fabric...selvage to selvage.
For the next tier I did the width 1.5 times that width and the bottom 1.5 times the width of the middle tier.

So if for example your fabric is 40" wide you will need the following strips to make a 5/6 size dress:
7" x 40"
8" x 60"
7" x  90"
For the middle and bottom strips you will need to sew together pieces to make the widths.
**Adjust lengths to fit different sizes.**
To know how long it should be total, I use a dress out of her closet that fits like I want to get my total finished length.

Tips:
Start from bottom up.
Sew your bottom tier strips together, serge/overlock edges, then hem the very bottom.
Gather the bottom tier and sew to middle tier.
Gather middle tier and sew to top tier.
Now gather and sew skirt to t-shirt.
Serge or overlock edges as you go.
Topstitch tiers once finished for nice look and dress to lay nicely.
Now hand to your very happy little girl for much twirling pleasure!

Thursday, October 27, 2011

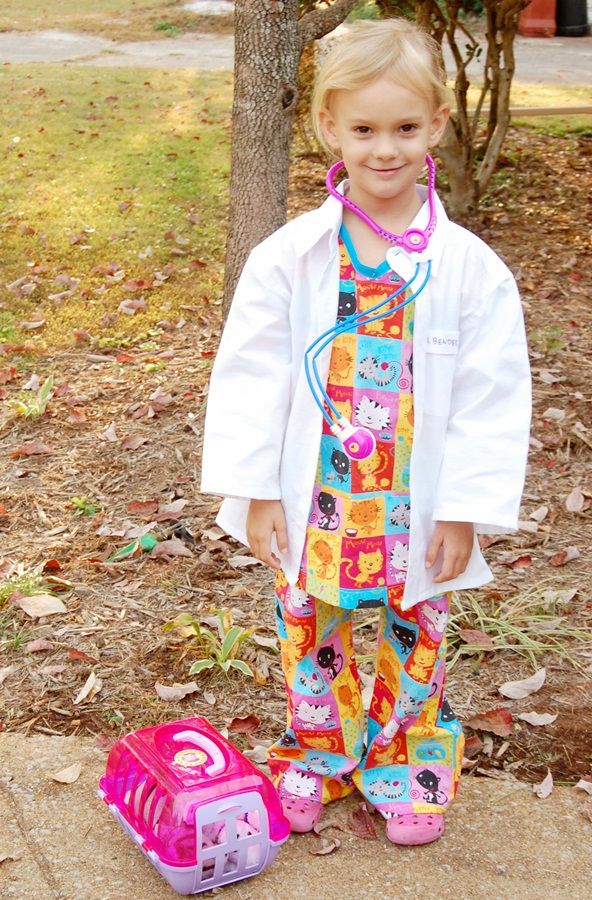
My littlest veteranarian, aka animal doctor

Costume #2 for this one.
Her preschool class had a community helper party today in lieu of a Halloween party.
When she decided to be an animal doctor I just couldn't help myself.

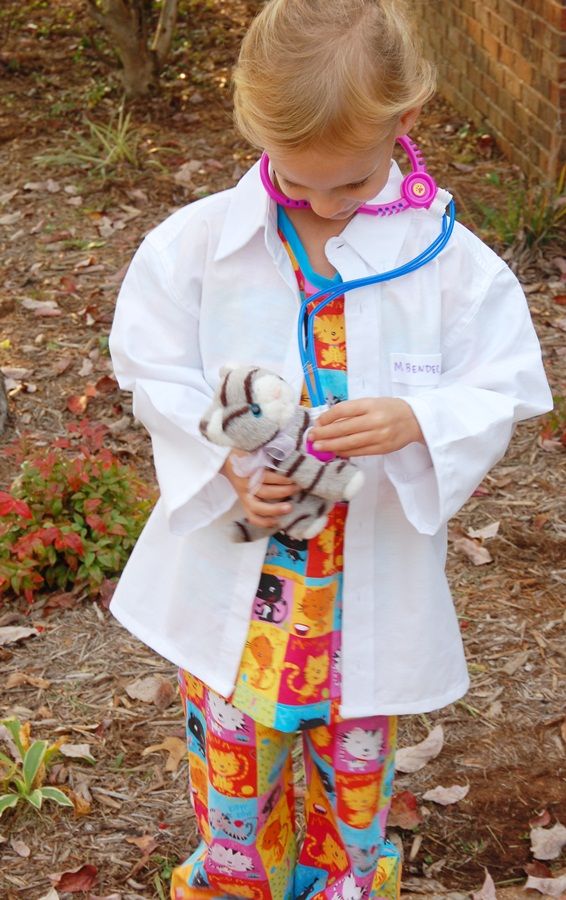
I found this adorable kitty fabric and made some super simple scrubs and doctors coat.

I used an old pants pattern for the bottoms.
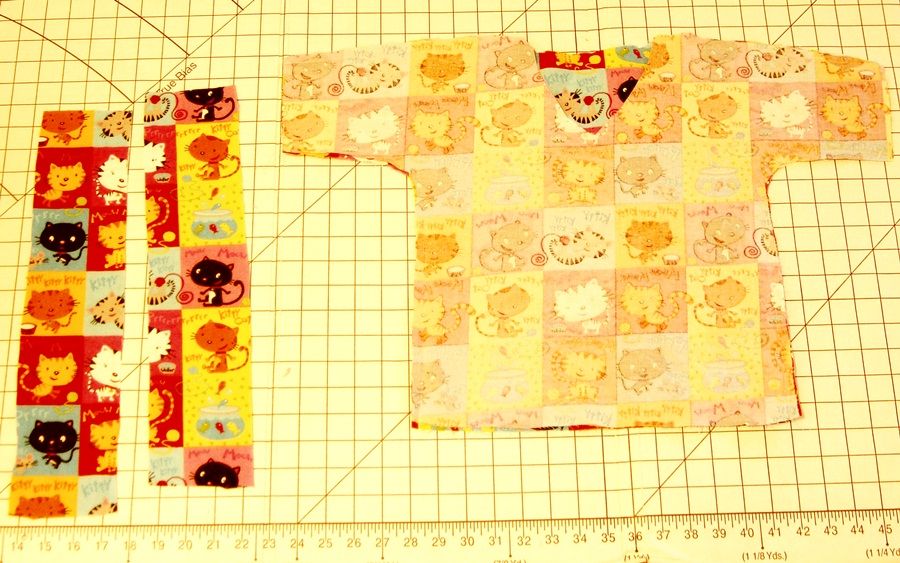
I just used a shirt of hers to trace to cut out a simple top.
I learned the hard way not to use a knit tee.
Cotton tops need to be much more wide.
As you can see I just cut the sleeves in.
This ended up being too fitted.
So I added those strips you see to the left all along each side seam.
This made it perfect and was easy to do.
I didn't take a picture, but I cut a vneck top and after sewing the shoulders and sides,
 I used bias tape for the edges of the neck.
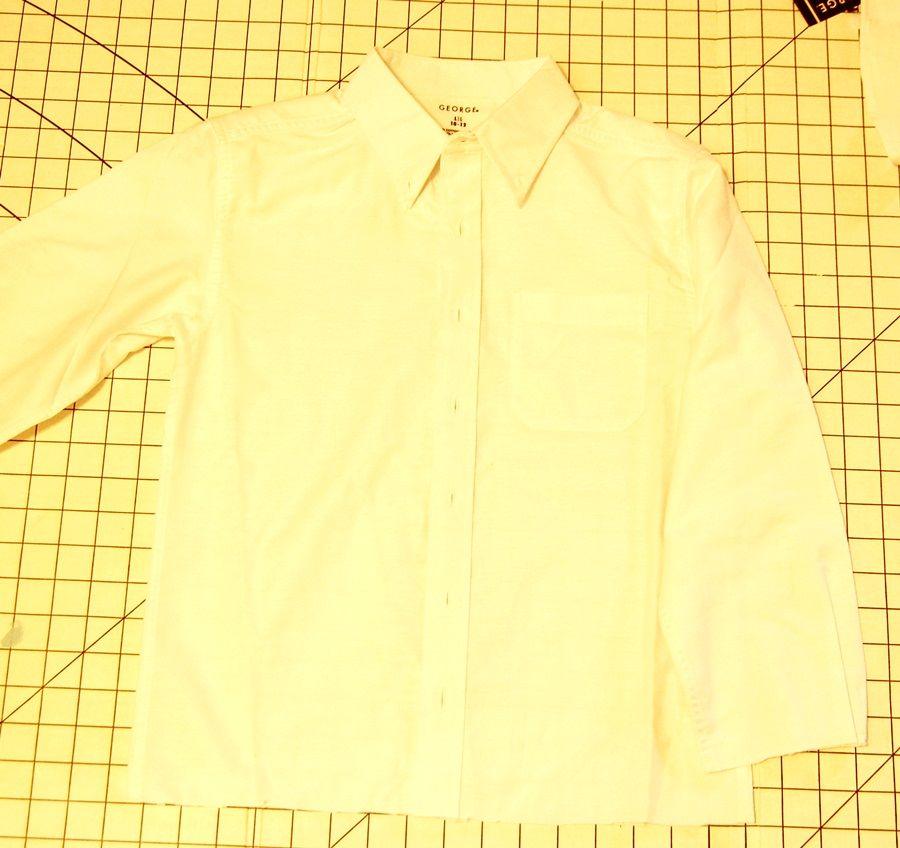
For her doctors coat, I bought a size large boys white button up.
I cut all the buttons off.
Then I cut off the sleeves after the entire cuff and hemmed.
The bottom I cut evenly across and hemmed.

Then I used a scrap of the shirt and wrote Maressa's name with a fabric marker.
Sewed it to the pocket.

Yes, now I'm officially bonkers.
I reasoned by the lavish costume that she can use the scrubs as pjs.
The lab coat can be used for play.

Luckily, I don't have to make anything much for the others.
Kalla is going to be a black cat.
Black tee, black yoga pants, ears and tail from Target and we'll make her a cute collar.
Micah is going as Flash and the mailman brought his costume.
Zachary is going to be Robin.
Couldn't find a proper fitting costume for him so I'm transforming a tee and sweat pants to the Boy Wonder.  ;)

Course will have pics of all next week.

What are your kids going as this year?


Tuesday, October 25, 2011

Make this: Unicorn costume tutorial


This was Maressa's halloween costume request this year
We went from Hello Kitty, to Wonder Woman, to girl gnome to a pink unicorn.
She saw a doggie unicorn costume at the pet store. 
She wouldn't budge after that.

I saw an expensive, but not super impressive one at Potttery Barn kids.
I finally decided to tackle a home made one.

It was really easy actually.
Just a plain sweat suit with hood and felt.
I didn't even need my machine.

She liked it just a little bit.

She kept it on all day once we tried it on.

Her sister and her played princess and unicorn for a while.


So here's how I made it:
The hardest part was finding a plain pink hoodie and sweat pants.
I actually ended up finding this set on Amazon.

Then I cut a bunch of white felt for the mane and tail.
Then black felt for the hooves and bit of pink trim for the feet.

I'm not sure how long the strip of white felt I used.
I cut 2 long and wide strips like above.

Then I sewed them down over the hood, one on top of another, with white embroidery floss.

The mane was too long so I cut it off where I wanted it to stop.
I used those pieces to sew a tail at the bottom hem of the jacket.

I added felt hooves to the hem of the legs and arms of her sweat suit.
I didn't take a picture, but I added the pink scalloped felt over the top of the stitches.

Then I added ears to the top of the hood in pink felts.
I used glitter white felt for the horn.
I simply cut a skinny cone shape. 
Then sewed the sides together and added a little stuffing.
Using white embroidery floss I sewed it to the top of the hood.

And a big thank you hug from my own unicorn.  :)

Photo courtesy of Kalla.

LinkWithin

Related Posts with Thumbnails