Showing posts with label organization. Show all posts

Monday, August 20, 2012

Mom’s No-Nag Morning Lists

list2
Today was the first day back to school for the oldest 3.

I came up with this genius-ness Sunday afternoon.

In the years past, every school morning was semi-chaotic.  Trying to get all 4 out the door early.
The children are all early risers, but I’m not a morning person.  So they get up before me and they don’t see me til I’ve had a shower, I need them to get started getting ready before I come out.
The temptation of course is getting right down to playing.
So this was my game plan.  I placed each kids cards in their spot at the kitchen table.
I decided to make separate cards instead of a chart, because I could foresee fighting over access to it.
Let me tell you I’ve never seen 4 kids happily busy getting ready on the first day of school.

list3
Here’s Zachary’s list.
Silly as it is, we used to fight over him combing his hair in the mornings and yes, he did whine when he saw it on his list last night, but it was checked off before school today without mom nagging.

list1
Maressa can’t read yet, but insisted she needed her own list.
So I drew a few pictures to help her know what to do.

list4
I used large notecards to make these that I already had on hand.
Then blinged them out a little with some washi tape.
Once I had them like I wanted I used peel and stick laminate paper to cover them.
They use dry erase markers to mark off their list.

firstday1
This is my 5th grader.  He heads to school earlier than the others.

firstday2
2nd and 3rd graders.
Apparently it is orange day.   lol

firstday3
This is why Z man is early to school every day.
As a 5th grader he has one of the coveted safety patrol positions.
Pretty light day as every one walks their kids in on the first day.

Tomorrow my baby starts kindergarten…someone pass the tissues will ya?

Saturday, January 28, 2012

Just a little loopy

Hello everybody.
Just a little post to fill you in.
Lot of little things going on this past week.
First internet went down.  It's still not right and we can't get the wireless to work.

Then guinea pig got sick.

Gus stopped eating and drinking at some point this past week.
He's just pitiful.  Vet can't find what's wrong at the moment without a bunch of random and expensive tests.
So I am syringe feeding him for now and see if he doesn't get better.
Fun fun!  :)  It's actually not that bad and they kids think it is just adorable.
I got the closet done.  Organization bliss.
Much better!  May add a peg board on the wall in there too.

Oh and lastly, I had surgery yesterday.  I was going to blog about it before, but we had connection issues.
I had my yucky gall bladder removed.  I hear I will feel much better.
Yesterday was rough at some points.  Pain medicine is good.
 Speaking of if this post makes no sense, I am heavily medicated at the moment.  lol
But it does the job.  My hubby got up to find me making waffles for the kids this morning.
He thought I had lost my mind.
I have a little with this medicine...but there were only 2 egg casualties.  :)

Should be back in a few days and hopefully a little more coherent.

For now I'm going to go watch a movie with Maressa while all the other kids are at basketball.

Tuesday, September 6, 2011

A Sewing Tutorial: The Reusable Ziplock bag

I LOVE ziplock bags.  
I could use them for virtually everything.  
Especially handy for packing.
This tutorial is about a year + coming.  
I've been wanting to make these for a long time.
Actually, this is a little different than my original idea.
I may bust out the other version soon.  :)
Anyway, this is the cutsie fabric version.

To make your own, just follow along.

You'll need:
 2 pieces of fabric 12.5" X 11.5"
once piece of the nice thick clear vinyl about 11" X 11.5"
one zipper at least 12" long

First, cut your vinyl across the 11" side down 1.5"
This should leave you with a piece 11" X 1.5" and one 11" X 10"
Does that make sense?
Now you're ready to sew on your zipper.  
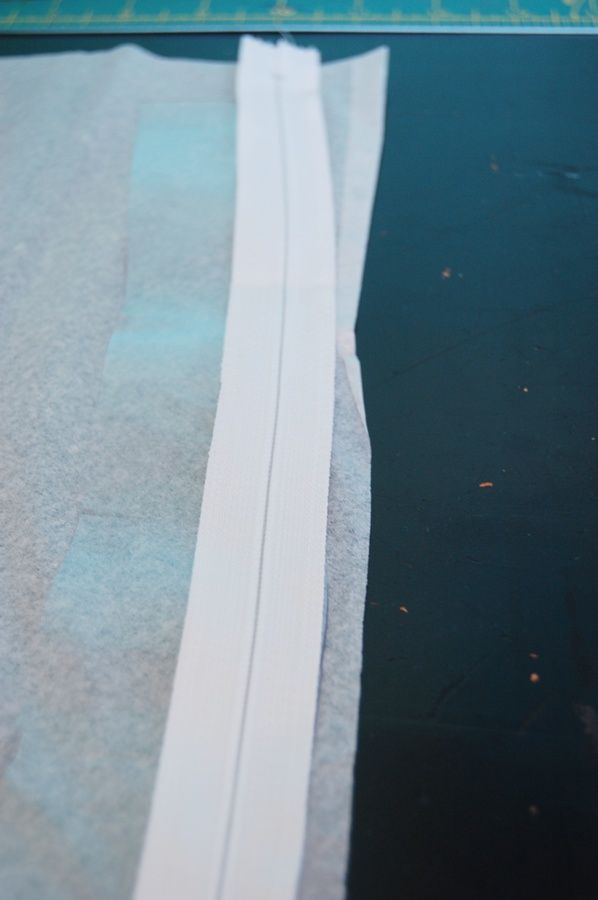
To sew with vinyl you will need a layer of tissue paper between the vinyl and feed dogs of your machine.
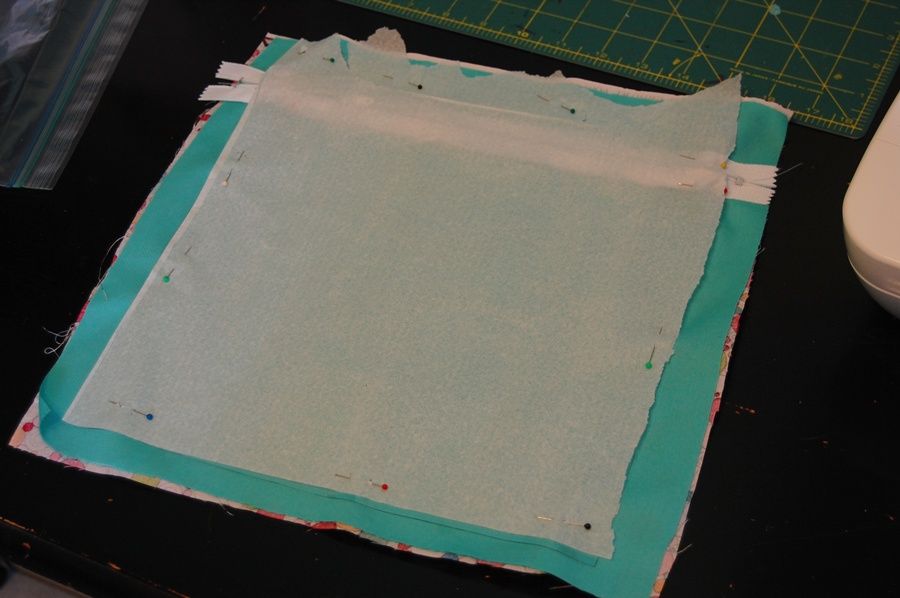
So lay down a piece of tissue paper, then your skinny strip of vinyl and then your zipper lining up with the long edge of the vinyl, face down.
See above picture.
Sew.

Now layer a piece of tissue again with your 11X10 piece on top.  
Flip over your zipper so the opposite edge is lined up with the 11" side, facing down.
Be careful to line up the other edges with the piece already sewn.
After sewing both down, pull off your tissue.
Now your vinyl piece should have a zipper along the top middle.

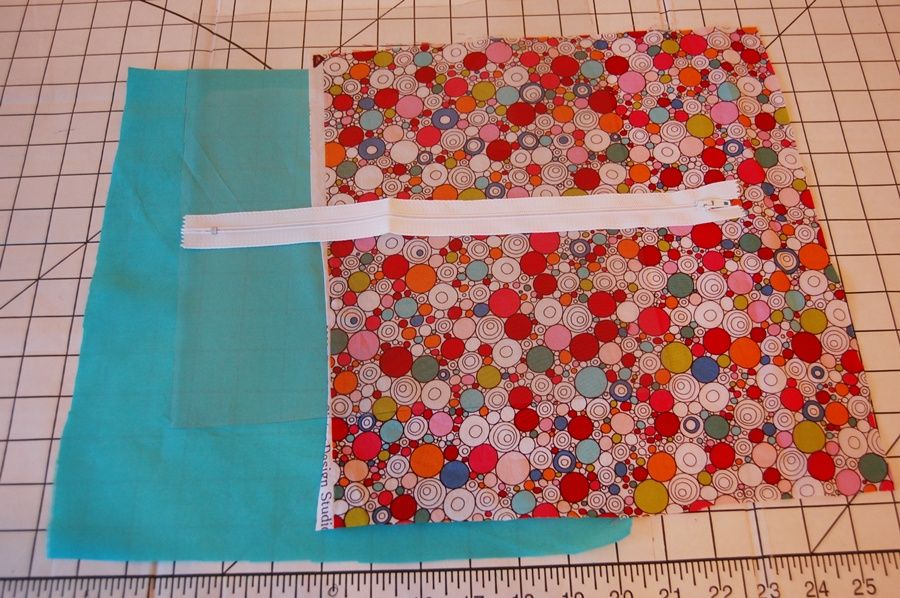
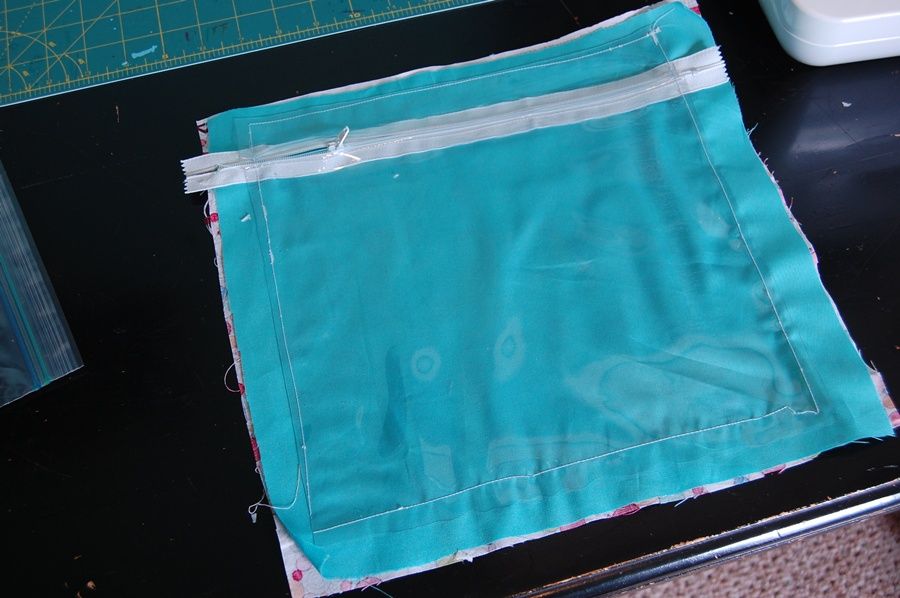
Now to make the next step easier, I chose to center the vinyl on top of the fabric and sew down.
To do this you will want to place your outside fabric down, wrong side up.  
Then place your inside fabric right side up. 
The vinyl will go down with the zipper pull to the outside, zipper seams on the inside.
Also, note, I wanted to 'press' my zipper seams to help them lie flat.  
I did this by covering the vinyl and seams with a thick cloth and pressed a hot iron on them.
This will soften up the vinyl temporarily, but will not burn it.
**Before you sew the vinyl piece down, be sure to pull your zipper pull to the inside of where you will sew.  See below.


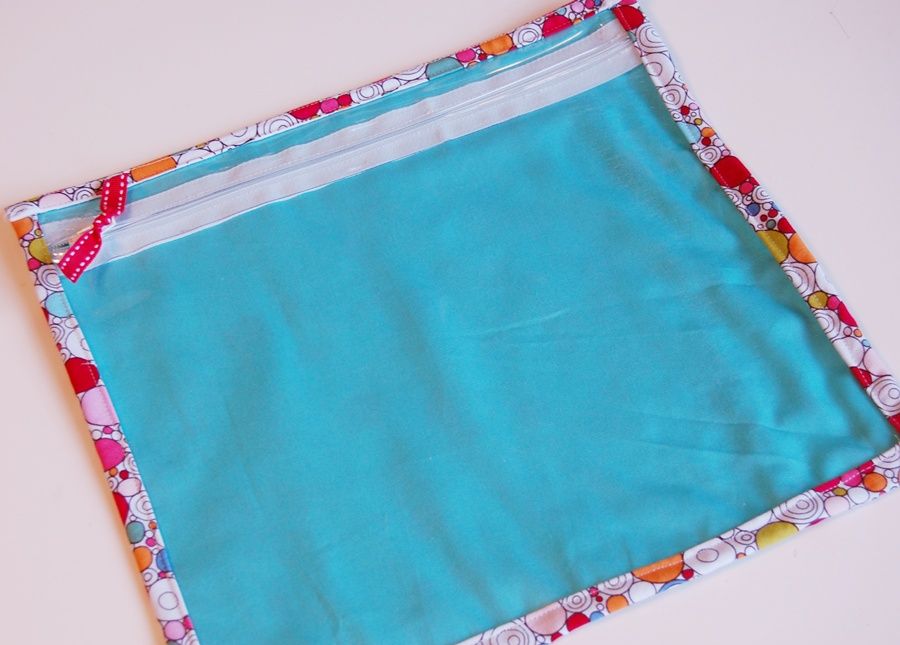
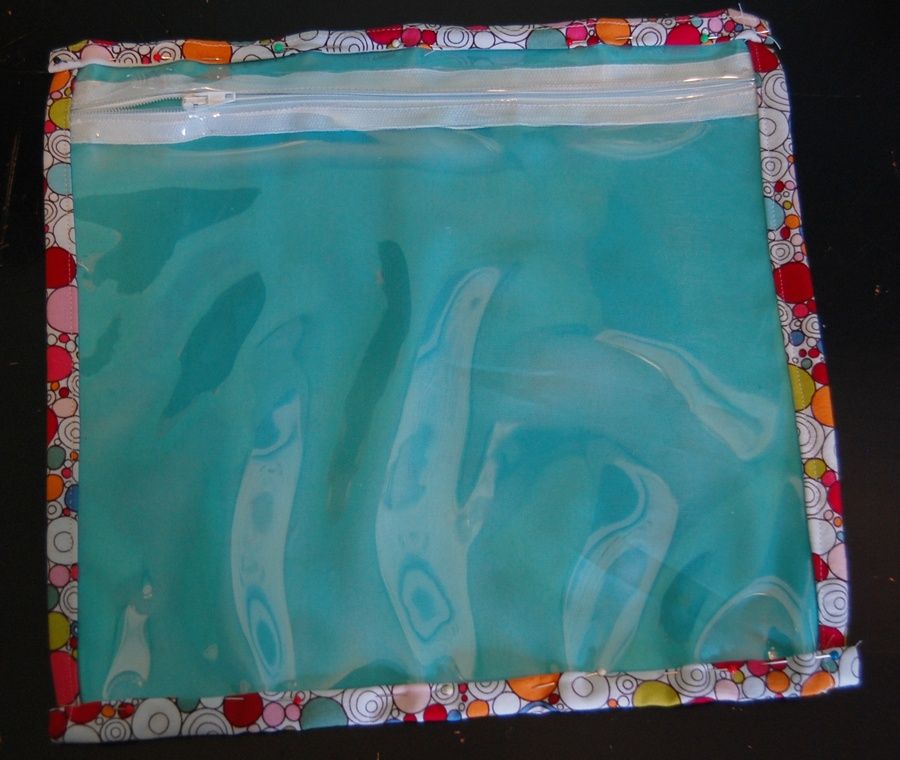
Now I folded and hemmed the sides over the edges of the vinyl.

Then the same with the top and bottom.

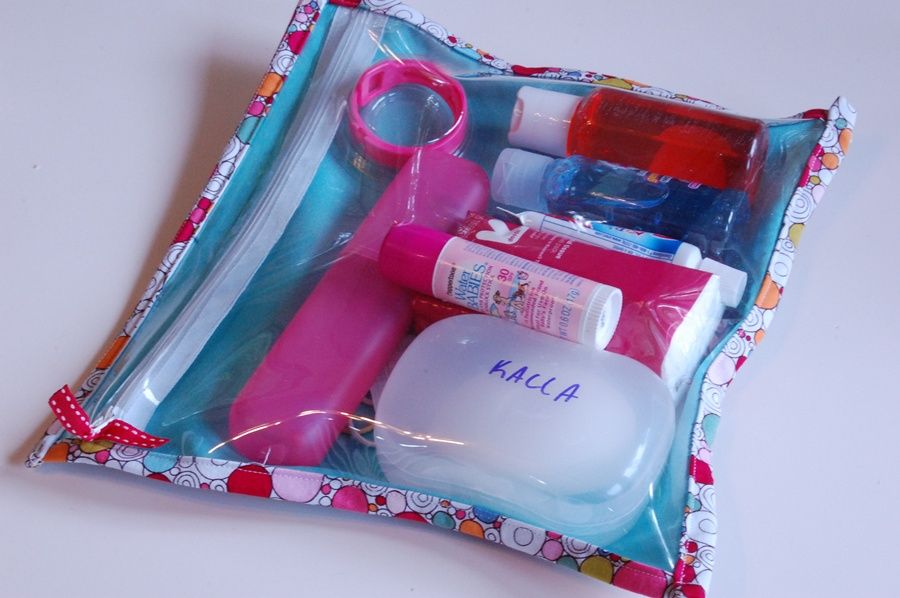
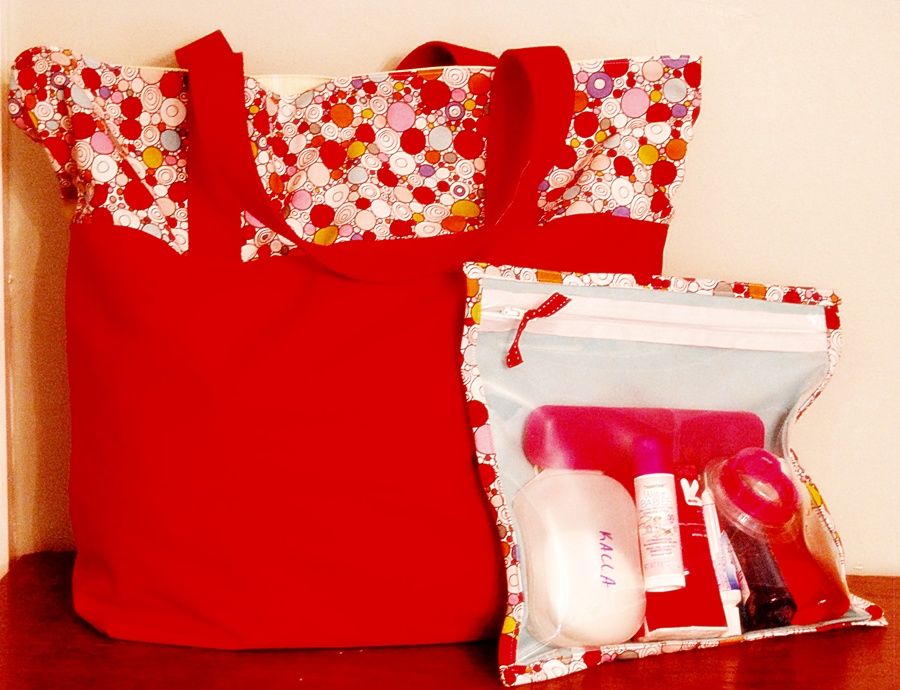
This cute little ziplock bag matches a weekend bag I made.  
Tutorial to come soon!
We used this set for Kalla's things when she went to camp this summer.
Oh and sorry for the terrible editing above...it kinda hurts my eyes now, but didn't look as bad on my little net book I was working on.  
You get the idea.  :)

Friday, September 10, 2010

Taming the school papers

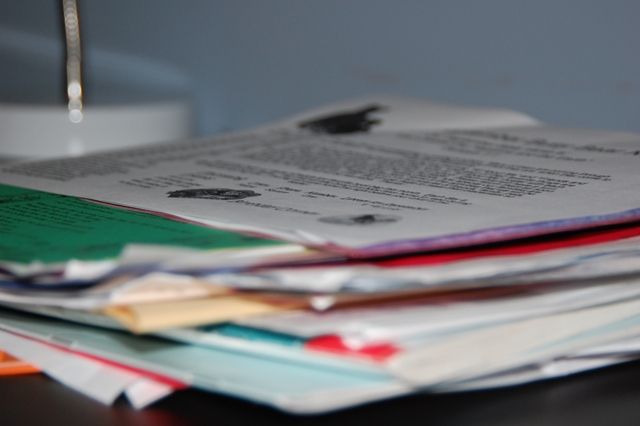
School papers.  They come home by the stacks.  Now that we have 4 kids in some sort of school, they can get really out of hand very quickly! 

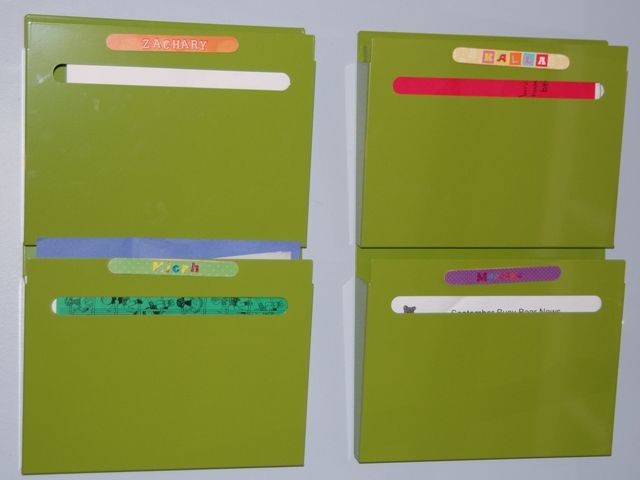
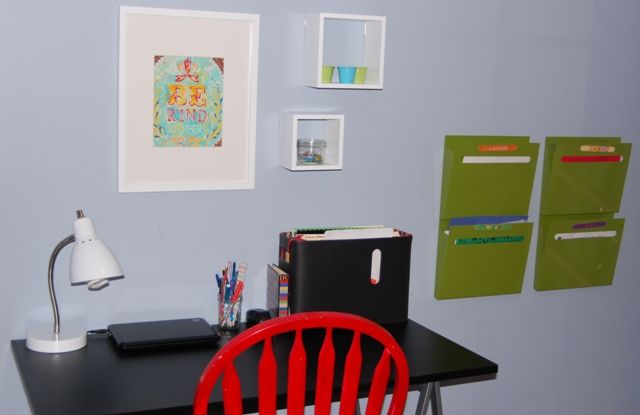
When I saw these double wall files in a catalog I just knew they would do the trick to tame all the papers.  They are metal and a lovely shade of green.  I hung them low enough that the 2 little kids can reach the bottom.  I used wide popsicle sticks, paper and stickers to create magnets with their name to label their file.  When each kid gets home from school, they empty out their totes and backpacks and put their papers in here.  Then later when I have time I can go through them all and then file or throw away.  The little kids especially love putting their papers away in their own file holder.
They hang in our little office not far from the front door.  We are loving them.  :)

Thursday, March 11, 2010

Oh My Craft & Sewing Room, How I Love Thee

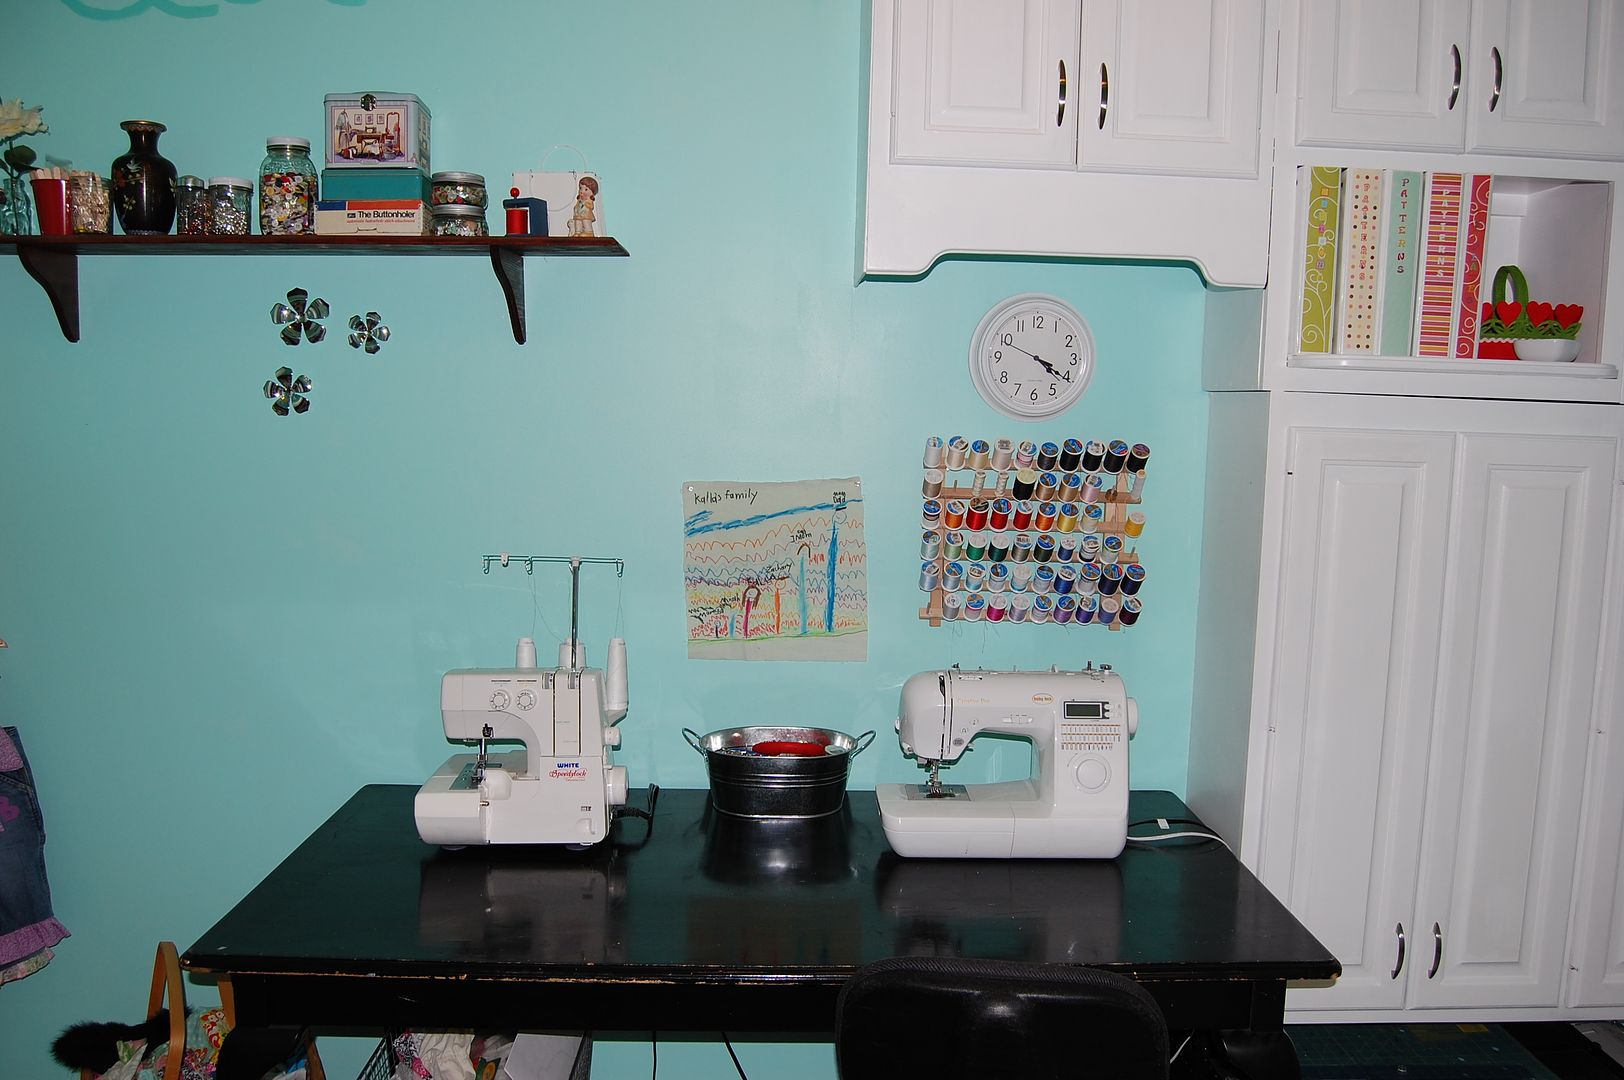
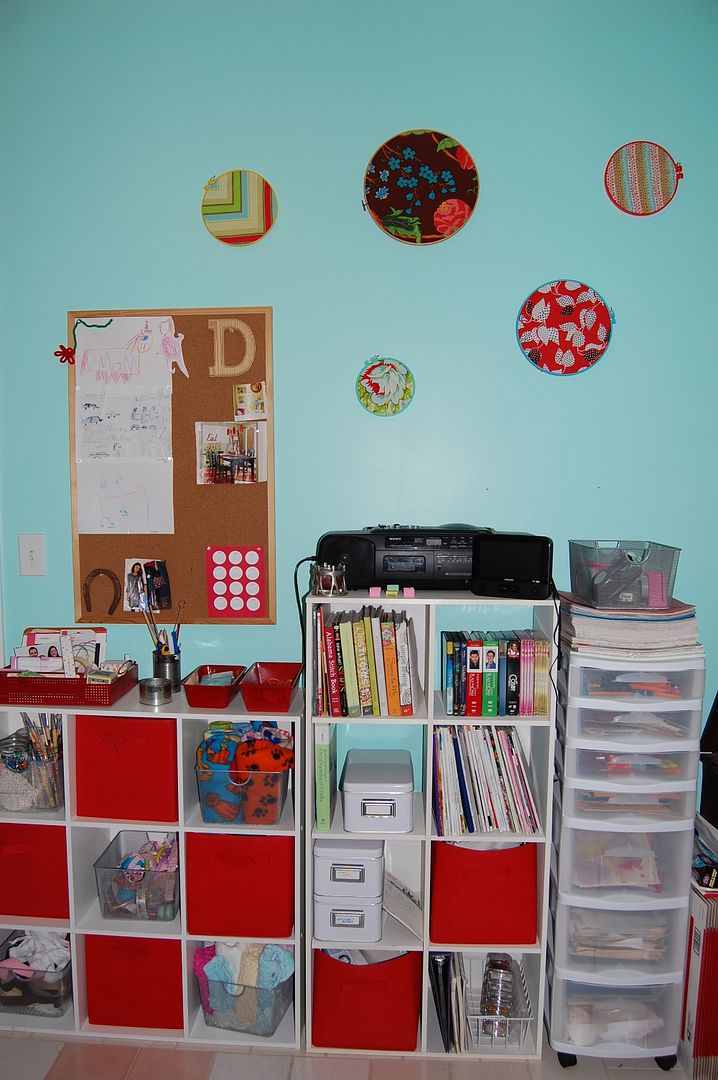
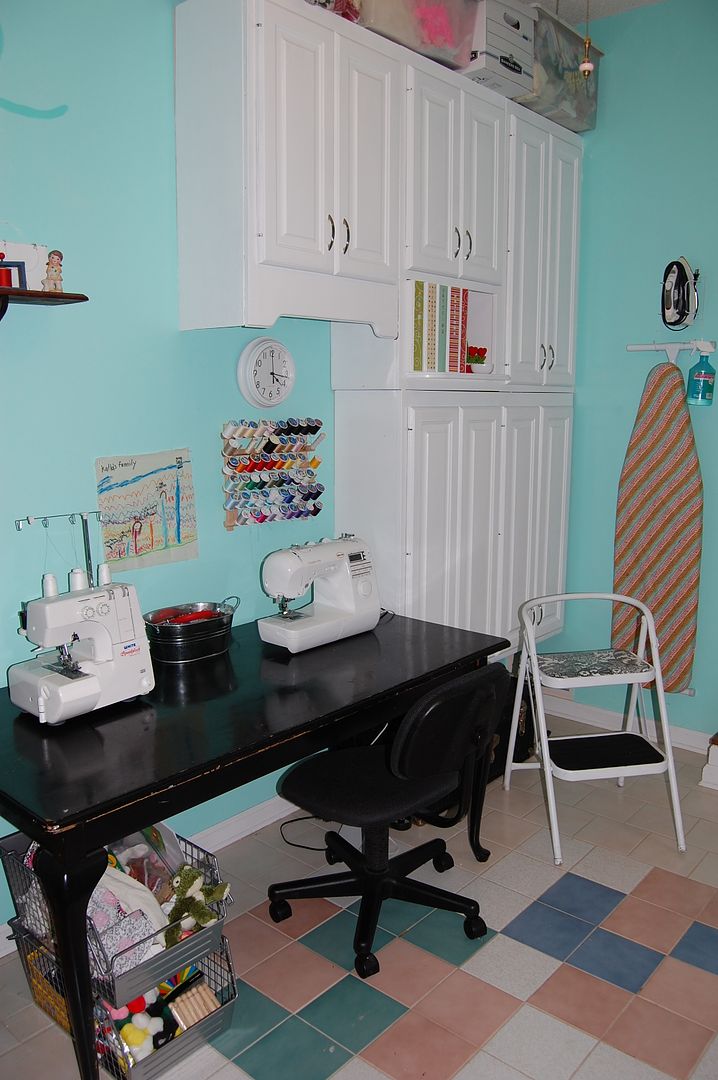
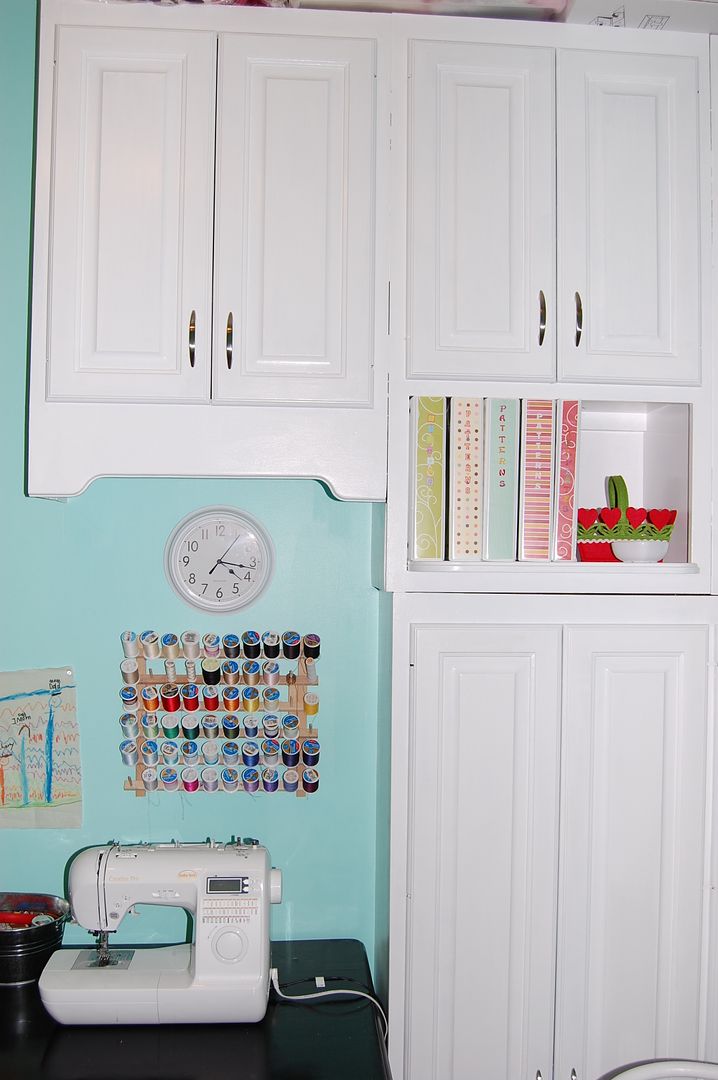
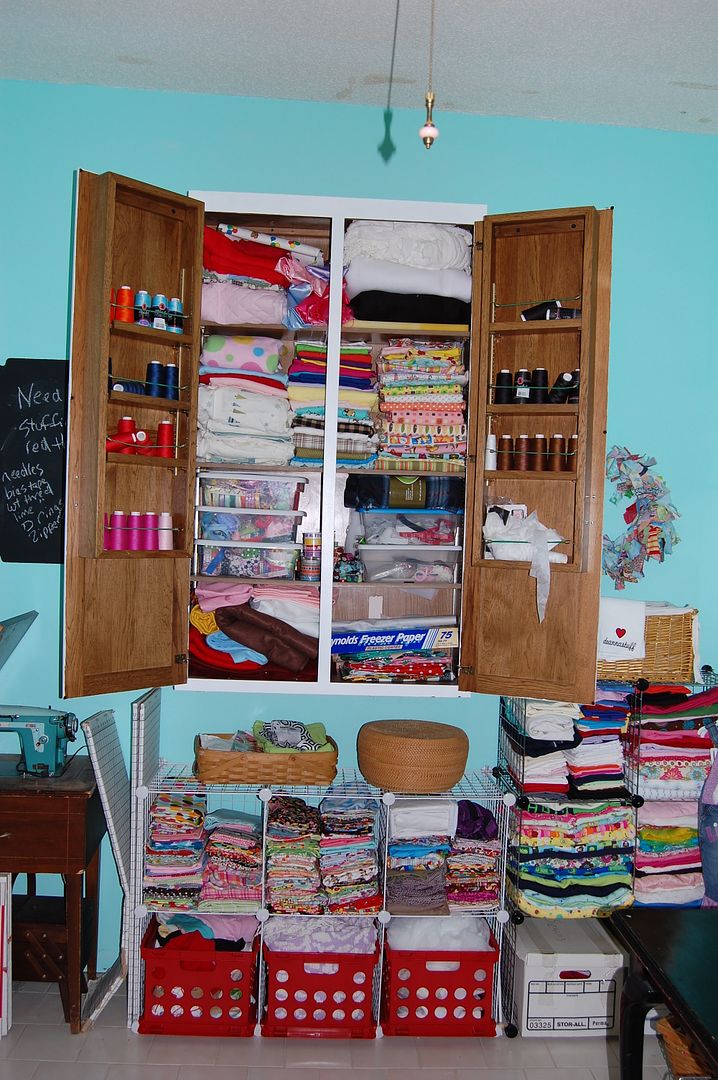
My room got a redo a couple of months ago.  Here are some before and after pics of the first redo.  But it just wasn't working for me...and it never truly got finished.  Well, there are a few things I still have on the to do list, but this is pretty much it now.  I finally got all the cabinets a nice bright white and new handles.

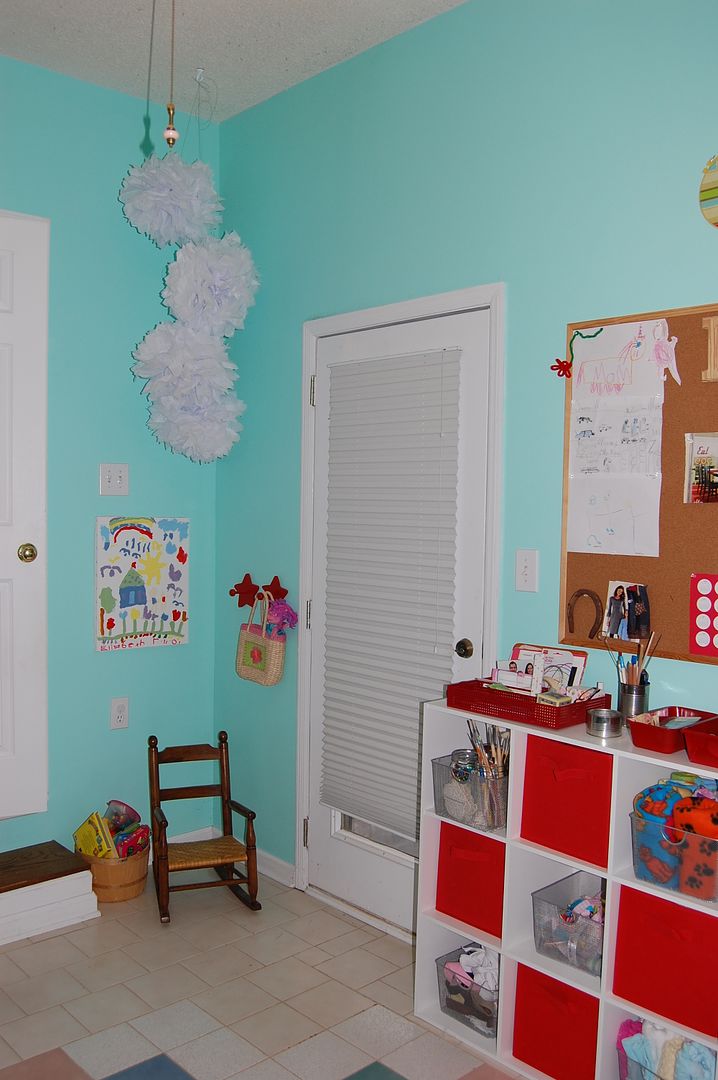
Hung some fabric decorations.  The ceiling is super high.  This used to be part of the garage.  I say this room is what really sold me the house.  The previous owner had a little business of sewing custom wedding gowns out of her home.  So she had this room built off the den with all the lovely cabinets...you should have seen her awesome huge custom cutting table she had in here...but sadly she took it with her.  But it's probably for the better because it took up most of the room.  My tall plastic drawers holds mostly paper craft stuff with my big paper pads on top and a basket of my shape punches.


She told me she would leave the cabinets if I promised to use them and not rip them off and throw them away...as if!!  lol  Most of my fabric is folded neatly into these metal crates.  Batting, pieces of chenille bedspreads (for bibs and baby blankets) and half done projects in the red crates.  Old Bessie sits in the left hand corner.  I inherited her from my husband's grandma and this machine worked like a horse for years when I made and sold boutique children's clothing on eBay.  When I finally got a new machine, I couldn't bear to part with her.  I actually did the colors of my room around her lovely 50's shades of aqua and red trims.

Maressa's corner is still here.  I hated throwing away my white snowballs after my Christmas party, so I hung them in here.  This summer though I plan to put a small table in that corner and get Kalla her own machine.  The door there leads to the side of our yard.  I hope this spring to put in a nice wooden screen door on the other side as I love to have that door open when it's warm.

Could you imagine NOT keeping the cabinets???  I store bins of stuff I don't use often on top.  The metal bins under my table hold ongoing projects and crafts I plan on doing and the random kids stuffy that needs fixing.

The other thing I'd really like to do is either paint the tile (messy) or just lay some nice vinyl on top.  I'd love a throw rug, but thinking I really don't want to have one more space to vacuum often with all the threads that go flying around here!

And yes even my ironing board matches (find tutorial for covering your ironing board here).  :)


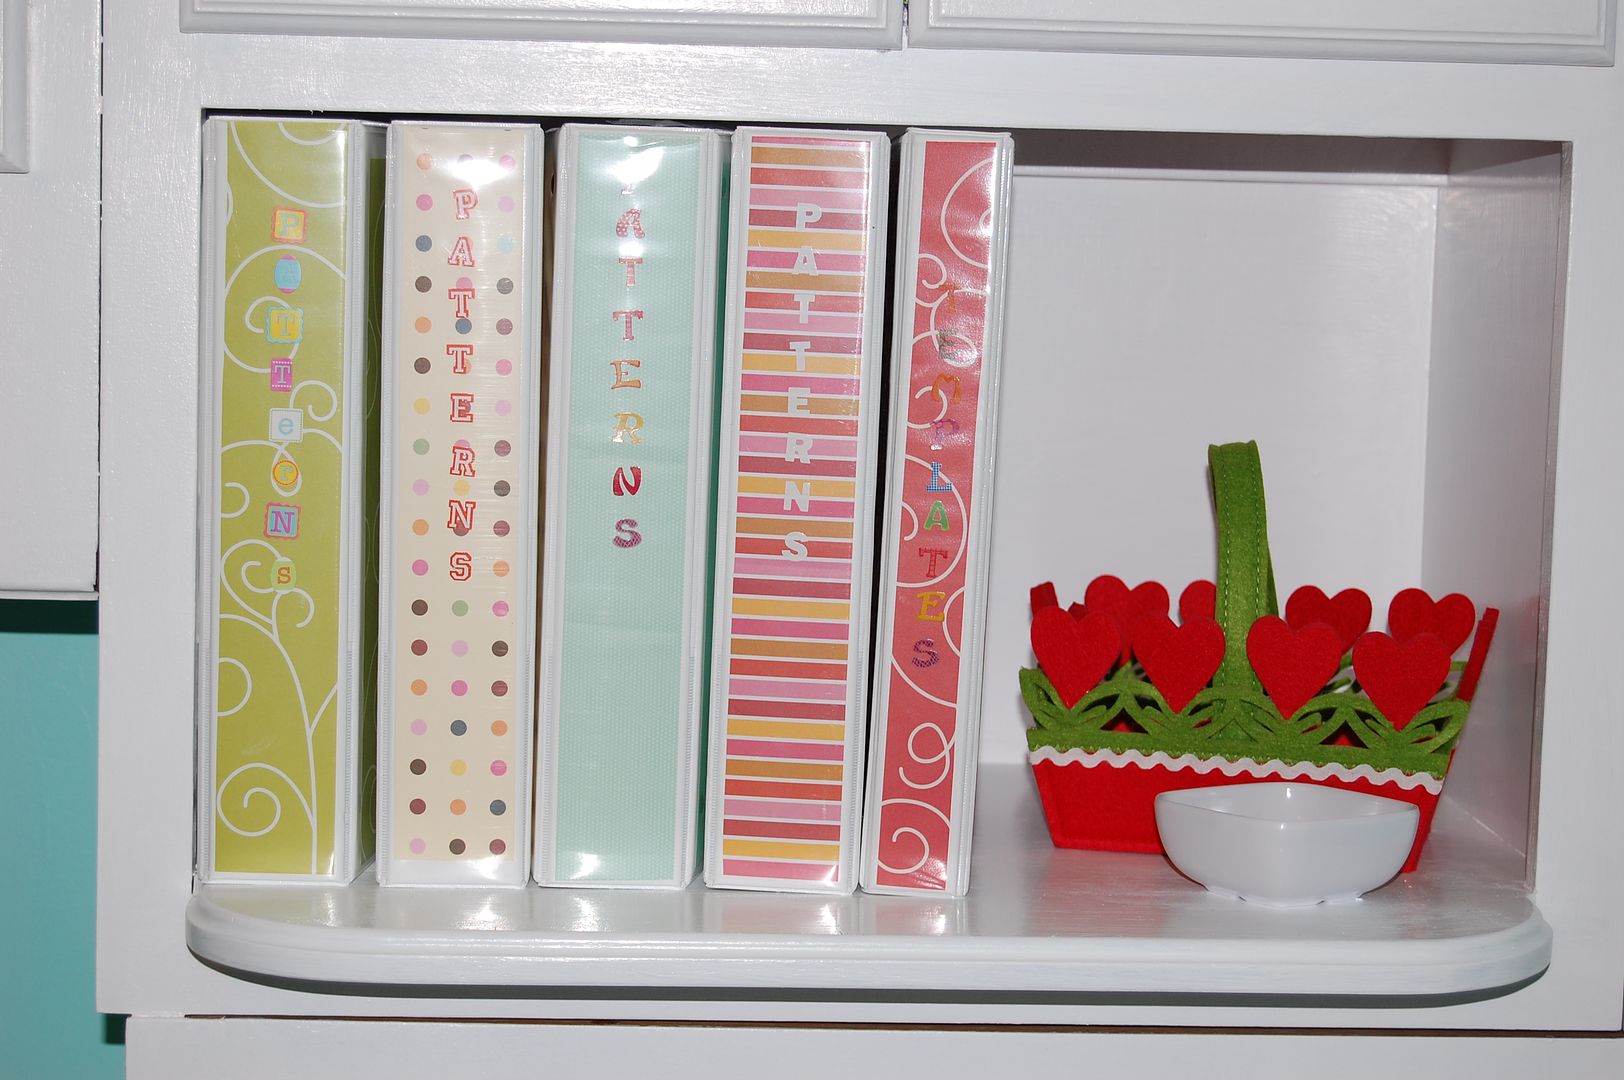
This open space in my cabinets is perfect for my pattern binders.  I got really fat white binders and filled them with plastic sheet protectors and all my patterns go down in them...that way I don't have to fit everything back in those little envelopes.   Also perfect for finding all the templates and patterns I print off the net.  And when I draw or print pictures for appliques they go in my template binder.  I just used some scrapbook papers and stickers to jazz the binders up.

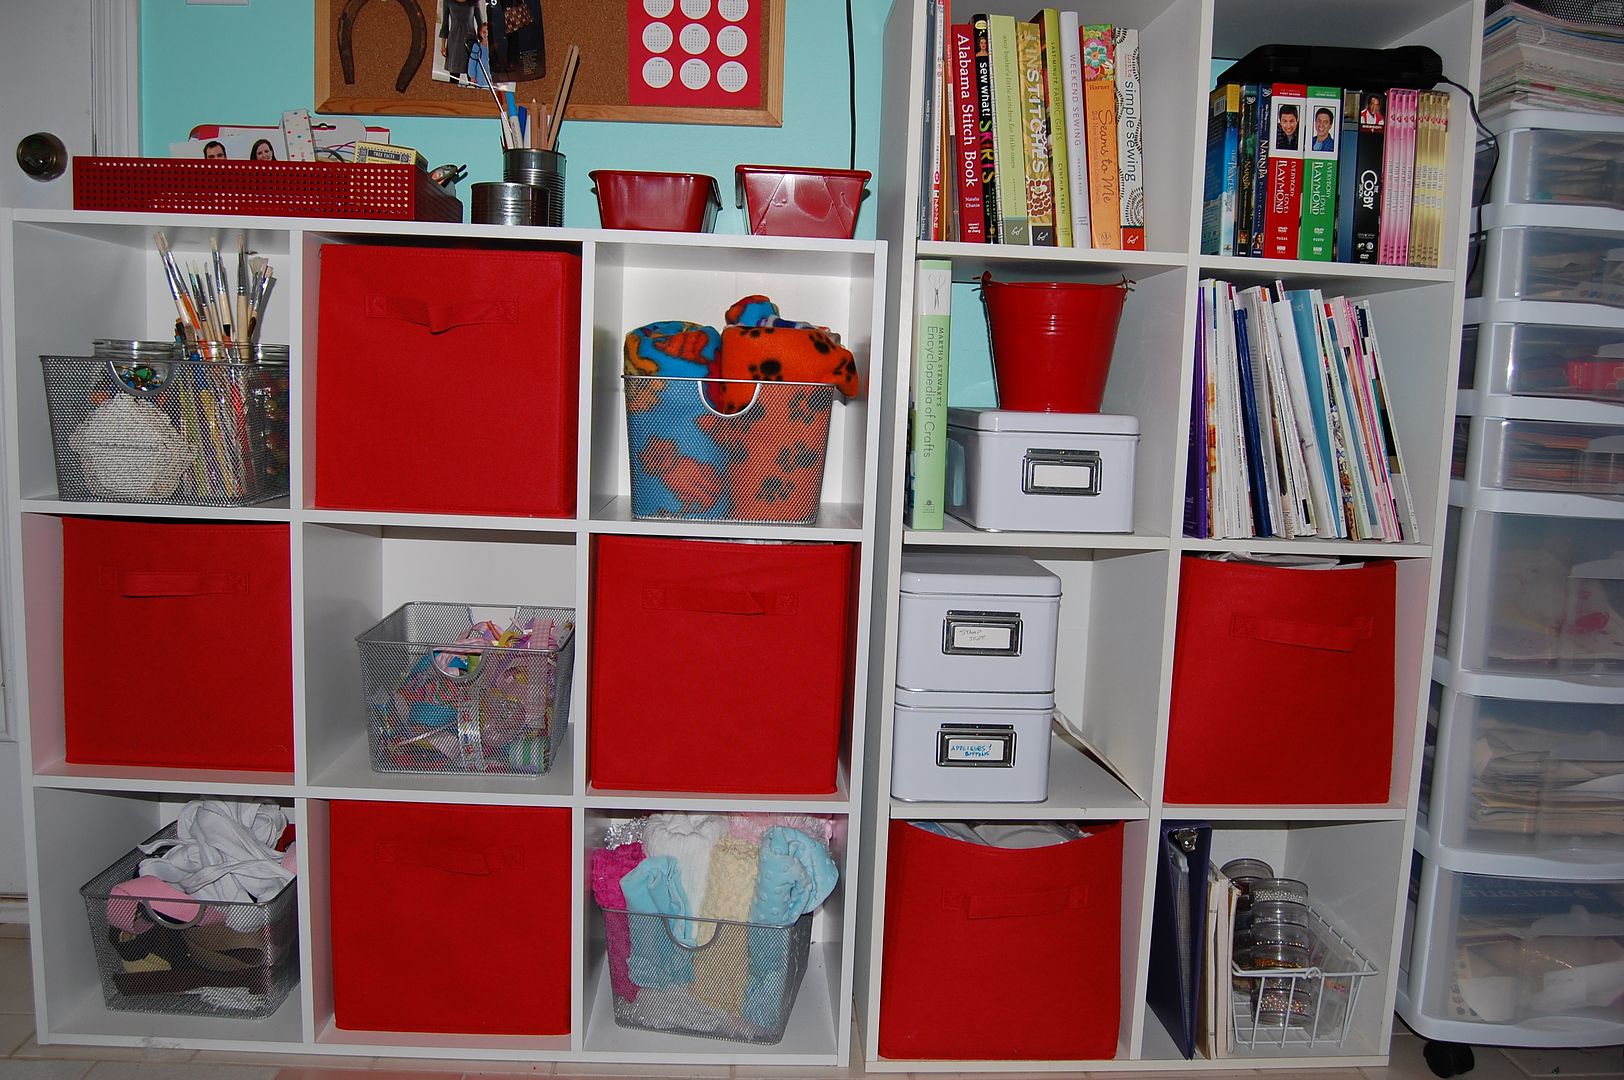
I got these inexpensive cubbies and boxes at Target.  The mesh metal bins are Target dollar spot finds.  These hold crafts and supplies.  Also my pattern and sewing books and magazines live here.  On top is some recycled metal tins to hold supplies, a drawer type utensil organizer holds a bunch of random stuff and instead of getting rid of my old metal loaf pans when I went to glass, I spray painted them red and they hold my shears and other things.  You will also notice I have my dvd collection in here.  I like working to background noise, always have.  So I keep our portable dvd player in my room and play some of my fav sitcoms (Target had Season 1 &2 of I Love Lucy for only $15 a month ago!!) while I work.  It's so nice and cozy and I bring a cup of tea, light a smelly candle and I can live in my room for a nice long time...course that never happens!  ;)  Not for lack of trying though!!

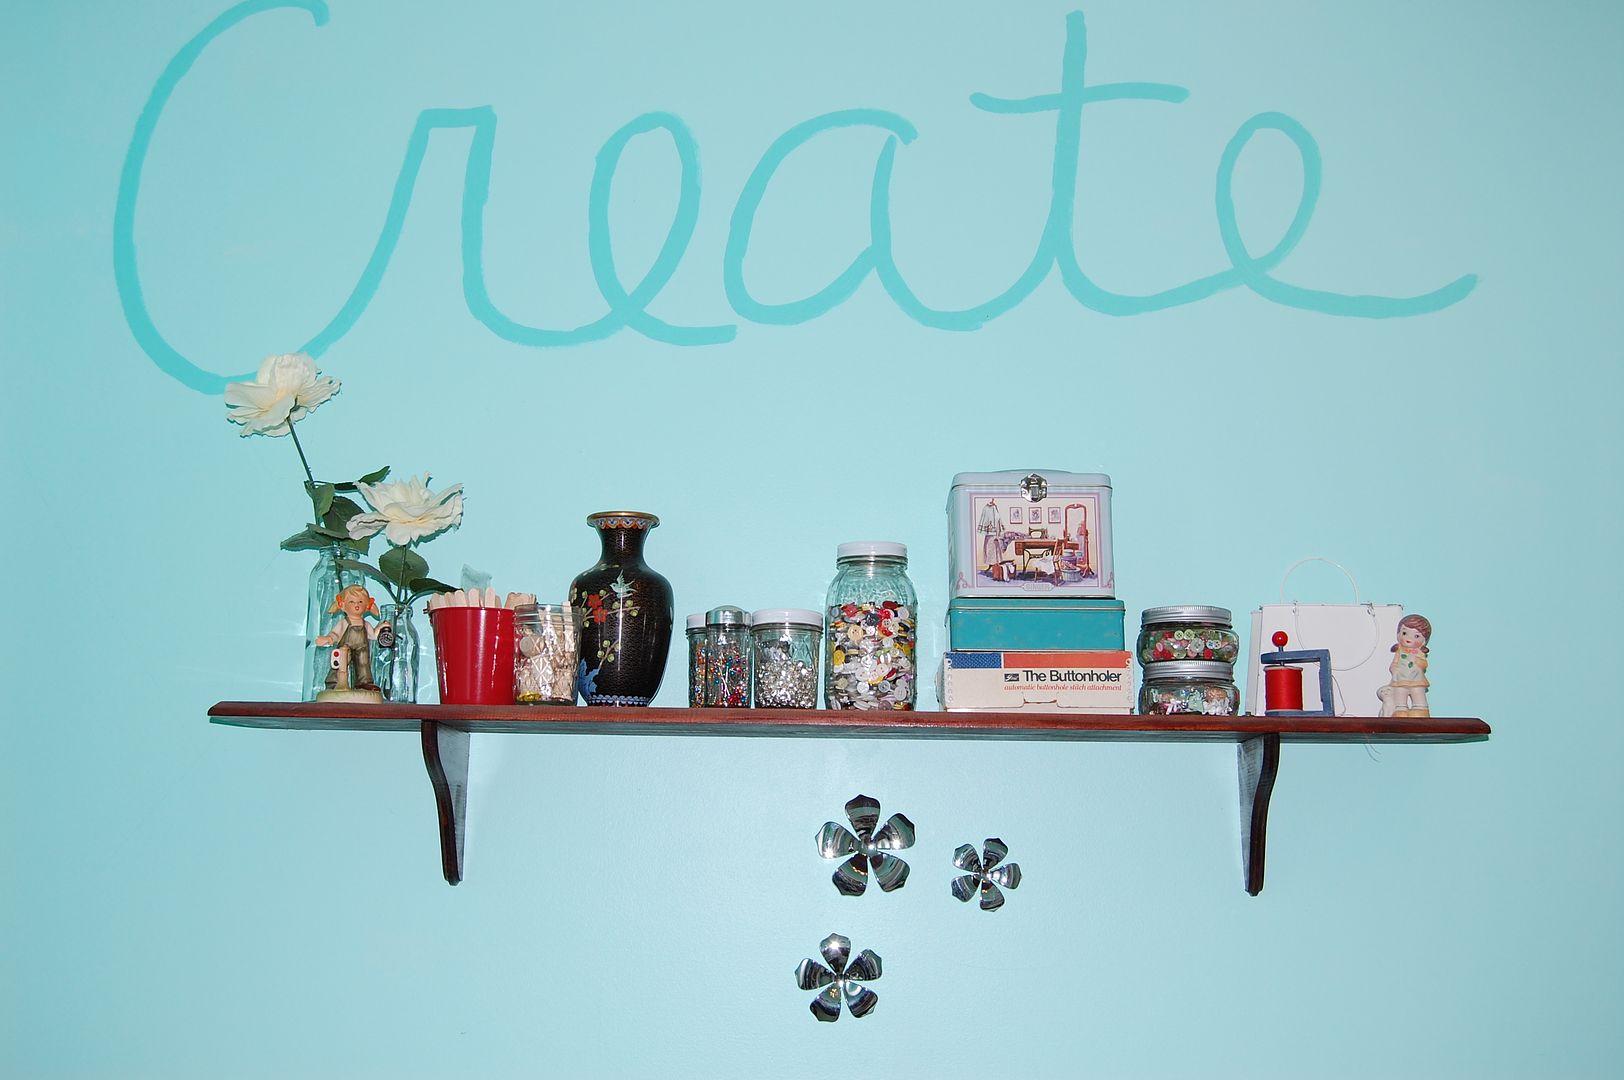
On my shelf is jars of stuff like buttons and beads.  Some ancient sewing supplies I got from hubby's grandmas, some old ceramics I had given to my grandma when I was little (I got them back when she passed away) and a vase from Indonesia where my dad lived for a time.

So I know you guys are probably wondering what is behind all those doors.
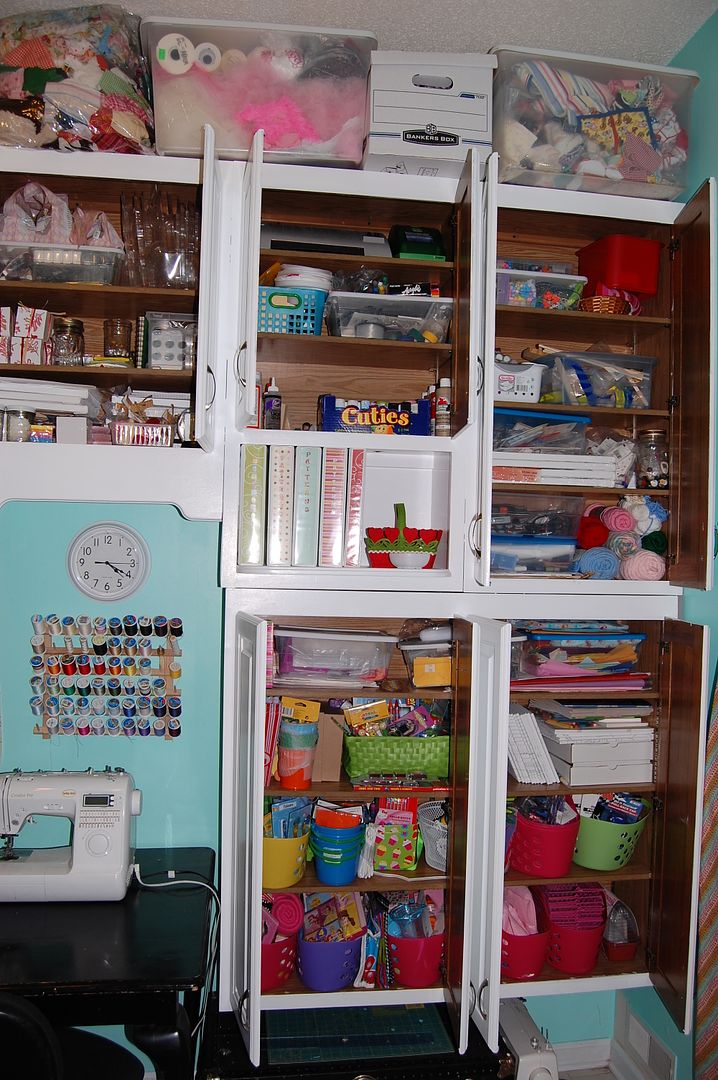
My controlled chaos.  :)  Anyone up for I-spy?  And no there aren't oranges in my cabinets...I repurposed an orange box to hold my craft paints.

This awesome custom built cabinet I inherited has places to hold my serger cones in the doors.  Boxes of ribbons, large pieces of felt and my flannel and fleece live in here.

Yeah, I know I'm spoiled with my room.  ;)

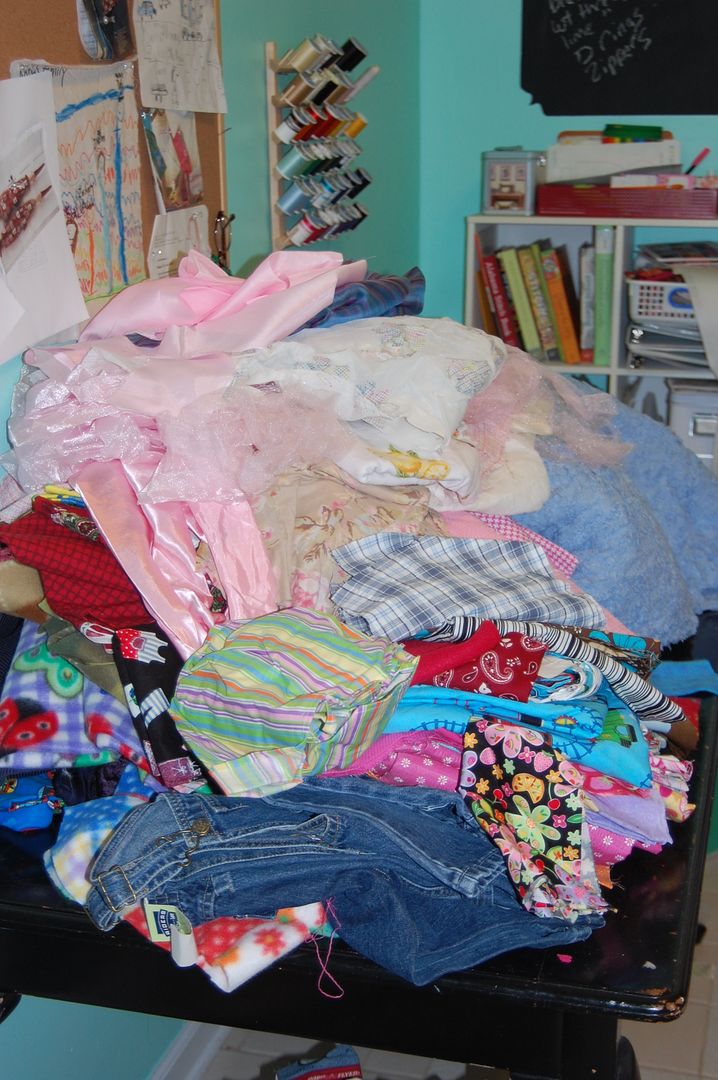
A before...this was one of the reasons for my redo.  The Great Fabric Giveaway.  I couldn't stand it any longer.  I was busting at the seams.  So I got rid of a ton of fabric I no longer planned to use and other stuff just sitting in my room.

Tuesday, March 9, 2010

Stumped

This is Kalla's stash of 'houses' for her beloved stuffed animals (mostly Webkinz).  In the kids craft closet I have a recycled section that I put shoe boxes in.  Anytime I have a new shoe box it is found within 24 hours or less and decorated to become a house.  That is fantastic.  However, they never go away and are starting to pile up.  Unlike my clever idea for all the drawings the child does, I am stumped at what to do with these.  I am really trying to be nice and accommodating for all their creativity.  But I must admit seeing all this stuff makes my skin crawl.  Clutter gives me anxiety.  If it doesn't have a home (in a container, on a shelf...just NOT on the floor) in my house it usually is put in the garbage or given away.  But I mean how can I trash Cutie Pie's Lamb Room without it going unnoticed??  It takes like a year after receiving a new Build a Bear to be able to get rid of those boxes on the sly.

I guess I'm just going to have to rethink the girl's closet and find a shelf for these boxes.  :)

Tuesday, March 2, 2010

In the Kitchen~Part II: Organizing the Kid Friendly Way

In my post yesterday about my kitchen I mentioned how I keep this shelf for the kids use.  Here they find snacks and snack dishes.  This is also where they stash their lunch boxes.  Everyday they are supposed to take their lunch box out of their bags.  Then take everything out and put their water bottles in the fridge.  Then put them away here.  Miracle of miracles for some reason they, who even with infinite amounts of nagging about leaving their dirty undies in the middle of their bedroom floors, seem to do this simple task with out problem.  :)

Another kid spot is this really large pull out drawer.  Bottom one under the oven.  It's all theirs.  Sectioned dinner plates and cups are color coded by kid.  SO nice to not have that battle over so-n-so got the blue one today, but I wanted it.  Plus I always know the culprit who left their milk out.  ;)  Also smaller lunch and breakfast plates.  And because all this stuff is here in reach of even smallest child, any one of them can help with setting the table for all meals.  Maressa especially seems to like to help out.

My kids also all rise at an inhuman hour every. single. day.  Yeah 6 am.  No matter if Daddy let them stay up to watch the Olympics 30-45 mins after bedtime every day for 2 weeks.  Yep.  Early risers is what I have.  Soooo guess what, I let them make their own breakfast (I don't get up at 6 am!!).  They make their own bowls of cereal and make one for little Maressa too.  I leave yogurts in the fridge as well.  So in their drawer are also a bunch of cereal bowls with the straws...nice so that they don't waste our precious organic milk!

In the silverware drawer are bunches of kid and toddler sized forks and spoons.  And plastic knives they use to spread cream cheese on mini bagels....something else they make themselves if we have them in the pantry.  However I just found out that Kroger has stopped carrying them :(   They would just spread on the strawberry cream cheese on un-toasted bagels.

In our pantry is the cereal shelf...we really should buy stock in Cheerios.  Some granola for their yogurt. And a bin of their afternoon snacks...granola bars and fruit bars (speaking of I really need to make some homemade granola bars!!  I get lazy sometimes).  All in reach of the kids.

And of course their is Mommy's quick 1 point (WW) sweet snack box as well.  ;)

It's been so nice to have everything handy for the kids.  They know the 'kitchen' and 'eating rules' (yes I'm that kind of mom) and are able to help themselves within my set rules.  ;)  And when they have friends over, I expect that they are to play host/hostess to them.  Snack time comes and they get their friends snacks and water too.  :)

Wednesday, February 24, 2010

A Little Closet Organization

As much as I'd love a real mud room or an entry way that looks like this, it just doesn't make sense in our house.  We don't have a mud room.  The garage door opens up to our playroom.  We have a foyer at the front door, but it doesn't make much sense to spend all the money on cutsie wall 'closets' when we have a generous sized coat type closet right around the corner in our dining room.

But this is what it has looked like for a very long time.  I tried to hang hooks on the side walls for the kids to hang their stuff on, but they weren't sturdy enough and came falling out with much use (except one).  So little ones with arms far to short to reach the hanging bar, just threw their coats and bags and shoes on the floor.  I admit it, I would shove it all back with my foot and just close the door to try and forget about the mess inside.

Well I finally decided enough was enough and came up with a plan.

This is the after.  And yes it's not exactly eye candy, but it works.  I would have loved to strip everything out and paint it a fun bright color, but there are other pressing projects that are more visible that I want to tackle.  So ignoring the ugly walls, I cleaned up the closet.  I finagled a way to get hooks up for the kids to use.  I took this small drawer caddy that I no longer am using in my sewing room and put our winter gear and the kids extra totes in it.  Up top I used crates from Walmart to store my extra totes and serious winter gear (for when we go skiing) and my horse riding gear (would REALLY love to use that stuff again...I have promised myself I would make time to do that again soon!!)


The girls have one side and the boys the other side.  There is a shelf above their hooks that holds fav drawing books, etc to take to church on Sunday mornings.


They have 2 hooks each and labeled.


These have worked like a charm!  I took some leftover wood that was used for a cub scout project back in Dec and painted them red.  Then I used stickers for their name and coated the whole thing in glossy mod podge.  Then I screwed the hooks in (not all the way as they were longer than the thickness of the board.  After that I used 2 nails to secure the boards to the wall and then finished screwing in the hooks.  Nice and sturdy and none of those icky screw anchors in my wall!

Now everyday, my wonderful kids come in from school and outings and hang their things up (after a few reminders for a couple of them).  :)


Not really pictured, but on a higher side shelf I have my electronics and a basket of their accessories and chargers.  So as to easily retrieve the proper charger for each, I labeled the cords with a little electrical tape and a sharpie.  :)

Friday, October 23, 2009

Organizing jewelry in a pretty way

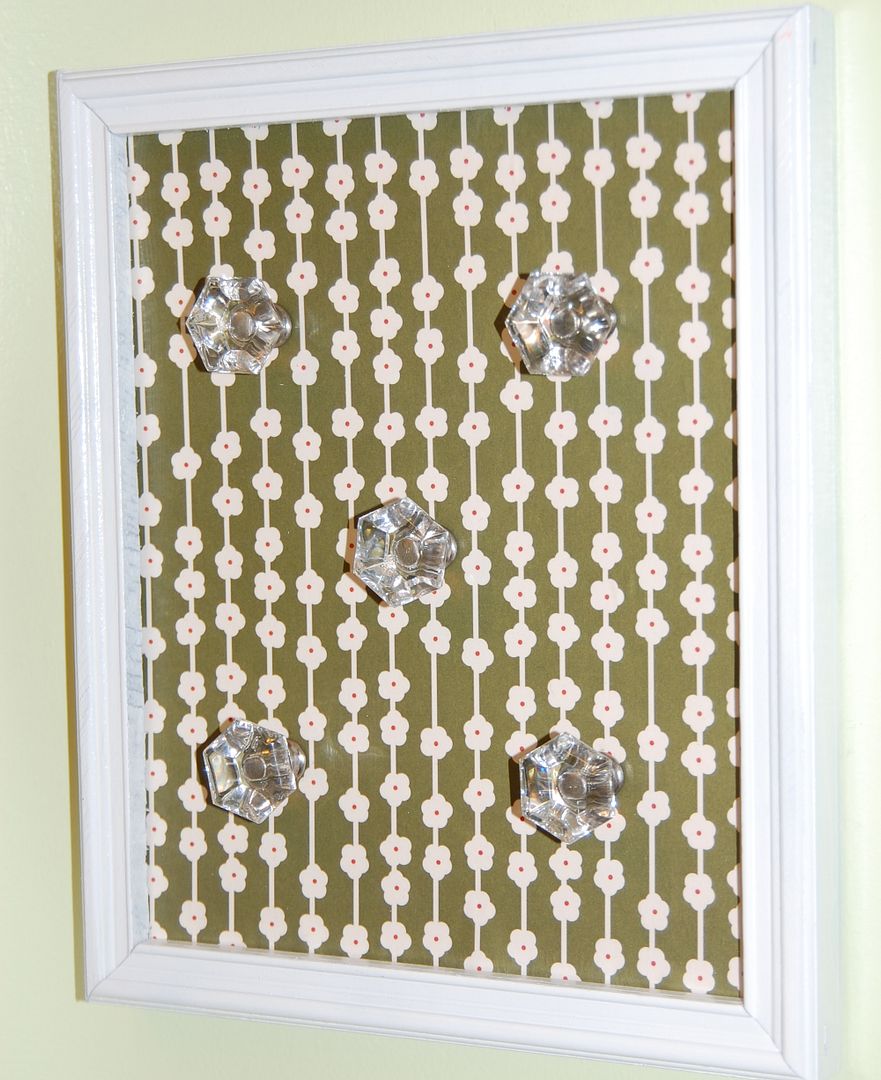
A while back I was going through a bunch of magazine pages I've torn out that I've collected over the years. I found a picture of a cool way to organize your necklaces and bracelets using cabinet knobs. I don't remember all the details (that picture is probably buried in a pile of torn magazine pages), but I sort of remembered the general idea. So this is how I made one.

I used:
8x10 old frame
scrapping paper
mod podge
5 pretty cabinet knobs (these are from Target)
1/2" screws to replace the ones the knobs come with

I used an old wooden frame and piece of a thick foam sheet (not the floppy kind sold for kid crafts, but those thick sturdy ones that come in poster board size). I spray painted my frame white. Then I placed the frame front size up and traced the back of the frame onto the board. Then I cut it out. It should then fit firmly into the frame. If your frame has a back to it, you can use that to trace as well.
Now that you have a backing, trace and cut a piece of printed scrapping papers to the size of your board. Use mod podge to glue it to the board. Once that is dry, coat the front with mod podge as well (I used matte for this project).
Now mark your spots where you want your knobs (I used a ruler to measure mine evenly). Then I used a sharp pencil to poke a hole in the paper/foam board. Now use your shorter screws to screw your knobs to the front of your paper board. Push your foam board into the back of the frame. If your frame comes with a finished back you can place that on as well.
Now hang it up and you can put your fav bracelets and necklaces on.

Another way I organized my jewelry is using this melamine tray and mini bowls (from Target) to put my earrings and a chunky bracelet and my pearl necklace in. :)

LinkWithin

Related Posts with Thumbnails