Showing posts with label decorating. Show all posts

Monday, December 3, 2012

Room Fit For a Tween

kroom1
We have a 4 bedroom house. 
Up til a week ago, the girls shared a room and boys shared a room.
Well you know how girls mature faster than boys?
My 9 yr old girl has all the makings of a tween.
And sharing a room with a messy, invasive 5 yr old about had her in hives.
(Boys, 11 and 7 have no interest in splitting up.)
So once our house listing expired (bummer) we decided to finally mix things up around here.

Kalla got the 'extra' room.
The one we used sort of as office (not really), guest room (rarely) and storage (mostly).
So it got a clean coat of white paint and some fun accessories.

kroom2
Quilt was found at our local Goodwill, but is Target brand and I've seen them there.
SMILE pennant was made by the 2 of us over Thanksgiving break.

kroom3
Curtains made by me.
Fabric from Hobby Lobby--hard to see here, but it's a pink and white geometric design.

kroom4
Biggest wish was a space to set up a permanent doll bedroom.
Don't you adore the poster doll bed made for me as a girl by my paw paw and patch quilt made by my great grandmother.
To be honest, I've had to convince Kalla how much more awesome they are than the sparkly trendy doll beds in AG catalog.

kroom5
Desk is a cheapy piece from Goodwill.
I painted it's veneer wood a bright white.
Chair is just a stand in til I can figure out how to get the vintage metal one I thrifted's cushion off so I can paint and reupholster it.
kroom6
Decorated the white desk a bit with some washi tape.
Orange silverware holder holds all her little notebooks, mp3 player and cutsie erasers and pens.
Clear chevron box from Target holds her craft stuff.

kroom7
Mirror is cheap plastic thrift find painted orange.
Blue lamp thrifted.
Painted blue plaque keeps her bowl of bracelets and sunglasses organized.
Replaced glass of cheap frame with cork board to hang necklaces on.
Far Beautiful printable from Joys Hope here.

kroom8
Giant bulletin boards to hang anything she likes from Hobby Lobby.
Framed out with some washi tape.

kroom9
Bed was hubby's old bed with storage underneath...SO NICE.
Don't look too close and you'll see I haven't finished painting it yet.  :)

Boys got moved to the girls' old room since it was the largest and biggest closet.
Maressa now has the bunk beds to herself and is enjoying the top bunk.
Her room will get a coat of white and some special things eventually.

But for now I'm sick.
Hence the time to post as I can't work on projects feeling like this!

Wednesday, September 12, 2012

the playroom: white is the new color


playrm1
Back in the day in my first house (14 yrs ago) I had lots and lots of color.
I had no fear and painted all the walls in deep colors.
Well, I’m over it.
I’m in love with the white and gray.
My next home will defintely be painted white and gray.
Then I can add all the color in accessories.
That and an accent wall in my bedroom of giant yellow and white stripes...to go with my gray quilt.

playrm6
Anyway, upon getting the house ready for it to go on the market, I painted the playroom (that used to be bright yellow) this soft white.

playrm2
LOVE it!  And now my maps lining the back of the shelves really pops.

playrm4

playrm3
One day we’re going to add pretty paper to the backs of the dollhouse shelves.

playrm5

pillows2
Oh and I made new pillows for our comfy denim couch.
The middle pillow is a Goodwill find (Target ‘reject’).

pillows1
I really loved some of Targets new sheets.
No need for sheets, I just bought some pillow cases and cut them in half or so and made pillows for the couch.

So that's the current look of our playroom.  :)

Monday, September 10, 2012

My Big Frame

frame4
I’ve had this big empty frame for some time now.
It’s actually the inner part of another frame I got at a thrift store.
This past weekend I decided to do something with it.

frame2
I simply wrapped it with strips of fabric then stapled bakers twine to each side.

frame3
Then I used small clothespins to pin up some of my favorite photos.

frame1
I really love how it turned out.

I needed something large for over the couch but something that can’t be broken.

This is our front room that we keep pretty open and free of breakables as this is the one room the kids are allowed to throw balls, wrestle and have light saber fights.  :)

I'm kinda over the red though. 
But our house is on the market so I'm not looking to start painting anything now.

I did paint one room before it went on...the playroom.
I don't think I ever showed you...maybe tomorrow.:)

Monday, June 4, 2012

Bathroom Renovation #2


The master closet bath.
Again I do not have before pics.
You will see this bath and think, well that’s a nice normal bath.
But the difference is very dramatic.
Imagine with me if you will, a barf tan color.
In tile.  Entire shower stall and 2/3 way up the walls.
You can see some shattered pieces of the tile in this post.
Floor was pieces of wood floor they used in the living space of the house.
Yucky bazillion year old tiled shower with yucky door.
mbath1
So now it’s crisp white and perfect gray.
Floor was replaced with white octagon tile and gray grout.
Beadboard in bathrooms…swoon.
mbath2
In this tiny space is a tiny sink and cabinet.
Before was two long skinny mirrors that met in the middle making me look like a cyclops.  lol
I replaced them with just a few mirror tiles on one side.
mbath3
Circle mirror from Target.
Mostly to open up the space and add light.
I used yummy brushed nickel hardware.
The double towel bar is perfect for our tight space.
Located right beside the new fiberglass shower.
mbath4
And this ruched white shower curtain from Target is just the icing on the cake.

Friday, June 1, 2012

I *heart* succulents


succ1

In tin cans on my picnic table.

succ2

On my coffee table in a lime green square pot.

succ3

succ4
These are called Hen and Chick…you can see where my hen has had some babies. 
I understand I can clip these and put them in another pot and they will grow.


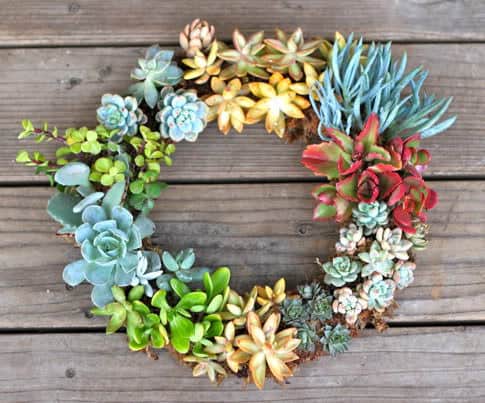
I’m totally in love with this succulent wreath. 
I plan to make one…or three.

Gotta love a nice modern plant you can neglect.

Tuesday, May 29, 2012

Bathroom #1 Renovation


bigbath3
Well, guys I’m really trying to get back into this blogging thing. 
Hard to get back in a habit.
Anyway, I thought I’d share my bathroom renovations. 
We just did two in our house. 
Unfortunately, it was not for fun or our need for pretty bathrooms (though I did have them on a future to-do list). 
We found out that our floors were rotten.
bigbath1
So while we ripped up the floor, we picked out new tile and had the walls repainted.
I was reading this post about paint and went with the recommendation for the March Wind. 
Yes, I find that it is a perfect gray.
bigbath2
I wish I had before pictures, aside from the demolition.
I replaced the mirror and we replaced the ugly peach colored countertop.
bigbath4
Shower curtain and towels are from Target.

Wednesday, February 29, 2012

Bunting Bottle centerpiece/table decor

           
A few weeks ago I was asked to make some table centerpieces for a ladies retreat at church.
I needed to make 8 in specific colors for each table.
(Yellow is missing as the yellow table used my bunting for a craft later so I came home with just yellow bottles)
I started with all those coke bottles we drank at my last Christmas craft party.
I of course saved them all.
I gave them a nice coat of color with spray paint.
To make the bunting, I simply grabbed a bunch of my fabric scraps and folded pieces in half and cut the triangles (I used the first one as a template for the rest so they would all be the same size and shape).  Then I just sewed them all together along the top.
To anchor the bottles down a bit I poured rice down to the bottom to add a little weight.
Then I used clothespins to hang the bunting to the tops of the bottles.
How fun and simple would these be for parties?
Baby showers, wedding showers  or even weddings.

I love having them all on hand now in every color and can pull them out for a little decoration for all sorts of things.

Not to mention that the painted coke bottles would make great bud vases.

Monday, January 23, 2012

Our family message center

This was my last project.  We have this little area between our foyer and living room.
It did have a desk.  Major hot spot.
It never stayed clean and was always piled high with mess.
So I got rid of it!
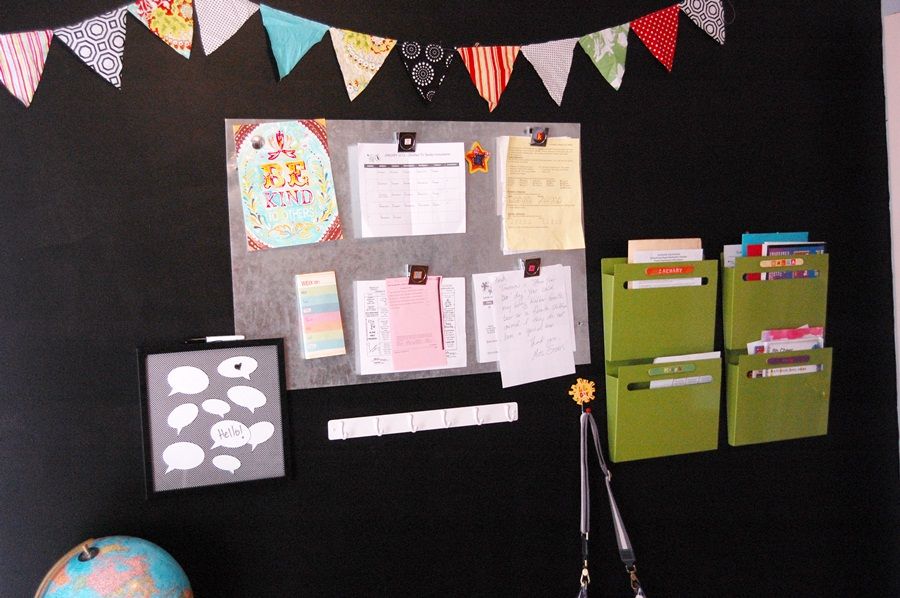
Then I thought it would be fun to paint the whole wall in chalkboard paint.
Added a metal sheet for a magnet board.
Each kid has a metal clip for important school papers.
This relieved the overflow on the front of the refridgerator.
Underneath is a strip of hooks for backpacks.
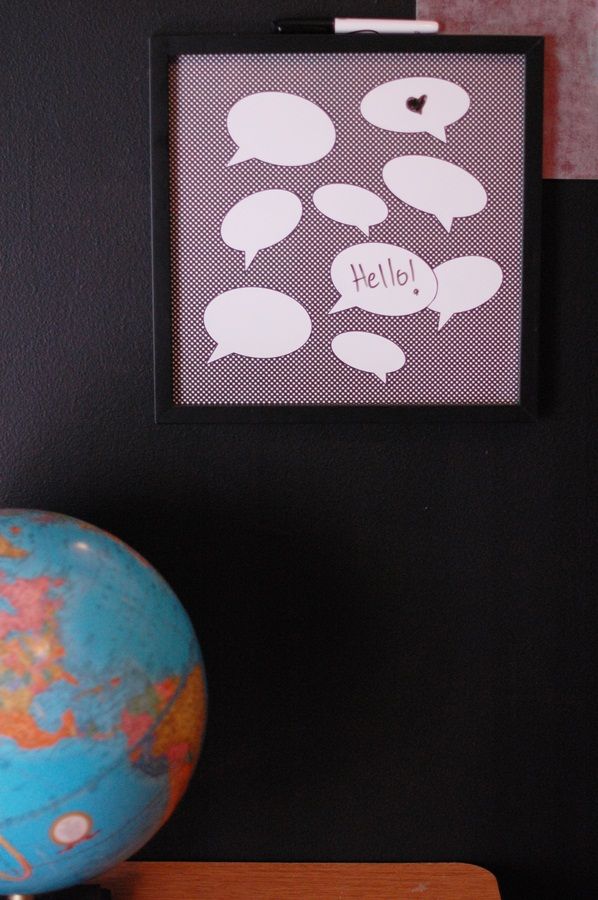
And for fun I added this ballon dry erase message area.
Inspired by this pin, I could not find the paper, but made my own.
I simply used the black and white dotted paper and printed up a bunch of conversation balloons on Publisher and cut them out and taped them on the dotted paper.
The kids have enjoyed writing messages to each other on it.
Here are some pictures after I finally let them use the area (ie chalk all over it).

We have really enjoyed this space and no more clutter!

Wednesday, November 30, 2011

Sparkly Christmas Card holder

I know I've posted many different ways to hang and display all those
Christmas cards you get over the holidays.
But this one I love best and I believe will be a keeper!
You may recognize this frame I picked up at a thrift store and made into a bulletin board.
I don't remember why I took that down and changed my mind.
But this worked out perfectly.
This was a quick and easy project.
I took a really large empty frame and simply used a staple gun to attach wired
star garland across the back.

Being that it's not Dec yet, I haven't received any cards yet (need to get working on my own!) so I used these vintage postcards from Anthro for display.
To attach them I used small clothespins with craft buttons glued on top.

To see other ways to display your holiday cards see here and here.

Monday, November 28, 2011

Crafty Christmas Houses

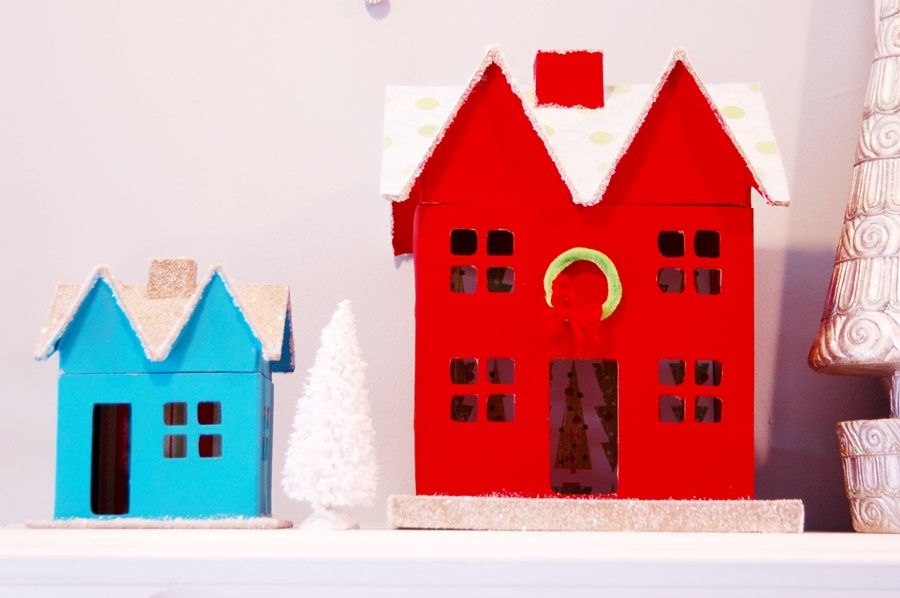
I think these are my favorite Christmas crafts yet.
Easy, cheap and involves glitter.  :)


I kept my houses pretty simple.
You of course could bling them up a lot more.
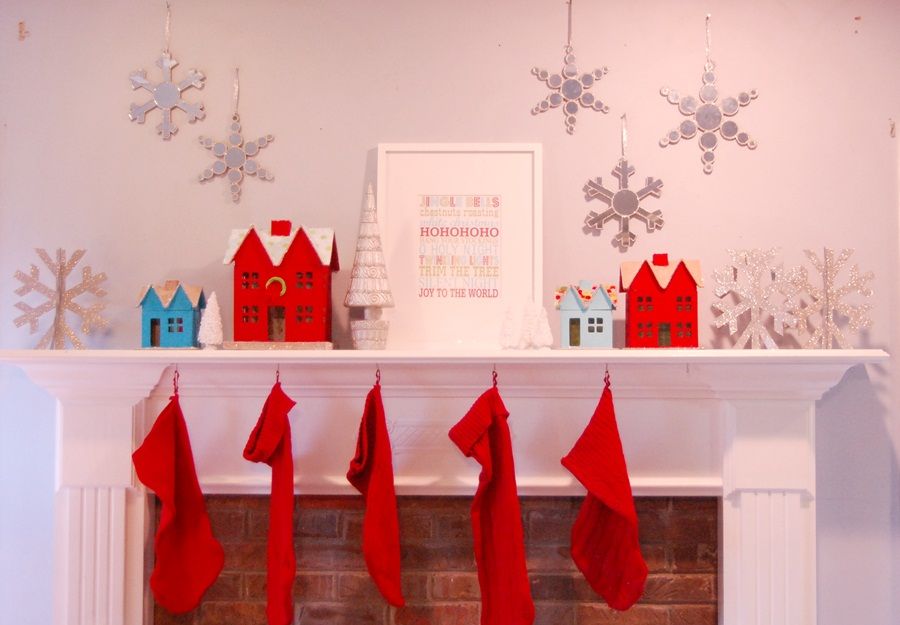
Also, I like to put a battery operated votive inside and they make them have a nice glow.
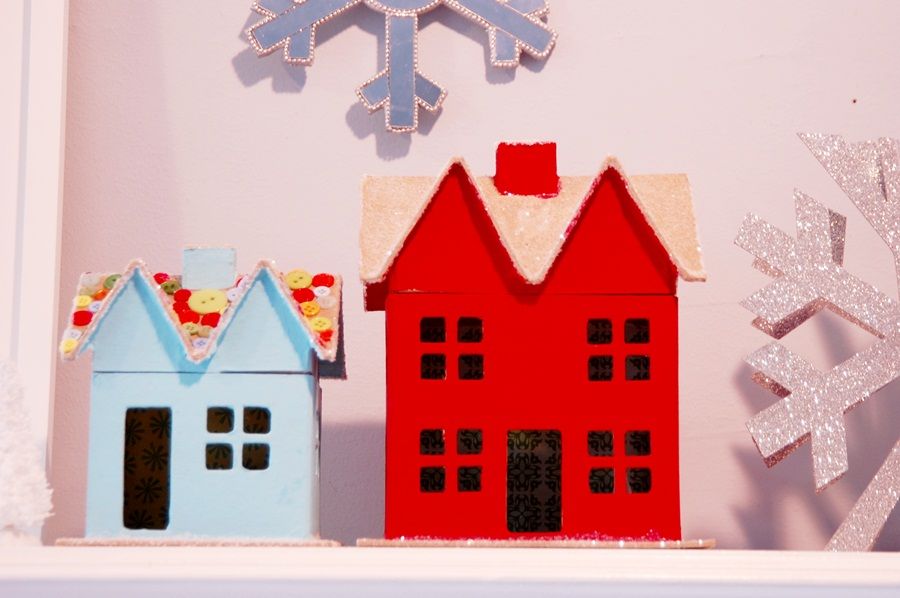
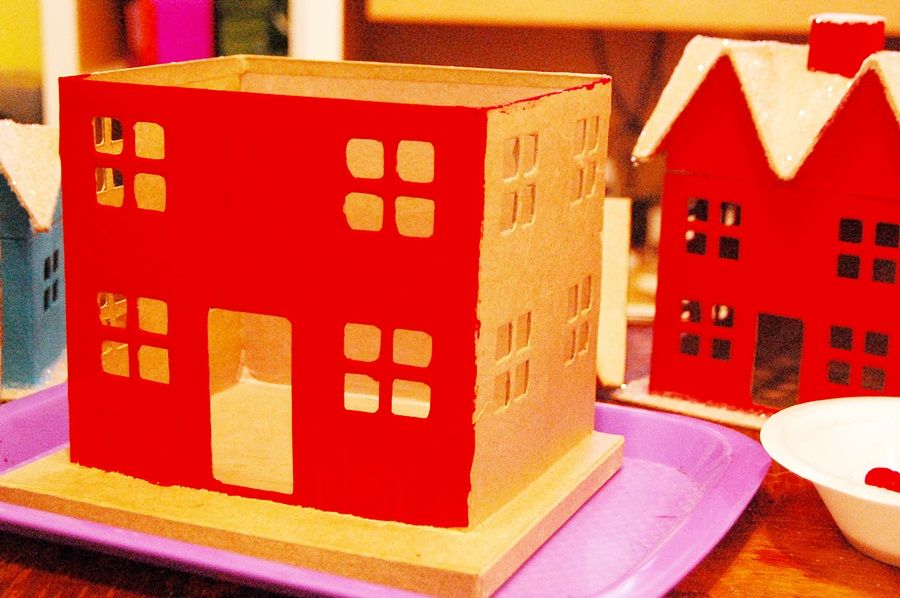
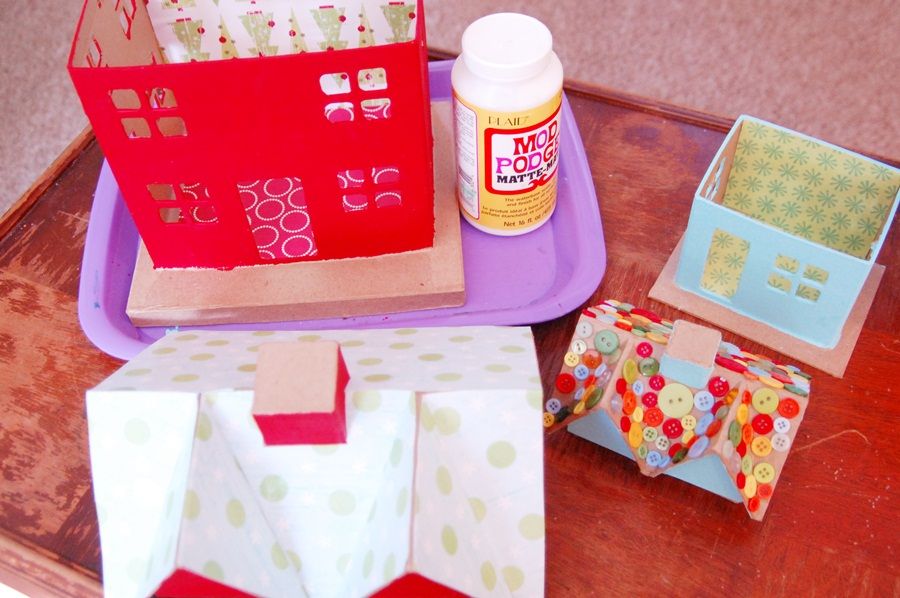
First I started with these paper mache houses I got at Hobby Lobby.
Super super cheap.  I think the large was $5.99 maybe.
Find them in the regular paper mache aisle instead of the Christmas aisle.
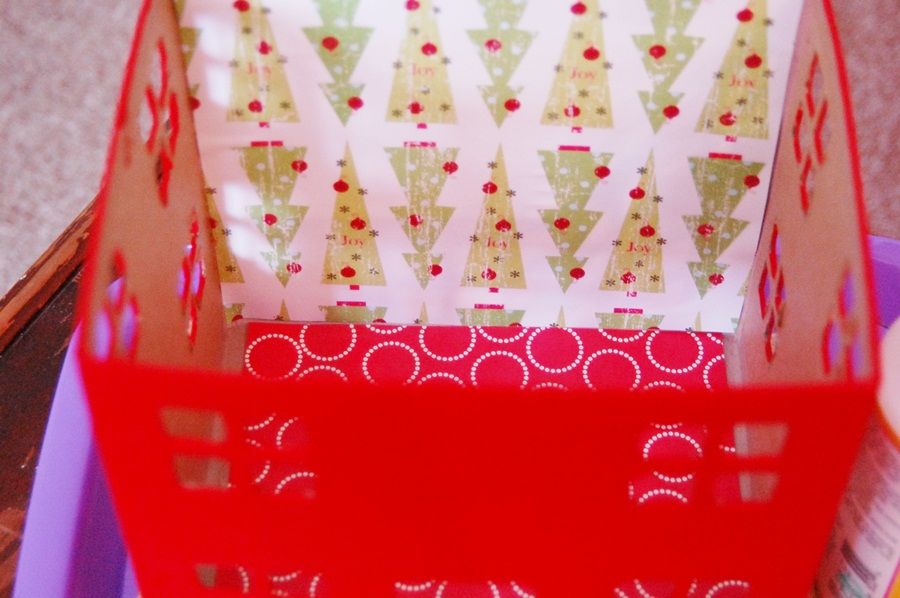
I started by painting them with craft paints.
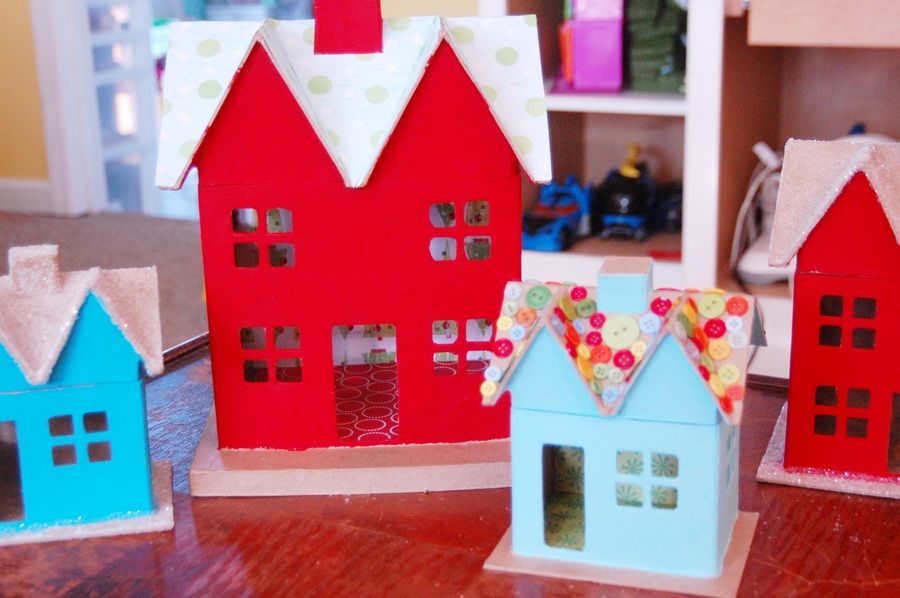
A couple I left plain on the roof.
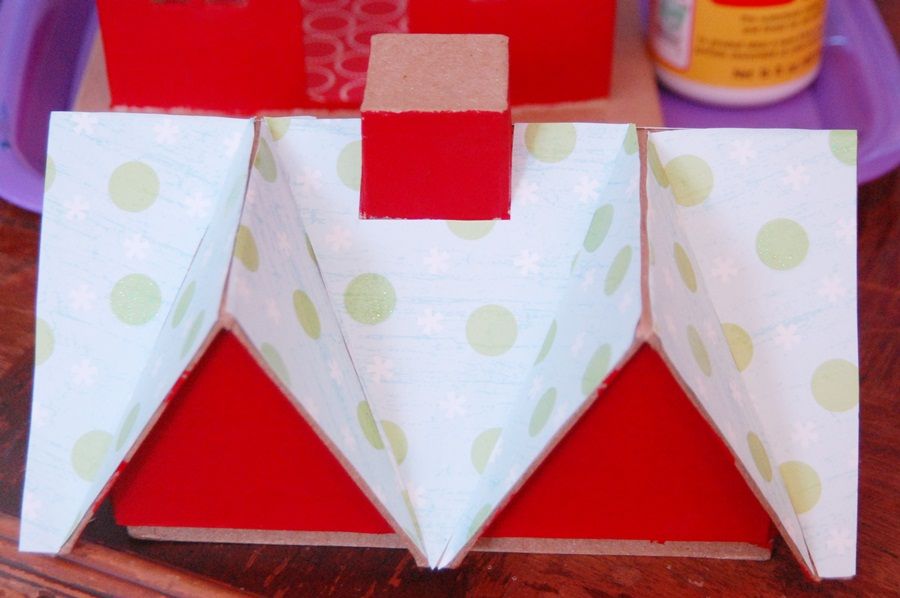
The large one, I glued down some scrap book paper.

The smaller one I glued buttons on the roof.
Then I also glued paper to the floors and back wall.


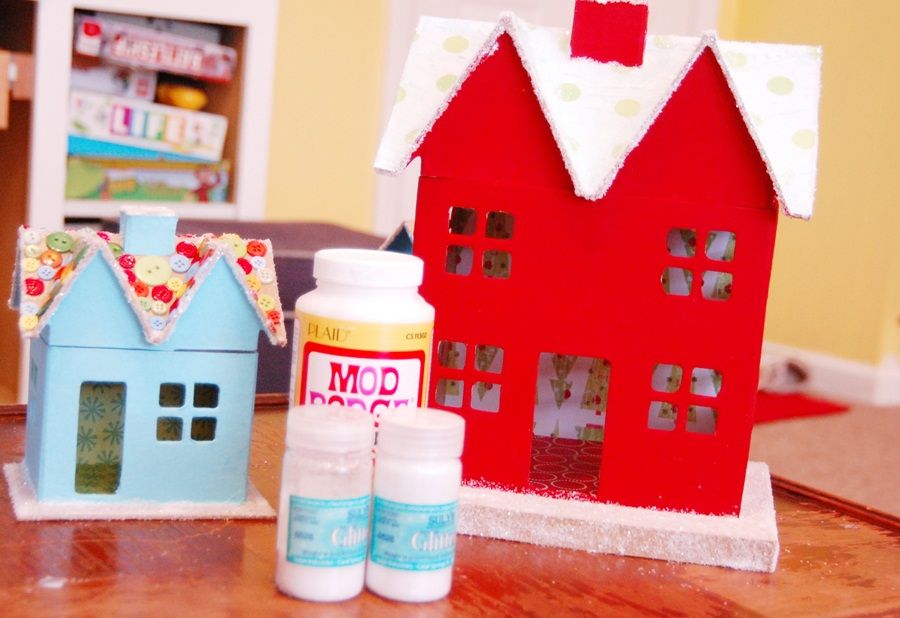
And finally the glitter.
For the plain roof houses I brushed on thick amounts of mod podge and glitter.
For the paper covered roof, I brushed the glue on all the edges and in the crevices of the roof where snow would likely stick.
For the button roof I did the same for the edges and top of the chimney.

For the largest house I also glued a little green wreath with a red yarn bow.
Added some white bottle brush trees (from Walmart) and a little snow bling.
Mantel done.

Subway art from last year.
Free printable here.

Oh and kids when they saw mommy's craft.
Thinking I will get some small ones to let them decorate and put in their rooms. :)

LinkWithin

Related Posts with Thumbnails