Showing posts with label accessories. Show all posts

Tuesday, September 11, 2012

Oh the Hair Ties

 hairelastics1
A while back I got some really cool hair ties online.
I thought from the picture I knew what they were made of and confirmed upon arrival.

hairelastics2
FOE otherwise know as fold over elastic.
Back in my children’s boutique designing and selling days on eBay FOE became a trendy item to add colorful and stretchy elastic in clothes.
Most commonly FOE is used in trim in panties.
Comes in a wide array of colors and is soft and stretchy.

One day I was wearing my new pony holder and a friend asked about it.
Apparently I was trendy and didn’t even know it. :)
 A local day spa were selling them (for like $3 a piece!!)  And the local high school girls all wear them.
So went to eBay and found 17 colors and 70 yds for about $20.
They take seconds to make.
Nine inches and tie in knot.  Melt ends with lighter.
I made me a big batch (though honestly brown is my fav since it’s the color of my hair.)
And I have so much I make them for friends and their kids.

hairties
My girls wanted some of their own as well. Pink please. And lime green.

Fun fun!

Thursday, June 24, 2010

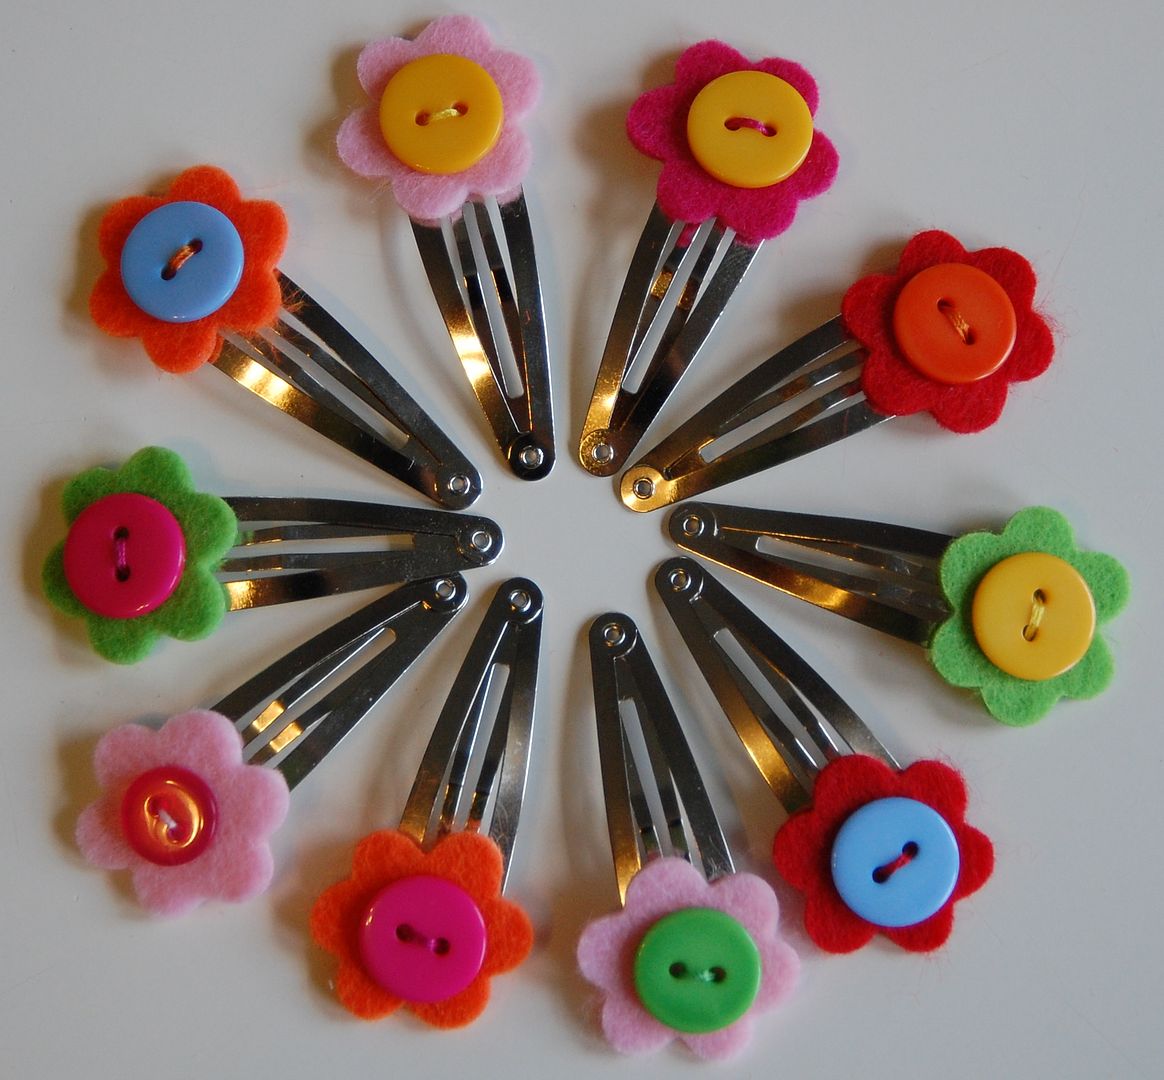
Make a rainbow spectrum of clippies~super quick simple project!

I wanted to make littlest one a new clip to match her new skirt the other day.  I like small and simple for my fine haired Maressa.  So rummaging through my crafty supplies this is what I came up with.  It was just perfect for her and SO easy to make that I made a whole bunch!

These snap barrettes can be found at Hobby Lobby by the bag full.  The little felt flowers were found at Target dollar spot (though I'm sure you can find similar at HL.  The buttons I got a bagful from Oriental Trading Co.  At the large end of the clip are a few holes.  They were perfect for sewing on the button and felt flower with coordinating thread.  No sticky glue.  No machine sewing tiny little clip cases.  Just a needle in thread during a favorite night time tv show.  :)  Thinking these would make great party favors or gifts.


Tuesday, March 30, 2010

Make a Ribbon Knotted Chunky Bracelet

Make a fun bright bracelet just in time for summer!

Super quick and easy!  
I made this bracelet for a friend's birthday, but thinking I may make myself one or a necklace like it.

Just need a few basic supplies.
I used a clasp and some rings (sorry I'm not a jewelry maker and don't know the proper names for anything). I got my fun chunky wood beads from Oriental Trading Co (I actually got them to make Christmas ornaments last year).  And I used a skinny grosgrain ribbon cut to 36", though that was barely enough so you might want to add a couple of inches to give more working room at the end.  :)  First attached a ring to the clasp and closed the ends of the ring with jewelry pliers.

Now, fold your ribbon in half and thread the ring on it and pull it to the halfway mark and tie a knot using both sides of the ribbon (in other words make a knot holding the 2 sides of the ribbon as one).

I used some floral wire to make a large flexible needle.

Now here was the tricky part.  The large beads had rather large holes, but still not big enough to fit the thickness of threading both ribbons through together.  So I threaded one side of the ribbon at a time.

Once a bead was threaded with one side of the ribbon, I tightly held the ribbon down and threaded the other side into the hole being careful to go the same direction as the other ribbon.

After each bead tie a tight knot close to the bead.  String beads alternating with the knots until the bracelet is the length you want.

Fold the ribbon under and secure with machine or hand stitch.  Once stitched trim off end of ribbon and heat seal with lighter to melt the ends slightly to prevent ravel.  Now loop on another jewerly ring and close ends of ring again with pliers.  Now you are done!

I also made this scarf for my friend.  It was actually the part of the gift I started with  because when I saw it here (there is a tutorial) I thought immediately of her as one of her fav colors is lime green.  This was super easy to sew and I'm thinking I need one!

And here is her final gift.  Headed to give it to her right now!

Tuesday, April 14, 2009

Quickie fabric belt


Make a quick fabric belt for a little one, or for yourself. Just need a strip of fabric and D ring.

Cut a strip of fabric 4" wide and to get the length either measure a belt you have or take waist measurement, add 2.5" for sewing and 5 or so inches for overlap. My daughter's finished belt in above photo is 30.5" and she is a 21" waist (size very skinny 6). Her belt is a little longer than needed and about extra 7" overlap. It's all a personal preference. If you are making a woman's size belt, I would up the width to 5-6" as well.
Now take our your iron and iron down each end toward the wrong side.Now fold your fabric in half and iron the folded edge down.

Open the fabric back up and you will iron in one long edge.
Repeat the other side so that the edges meet evenly. Pin down all edges. All raw edges should now be enclosed.
Sew along all 3 sides....both short sides and one long side.

Fold and sew down one finished end about an inch with D rings enclosed in loop. Now go snazz up some jeans and tee with a cute belt!

LinkWithin

Related Posts with Thumbnails