
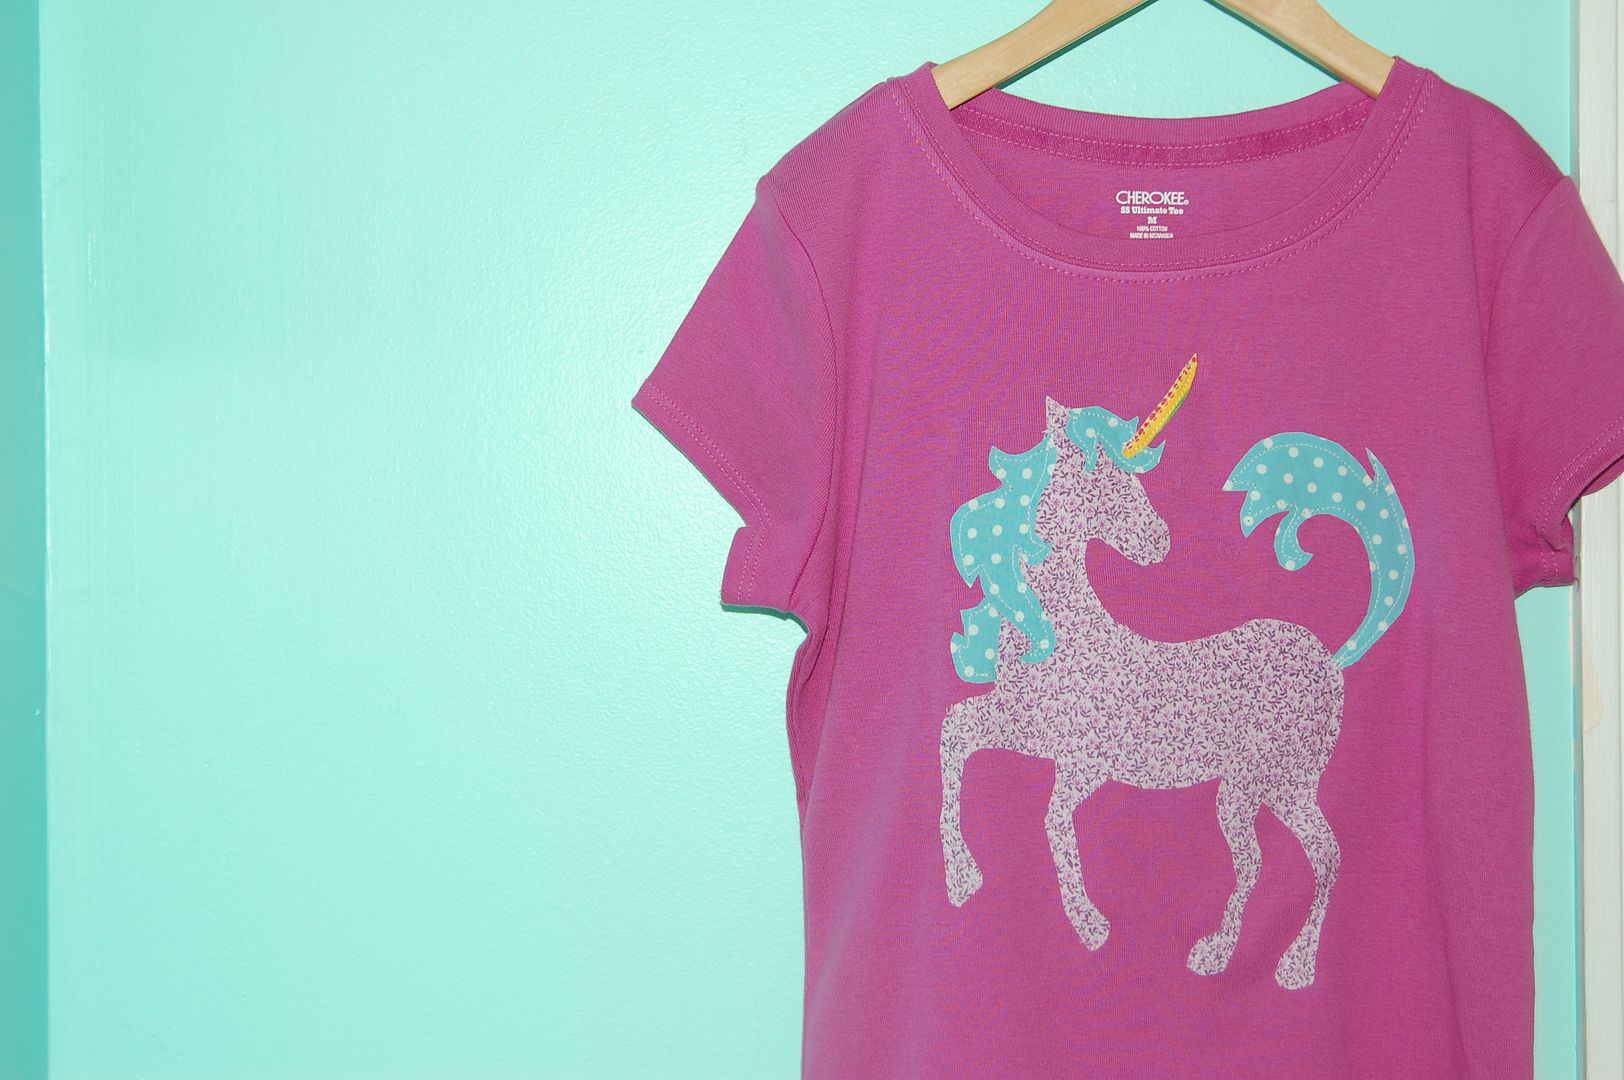
This was the first tee I made a couple of weeks back for Kalla to wear to her birthday party.
I wanted a simple unicorn silhouette.
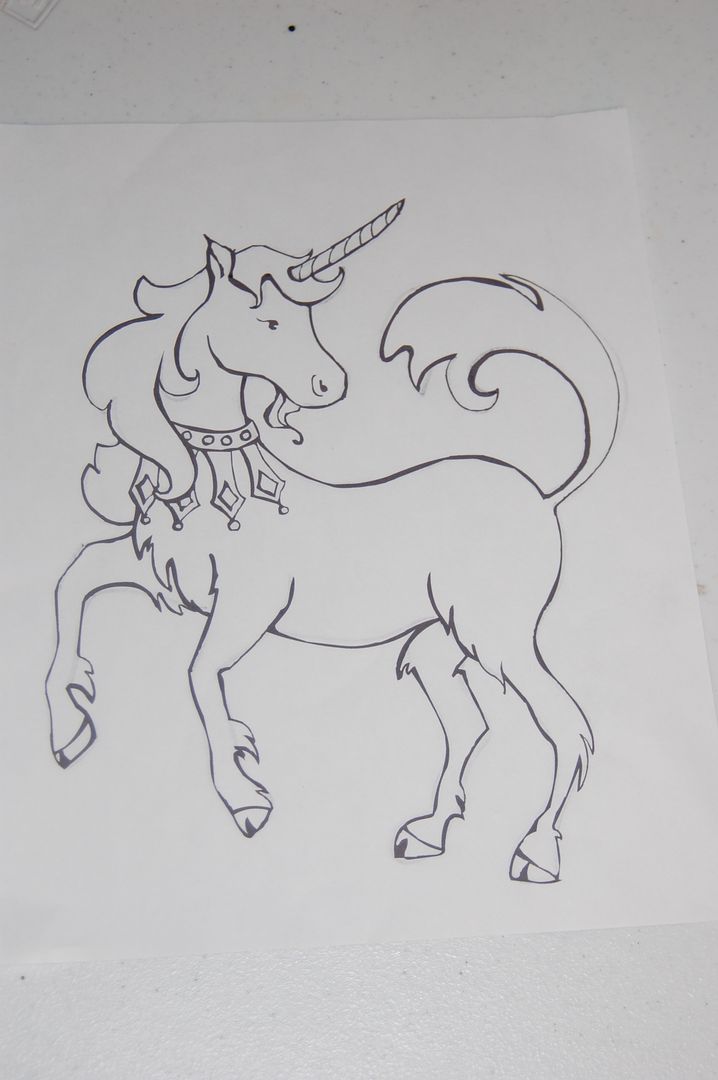
Here's where we started. I often use free coloring pages found on the internet as templates for my appliques. Sometimes I draw them.
I found this picture here. I wanted something a little simpler, but that is easy to change yourself.
You can take only what parts you want from your picture.
After you find the picture you want, print it to the size you want your actual applique.

Once you've printed it and you want the finished applique to look like the original picture, you need to flip your print over. Trace the picture with a dark pencil or sharpie. This is where you can leave out/add anything you like. I went for smooth hooves and legs and left off the goatee and other small details.
After making my tracings I traced this reverse image on my wonder-under lite in pieces. I traced the tail, horn, body and 3 separate mane pieces. Cut around them close to the drawn lines, but not on them. Now iron each piece to the fabric you want to use on the back side of the fabric. Once cooled, cut out the image while ironed on the fabric. Now carefully peel the backing off. Place your pieces on your tee (or anything else you want to sew it to like a tote). Arrange until you are satisfied with your picture taking care to layer pieces where you need to...for example I cut the tail slightly longer where it meets the horse's backside and before ironing it on, I tucked it under the fabric for the body.

Once ironed on well, I used just a straight stitch along the edge...not the very edge, but about 1/8"-1/4" away from the edge. The edges will fray slightly when washed.


Here is the party girl wearing her tee. :)
Come back tomorrow for an initial bunting applique. :)
1 comment:
How cute! I love the rainbow horn. My 7 year old would love this.
Post a Comment